


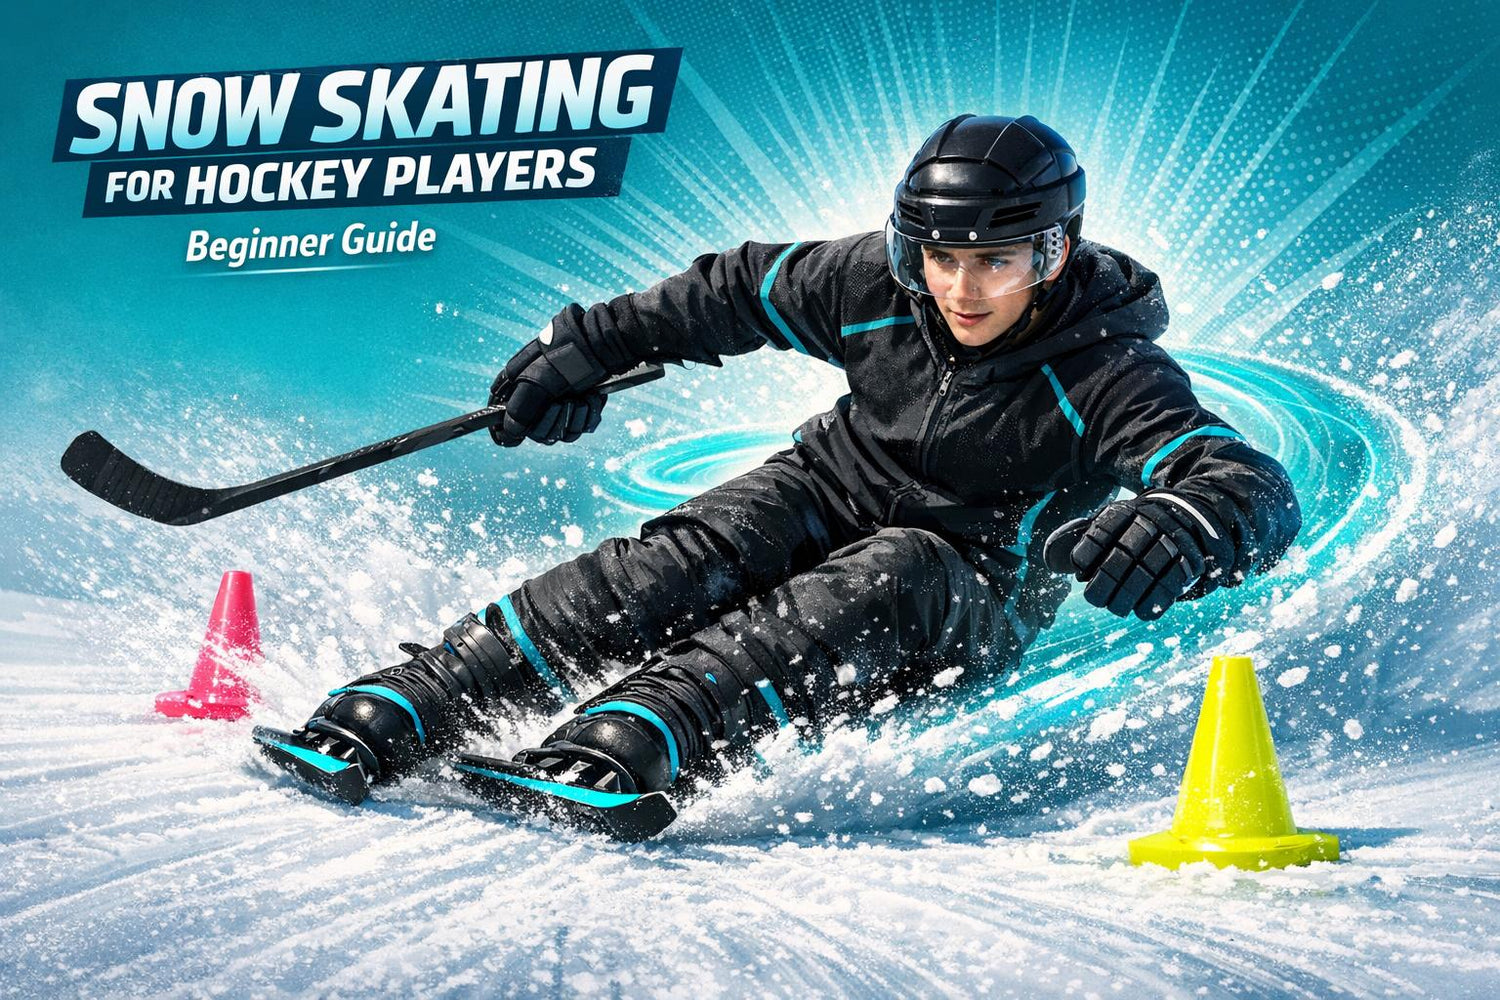
Snow skating is a perfect winter sport for hockey players. It uses short skis like Snowfeet* Skiskates or Snowfeet PRO that attach to your boots, making it easy to transfer your skating skills to the snow. If you’re comfortable with edge control, quick stops, and directional changes on the ice, you’ll pick this up fast. Plus, no ski experience is needed.
Here’s what you need to know:
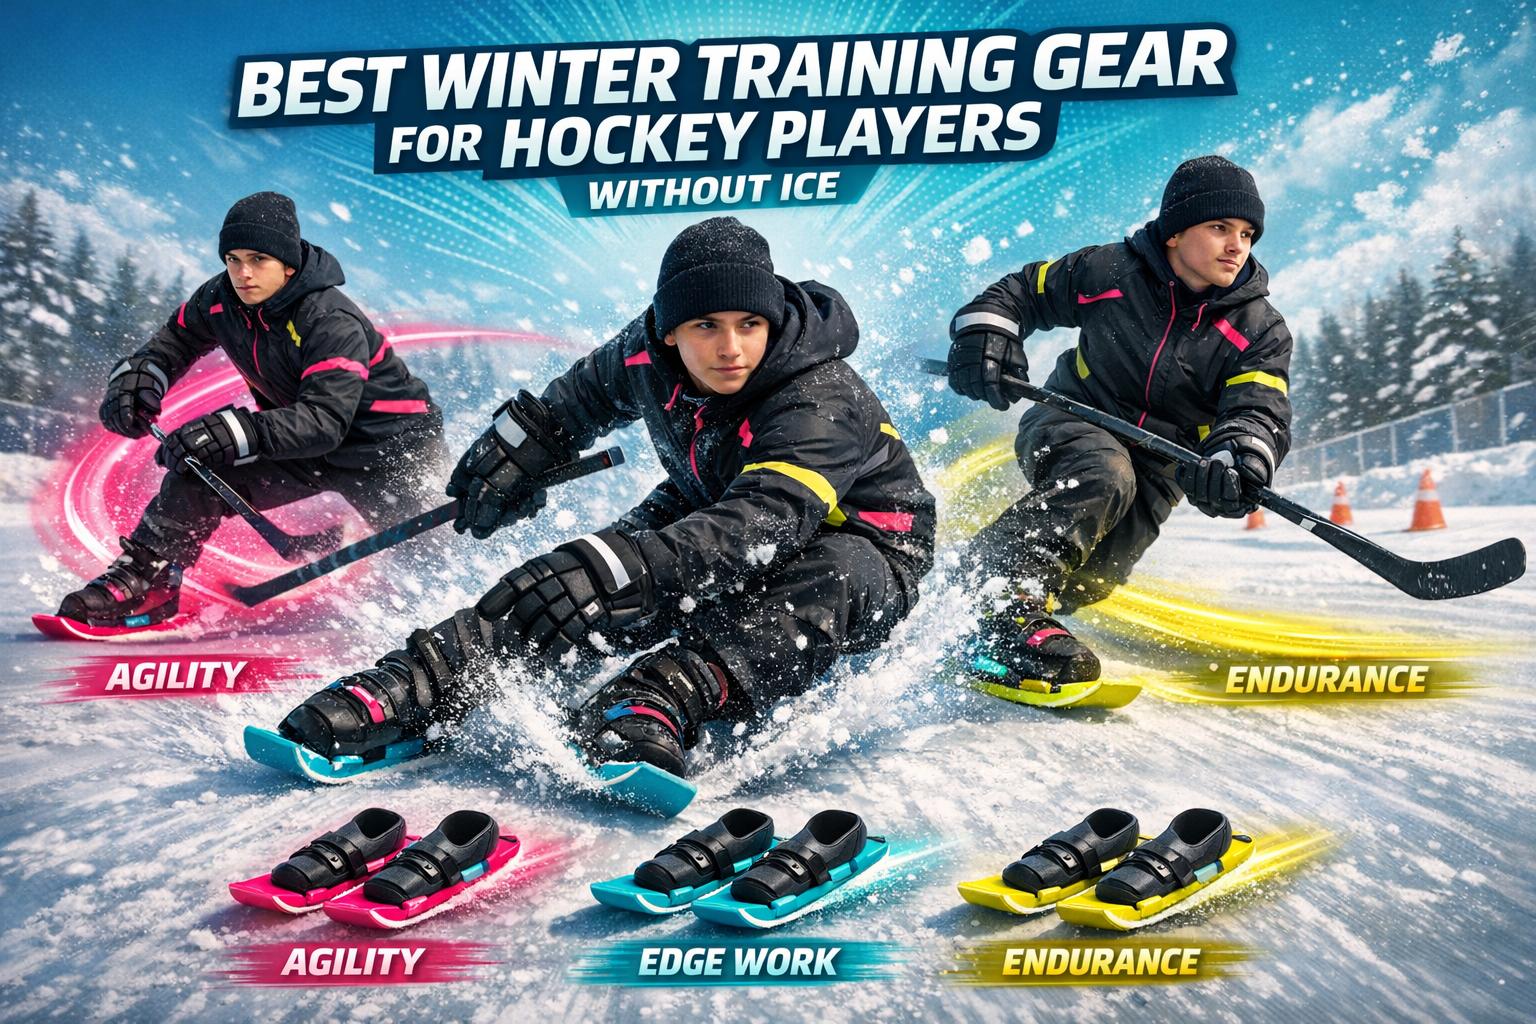
- Gear Options: Choose Snowfeet* Skiskates (17 in) for tricks and agility or Snowfeet PRO (20 in) for stability and carving.
- Boots: Use firm, supportive boots like snowboard or sturdy winter boots.
- Safety: Wear a helmet, wrist guards, and padded shorts to stay protected.
- Learning Curve: Start on flat terrain, practice your stance and edges, then progress to green slopes and S-turns.
- Cost and Portability: Snowfeet* is cheaper and easier to carry than skis or snowboards, fitting right in your backpack.
Snow skating offers a fun, portable way to stay active during the off-season or enjoy a snowy weekend. Ready to hit the slopes? Let’s dive into the details.
Picking the Right Gear for Snow Skating
Snowfeet* Skiskates vs. Snowfeet PRO

Choosing between these two models depends on your riding style and how your hockey skating skills translate to snow skating.
The Snowfeet* Skiskates (17 in/44 cm) are all about agility. They’re perfect for quick pivots, one-foot glides, and sharp edge transitions. These skiskates shine on smaller hills, terrain parks, and casual resort areas. If you weigh under 170 lbs and want a responsive, skate-like feel, this is your go-to.
On the other hand, the Snowfeet PRO (20 in/50 cm) offers a bit more platform, providing better stability at moderate speeds and smoother edge control on groomed runs. This model is ideal for carving smooth arcs on green or blue runs. If you’re a taller or stronger skater or prefer more stability for carving over tricks, the PRO is the better fit.
| Snowfeet* Skiskates | Snowfeet PRO | |
|---|---|---|
| Length | 17 in (44 cm) | 20 in (50 cm) |
| Price | From $575 | $275 |
| Best for | Tricks, quick turns, terrain parks | Carving, groomed runs, higher speeds |
| Ideal rider | Under 170 lbs, agility-focused | Bigger/stronger skaters, speed carvers |
| Feel | Maximum skate-like agility | Enhanced stability and smoother edge grip |
Boots and Protective Gear
Both Snowfeet* models attach to your boots using adjustable bindings. To get the best performance, pick boots with firm ankle support, a stiff sole, and a snug heel fit - similar to the locked-in feel of hockey skates. Sturdy waterproof winter boots or snowboard boots work great. Avoid soft, low-cut casual boots, as they won’t offer the precision or support needed.
Safety gear is a must. A certified snow sports helmet is non-negotiable, and wrist guards are highly recommended since falls often involve using your hands to break the impact. Padded shorts can protect your tailbone and hips, and if you’re a hockey player, you might already have padded compression shorts or shin guards that work well under snow pants. This setup lets you transfer your ice skills to snow with confidence.
Snowfeet* vs. Traditional Skis and Snowboards
Snowfeet* products, ranging from 17 to 20 inches (44–50 cm), are far smaller than traditional skis (59–71 in/150–180 cm) or snowboards (55–65 in/140–165 cm). Their compact size means they fit in a backpack, eliminating the need for bulky roof racks or ski bags. Plus, their centered stance makes it easier for hockey players to link turns quickly compared to traditional gear.
| Gear | Approx. Length | Portability | Learning Ease for Hockey Players | Best For |
|---|---|---|---|---|
| Snowfeet* Skiskates | ~17 in (44 cm) | Fits in a backpack | Very high | Tricks, quick turns, terrain parks |
| Snowfeet PRO | ~20 in (50 cm) | Fits in a large backpack | Very high | Carving, resort groomers |
| Traditional Skis | ~59–71 in (150–180 cm) | Requires a roof rack or ski bag | Medium | Long runs, high-speed carving |
| Snowboard | ~55–65 in (140–165 cm) | Requires a roof rack or ski bag | Medium | Flowing turns, freestyle, powder riding |
When it comes to cost, Snowfeet* offer a more affordable and portable way to enjoy snow sports. Entry-level skis with bindings typically cost $300–$600+, and snowboards start around $350–$700+. With Snowfeet*, you can get started for less - especially if you already own compatible boots and basic protective gear.
Now that you’ve got the gear sorted, it’s time to see how your hockey skills translate to creative and controlled moves on snow.
Applying Hockey Skills to Snow Skating
Stance and Edge Control
Your hockey stance is a solid foundation for snow skating. Stick to the basics: knees bent, hips low, chest up - just like when you're ready for a pass on the ice. This low position keeps you balanced and helps absorb bumps on uneven snow.
One key difference? Foot width. On the ice, your feet often come close together during transitions. On snow, you'll want to spread them to about hip-width. This gives you better lateral stability. Also, shift your weight slightly forward onto the balls of your feet. Leaning back weakens your edge grip and makes it harder to stay in control.
Edge control is also familiar territory. Just like on skates, you’ll use your knees and ankles to roll inward or outward and engage the edges. Want to practice? Try this: stand still on flat snow and gently rock from your inside edges to your outside edges. Feel how the Snowfeet* grab the snow. It’s kind of like those edge-awareness drills you’d do at center ice.
Once you’ve nailed your stance and edge control, you’ll be ready to bring in the movement skills from forward skating.
Gliding and Speed Control
Your hockey stride transitions well here, but take it easy at first. Start with short, relaxed pushes instead of going full throttle like you would on ice. Push off, then let the Snowfeet* glide for a few seconds to get a feel for how they track.
When it comes to controlling speed on a slope, it’s all about turn shape and angle. Heading straight downhill will make you pick up speed quickly, while angling across the hill slows you down. Think of your turns as wide, smooth C-cuts - use your edges to gradually scrub speed instead of trying to brake hard. Need to slow down fast? Aim for a flatter section of the slope. And whatever you do, don’t lean back when you speed up. It might feel instinctive, but it actually reduces your edge grip and makes things harder to control.
Turning and Stopping
Once you’re comfortable gliding, you can start working on turning and stopping. For turns, think of the crossover mechanics you already know, minus the stepping. Shift your weight slightly to your outside foot, roll onto your inside edges, and let your lower body guide the turn. Keep your shoulders facing downhill, and link two turns together for smooth S-shaped movements.
Stopping takes a bit of practice. Begin with a J-turn: glide slowly, then angle across the slope until you naturally come to a stop. It’s like easing up along the boards rather than going for a hard hockey stop. As you get more confident, you can gradually increase your edge angle and speed for sharper, skidded stops. Just take your time - rushing into aggressive stops, especially on icy or rough snow, can lead to catching an edge and wiping out. Let the progression happen naturally.
Hockey Player Tries Snowfeet* Skiskates | See What He Thinks | Skiboards | Short Ski | Mini Ski
sbb-itb-17ade95
Step-by-Step Beginner Progression
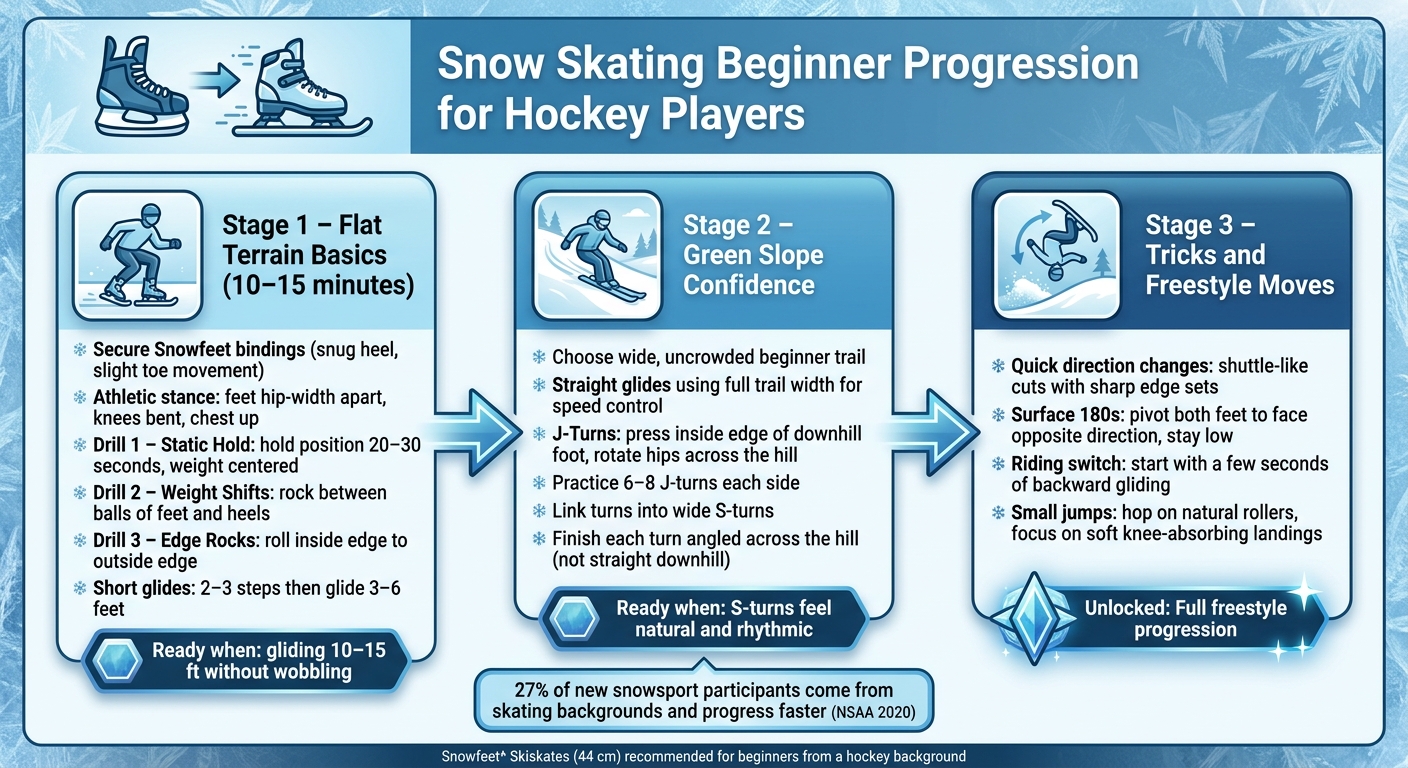
Snow Skating Beginner Progression for Hockey Players
Getting Started on Flat Terrain
Start by spending 10–15 minutes on flat, packed snow to build your basic skills.
Make sure your Snowfeet* bindings are snug - your heel should be secure while still allowing slight toe movement. Double-check the fit, especially in cold conditions. Once you're all set, get into an athletic stance: feet hip-width apart, knees bent, chest up, and hands slightly forward. From here, try three simple drills to get comfortable:
- Static hold: Stay in position for 20–30 seconds, pressing your shins lightly into your boots and keeping your weight centered. Avoid leaning back onto your heels.
- Weight shifts: Slowly move your weight between the balls of your feet and your heels.
- Edge rocks: Gently roll from your inside edges to your outside edges, similar to edge-awareness drills used in ice skating.
Once you feel steady with these, move on to short glides. Take two or three walking steps, then glide 3–6 feet with your knees bent and eyes forward. A common beginner mistake is leaning back when the glide starts - try to resist that instinct by keeping your weight centered.
According to a 2020 NSAA industry report, about 27% of new snowsports participants came from skating or inline skating backgrounds. These athletes often progress faster through beginner levels compared to those without prior experience in glide sports.
These drills will prepare you for tackling gentle slopes.
Building Confidence on Green Slopes
When you’re able to glide 10–15 feet on flat ground without wobbling, it’s time to take on a green slope. Pick a wide, beginner-friendly trail that isn’t too crowded and avoid icy spots.
Start with straight glides on the flattest sections, using the full width of the trail to manage your speed. When you’re ready to learn turning, try J-turns first. Glide straight, then press into the inside edge of your downhill foot and rotate your hips slightly to angle across the hill. This will naturally slow you down. Practice six to eight J-turns on each side before moving on to linking them together.
Next, connect a left J-turn into a right one to create wide S-turns. Keep the turns smooth and rounded - rushing the direction change can throw off your edge grip. Make sure to finish each turn by angling across the hill rather than heading straight downhill. This technique is key for keeping your speed in check.
Once your S-turns feel natural and rhythmic, you’ll be ready to explore freestyle elements.
Trying Tricks and Playful Moves
When your turns and stops become second nature, it’s time to have some fun by adding freestyle moves. Start with quick direction changes - short, shuttle-like cuts across the slope with sharp edge sets, similar to pivoting on the ice.
You can also try surface 180s on flat terrain. Pivot both feet to face the opposite direction while staying low and balanced. Another fun challenge is riding switch (gliding backward). Start small with a few seconds of backward gliding on gentle terrain before working up to longer runs.
For jumps, practice small hops on natural rollers or gentle terrain features. Focus on soft, knee-absorbing landings. The compact 44 cm platform of the Snowfeet* Skiskates makes these agile moves feel intuitive - it’s similar to the explosive, pivoting movements you’re already familiar with from hockey or skating.
These playful elements not only keep things exciting but also sharpen your control and balance.
Matching Your Snowfeet* Setup to Your Style and Location
Choosing the Right Snowfeet* Model for Your Style
Picking the right Snowfeet* model comes down to your style and how you like to ride. If you're all about quick movements and sharp turns, the Snowfeet* Skiskates (44 cm / ~17 in) are your go-to. These are the shortest option and feel a lot like hockey skates, making them perfect for tight cuts, fast edge transitions, and rapid footwork. Think of them as the choice for those who thrive on speed and agility.
For a bit more stability and smoother gliding, the Snowfeet PRO (50 cm / ~20 in) is a solid middle ground. They’re great for longer runs and moderate speeds, offering a balance between control and portability. If you enjoy cruising green or easy blue runs all day, this model has you covered.
If you’re aiming to explore more of the mountain, Skiblades (starting at 65 cm / ~26 in) are where it’s at. These give you a more ski-like feel, making them ideal for carving longer turns and tackling varied terrain. They’re a great option if you want to take chairlifts, progress toward steeper slopes, and enjoy a more directional ride.
| Model | Length | Best For | Trade-off |
|---|---|---|---|
| Snowfeet* Skiskates | 44 cm (~17 in) | Quick cuts, tricks, agile play | Less stability at high speeds |
| Snowfeet PRO | 50 cm (~20 in) | Balanced control and portability | Less float than longer gear |
| Skiblades | 65–99 cm (~26–39 in) | Progression, carving, full-mountain riding | Less portable than Skiskates |
Once you’ve locked in the right model, think about where you’ll be riding to get the most out of your setup.
Where to Snow Skate in the US
Your local terrain plays a big role in how much fun you’ll have with Snowfeet*. If you’re in Minnesota, for instance, college players can hit up sledding hills or smaller slopes like Afton Alps. The compact design of the Skiskates makes them perfect for quick runs and easy portability - just toss them in your backpack.
For those heading to Colorado, places like Breckenridge or Keystone are ideal for the PRO or Skiblades. Keystone’s Schoolmarm green run is a fantastic spot to build confidence before trying out park features. On the East Coast, resorts like Mount Snow and Smugglers' Notch in Vermont are great for beginners, with wide-open zones and accessible terrain parks. In the Midwest, Granite Peak in Wisconsin offers manageable verticals that are perfect for frequent, shorter sessions. Out West, destinations like Big Bear Mountain in California and Copper Mountain in Colorado provide beginner-friendly slopes and well-designed parks for all-day fun.
Tip: Before heading out, check with the resort to ensure Snowfeet-style gear is allowed on lifts and in terrain parks. Policies can vary.
This mix of portability and adaptability makes Snowfeet* a standout choice for a variety of terrains, offering a level of convenience that traditional skis and snowboards just can’t match.
Snowfeet* vs. Traditional Gear: Quick Comparison
For hockey players, Snowfeet* offers a natural transition to snow. The short learning curve is a huge plus - you’re already used to edge control and a low athletic stance, so you can hit the slopes with confidence right away. Compare that to traditional skis, which require adjusting to much longer lengths, or snowboards, which demand learning a completely different stance and edge technique. Snowboards and skis can be challenging for beginners, especially if you're coming from a skating background.
Another big win for Snowfeet* is portability. They fit easily into a backpack or car trunk, unlike traditional alpine gear that needs a dedicated bag or roof rack. For hockey players who already lug around heavy gear to the rink, this simplicity is a game-changer.
| Category | Snowfeet* | Traditional Skis | Snowboard |
|---|---|---|---|
| Learning Curve | Short (great for skaters) | Moderate to steep | Steep for skaters |
| Portability | Fits in a backpack | Needs ski bag or roof rack | Needs board bag |
| Edge Control | Similar to skating | Different leverage and stance | Completely different mechanics |
| Best Terrain | Green runs, small parks | All-mountain use | Park, powder, groomed runs |
| Trick-Friendly | Yes, especially Skiskates | Limited without freestyle skis | Yes, with practice |
Conclusion: Why Snowfeet* Works for Hockey Players
Snowfeet* is a natural fit for hockey players, seamlessly blending your ice skills with snow skating. Thanks to its design, it builds on your existing abilities, letting you hit the snow without feeling like a beginner. The Snowfeet* Skiskates (44 cm / ~17 in) and Snowfeet PRO (50 cm / ~20 in) feel intuitive and responsive, perfectly suited to hockey-style movements. Plus, their lightweight design means they're easy to carry wherever you go.
What makes Snowfeet* stand out is how it translates your skating instincts - whether it's gliding, stopping, or sharp cuts - from the rink to the slopes. Unlike cumbersome skis or snowboards, Snowfeet* offers speed, portability, and a sense of familiarity, making it a great choice for hockey players looking for a smooth transition to snow.
You don’t need to spend days learning. A few hours on a gentle green run or even a local sledding hill is enough to feel at home. From there, the possibilities are endless, depending on how far you want to push your skills. This ease of progression highlights why Snowfeet* is such a great match for hockey players.
With products sold in over 70 countries and loved by thousands of riders worldwide, Snowfeet* gives hockey players an exciting and accessible way to stay active during the off-season - or just enjoy a snowy weekend. It’s the perfect way to take your skating skills to the next level on snow.
FAQs
Can I ride Snowfeet* on chairlifts?
Yes, Snowfeet* skiskates are built to be light and easy to carry, which makes them perfect for taking on chairlifts. You can use a chairlift with Snowfeet* just like you would with regular skis - minus the hassle of lugging around bulky gear.
Which Snowfeet* is easier for hockey stops?
Both the 44 cm Snowfeet Skiskates and the 50 cm Snowfeet PRO are great choices for pulling off hockey stops. The 44 cm version shines when it comes to agility, giving you the ability to make sharp, precise moves. On the other hand, the 50 cm PRO offers added stability, which comes in handy for maintaining control during faster runs. Both models are designed to let you pivot smoothly and carve into the snow effortlessly, making hockey stops feel intuitive and easy.
What boots work best with Snowfeet*?
Snowfeet* skiskates are designed to work with a range of footwear, making them super versatile. For a cozy fit, you can use waterproof winter boots. If you're looking for more ankle support - especially for sharper turns or tricks - snowboard boots are a great choice. While certain models are compatible with ski boots, hockey players often lean toward snowboard boots because they offer more flexibility and feel similar to skates. Just make sure your boots are snugly secured to avoid heel lift or side-to-side wobbling. This will help you perform at your best!


Leave a comment
This site is protected by hCaptcha and the hCaptcha Privacy Policy and Terms of Service apply.