


When you're heading out for a multi-day winter adventure, packing light while staying safe is a balancing act. Here's the deal: you need to carry enough to stay warm, dry, and prepared for emergencies, but lugging around heavy gear can slow you down - especially in freezing, unpredictable conditions.
Key Takeaways:
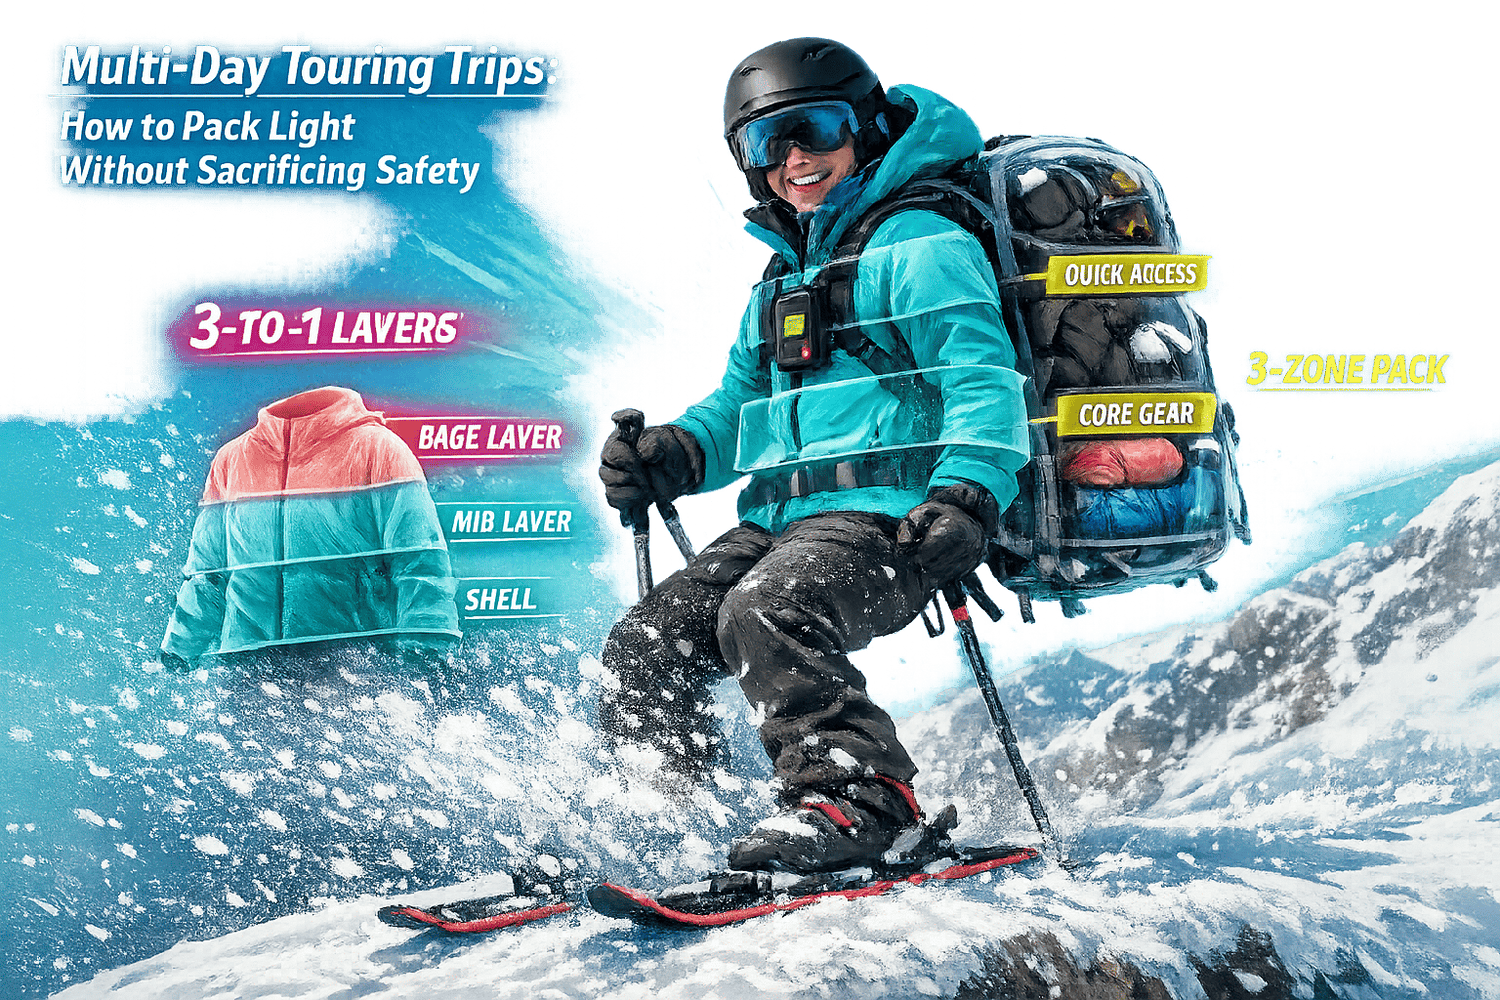
- Layer Smart: Use a 3-to-1 clothing system: 3 base layers, 1 insulating mid-layer, 1 protective shell. Prioritize merino wool and synthetic insulation over bulkier options.
- Compact Gear: Swap out heavy, bulky skis for lightweight options like Snowfeet Skiblades (65–120 cm) or Skiskates (44 cm). They’re easier to pack and still handle winter terrain well.
- Safety First: Always carry avalanche tools (beacon, probe, shovel), a first aid kit, and a satellite communicator like the Garmin inReach.
- Pack Strategically: Use the 3-zone method to keep heavy items close to your back and essentials accessible. Keep everything dry with waterproof bags.
How to Pack for Cold Weather (Beginner’s Guide) - 1 Week in Lapland, Finland
Selecting Your Core Gear for Multi-Day Winter Trips
When you're gearing up for a multi-day winter adventure, the trick is to find the right balance between keeping your pack light and ensuring you're prepared for anything. Your gear choices should focus on functionality and reliability - no need for flashy extras that won't hold up in tough conditions.
Keep It Simple and Durable
Simplicity is key. Durable, reliable gear beats fancy features every time. Backcountry expert Matt Leitzinger sums it up perfectly:
"The main idea here is that your kit's weight is invested in the shock-absorbing portions of the setup - the skis and boots - while the binding stays light and out of the way."
For bindings, go with machined aluminum models that have fewer moving parts - they're less likely to fail when you're miles from help. Snowfeet* Skiblades are a good example of this minimalist approach. When it comes to poles, aluminum is the way to go. Unlike carbon, which can snap completely, aluminum bends and can often be fixed in the field.
The 3-to-1 Clothing System
Packing clothes for winter trips doesn’t have to be complicated. A simple formula works best: three base layers, one insulating mid-layer, and one protective shell. Rotate the base layers to manage moisture and stay comfortable.
For base layers, merino wool is a standout choice. It keeps you warm even when damp and doesn't hold onto odors like synthetics do. For your mid-layer, fleece or synthetic insulation (like PrimaLoft) is ideal - it breathes well and handles moisture better than down . As for your outer shell, a 3-layer hardshell with a big hood is a must. Look for models with ePE membranes for solid storm protection without adding unnecessary weight.
Organizing Gear by Category
To keep your pack organized and efficient, divide your gear into five main categories: shelter, clothing, food, navigation, and safety. This approach helps ensure you bring only what you need.
Ask yourself, Can this item serve more than one purpose? For example, a "Whippet" pole doubles as a ski pole and a self-arrest tool, often replacing the need for a full ice axe. Similarly, a sleeping bag rated for 10–15°F can pair with your insulated jacket to save you from carrying a bulkier 0°F bag. This kind of strategic packing keeps your load manageable .
That said, safety gear is non-negotiable. A 3-antenna digital transceiver, an aluminum shovel (never plastic), and a probe that's at least 260 cm long are essential for backcountry travel . These items might add some weight, but they’re lifesavers when things go south.
Up next, we’ll dive into how compact mobility options like Snowfeet* can lighten your load while keeping you safe and efficient out there.
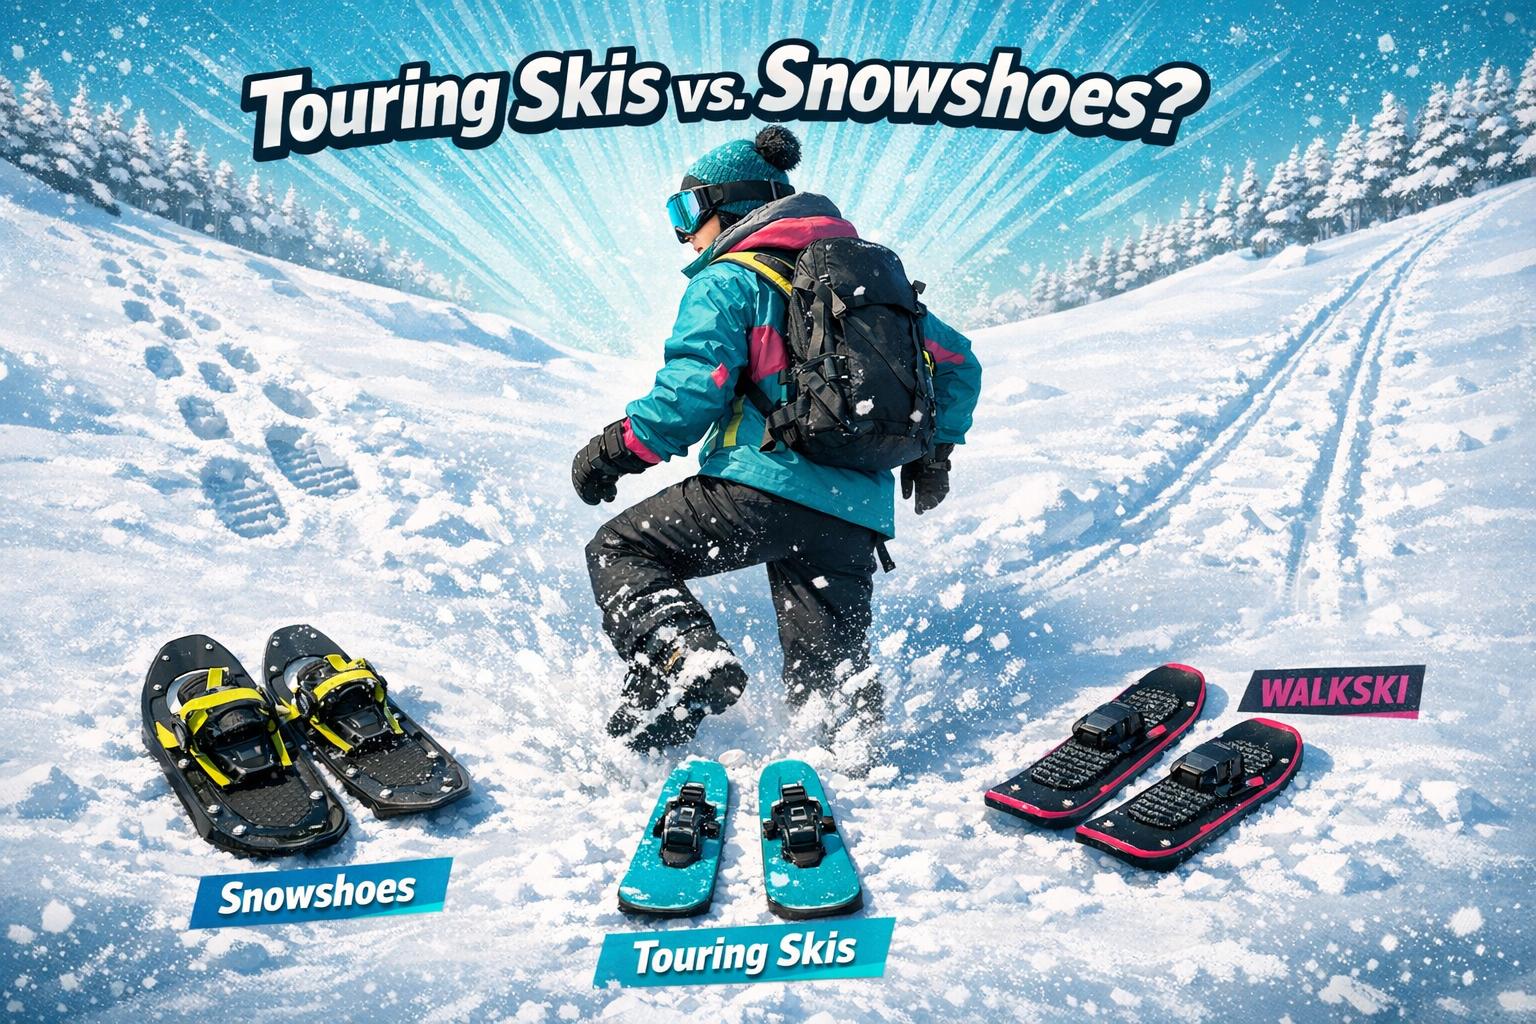
Compact Winter Mobility Equipment
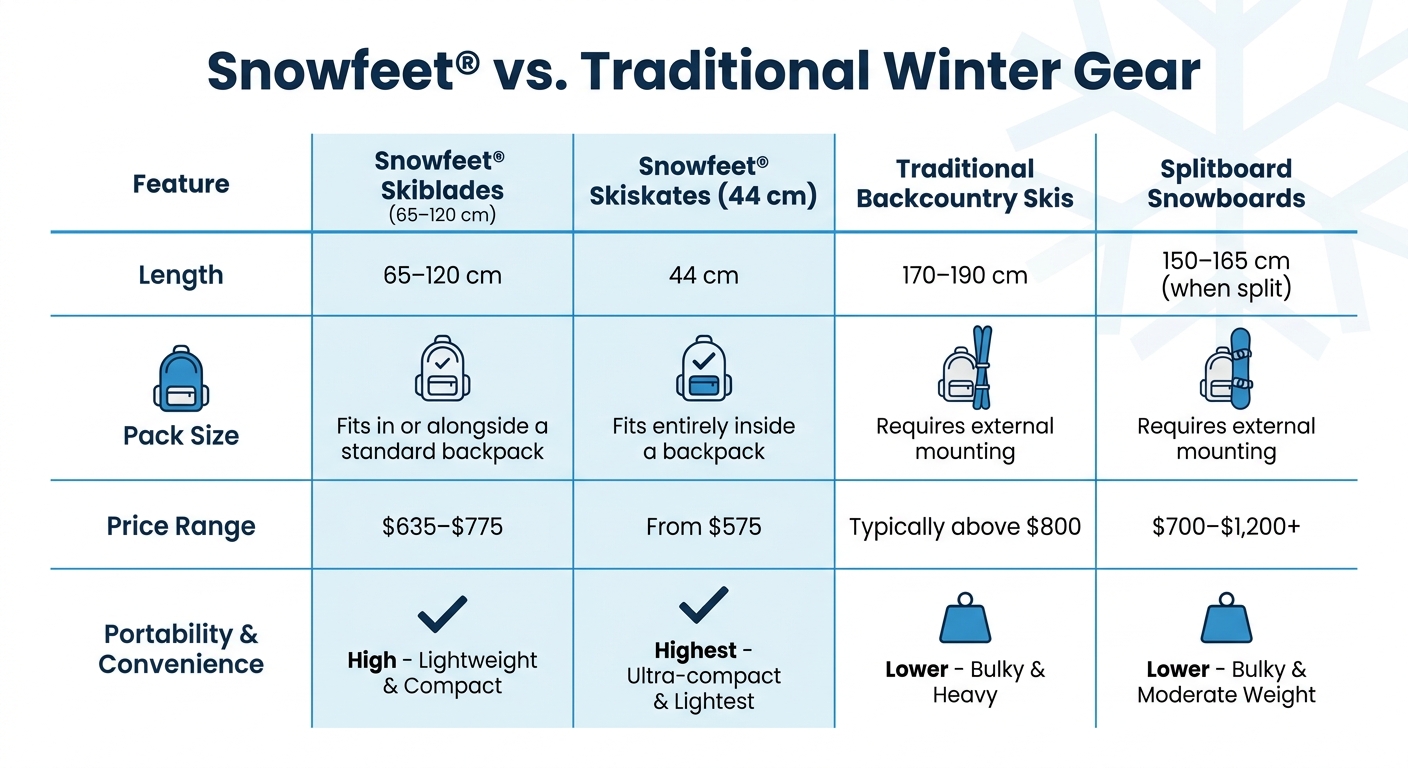
Snowfeet vs Traditional Winter Gear Comparison Chart
When you're heading out on multi-day tours, every ounce and inch in your pack counts. Traditional skis and snowboards can be bulky and heavy, often requiring external mounts and a lot of fiddling to get them adjusted. That's where compact mobility gear like Snowfeet* steps in. These streamlined options make your adventures more efficient by cutting down on weight and size without sacrificing performance or safety.
Snowfeet* Skiblades: 65 cm, 99 cm, and 120 cm Models
Snowfeet* Skiblades come in three sizes, tailored to different snow conditions and touring needs:
- 65 cm (starting at $635): The smallest and lightest option, perfect for quick descents after summiting or navigating moderate terrain. It fits easily into your pack, making it a great choice for minimalists.
- 99 cm (starting at $675): A versatile middle ground, offering a mix of portability and performance. It handles deeper snow and longer descents with ease.
- 120 cm (priced at $775): Designed for those seeking a more traditional skiing experience without the usual bulk.
All models work with standard ski boots, so you don’t need to invest in specialized gear. Unlike traditional touring skis, which are typically 170–190 cm long and require unique bindings, these skiblades are compact and easy to carry, even on narrow trails.
Snowfeet* Skiskates: 44 cm for Quick and Light Movement
For the ultimate in lightweight mobility, Snowfeet* Skiskates are just 44 cm long and start at $575. Their wood core strikes a balance between durability and weight, and their size means they can fit entirely inside your backpack. Whether you're gliding around camp, tackling short descents, or crossing flatter sections of terrain, these are a quick and simple solution.
Skiskates are designed for seamless transitions between hiking and gliding. Unlike traditional setups, which often require time-consuming adjustments, Skiskates can be strapped on quickly, letting you keep your momentum as you move through mixed terrain.
Snowfeet* vs. Traditional Skis and Snowboards
Here’s a quick breakdown of how Snowfeet* stacks up against traditional options:
| Feature | Snowfeet* Skiblades (65–120 cm) | Snowfeet* Skiskates (44 cm) | Traditional Backcountry Skis | Splitboard Snowboards |
|---|---|---|---|---|
| Length | 65–120 cm | 44 cm | 170–190 cm | 150–165 cm (when split) |
| Pack Size | Fits in or alongside a standard backpack | Fits entirely inside a backpack | Requires external mounting | Requires external mounting |
| Price Range | $635–$775 | From $575 | Typically above $800 | $700–$1,200+ |
Snowfeet* products prioritize compactness, freeing up space in your pack for the essentials you need to stay safe and comfortable on your winter adventures. Whether you're looking for the versatility of skiblades or the ultralight convenience of skiskates, these options redefine what efficient winter mobility can look like.
sbb-itb-17ade95
How to Pack Your Backpack for Comfort and Access
Once you've picked compact gear like Snowfeet* Skiblades or Skiskates, organizing your backpack the right way ensures you're balanced, comfortable, and that your essentials stay unfrozen. The way you pack makes a big difference. It complements the compact nature of Snowfeet* gear, helping you stay efficient and safe.
The 3-Zone Packing Method
Think of your pack in three horizontal layers. The middle zone, closest to your back, is where heavy items like food and fuel should go. This keeps your center of gravity steady and prevents the pack from pulling you backward. Bulkier items - like your first aid kit, repair tools, and sleeping gear - should sit at the bottom near your hip belt. This setup shifts the weight to your hips, sparing your shoulders. Lighter items, such as gloves, a puffer jacket, or a neck warmer, belong in the top zone to minimize swaying on uneven ground.
"Packing your backpack smartly will get you further up the mountain. It's crucial for comfort, balance and both uphill and downhill efficiency. In the long run, it'll help avoid nasty back injuries." - The Uptrack
Keep your small essentials - like sunscreen, snacks, a headlamp, or a satellite device - in the top lid or external pockets. This way, you can grab them without digging through the main compartment. A 35–40L pack is usually the sweet spot, offering enough room for the necessities without weighing you down. Avalanche safety tools, like a shovel and probe, should go in a dedicated internal pocket. Strapping them to the outside risks losing them when you need them most.
And don't forget: keeping your gear dry is just as important as packing it smartly, especially in freezing conditions.
Keeping Gear Dry and Managing Total Weight
Moisture is your worst enemy in cold weather. Use waterproof stuff sacks or dry bags to separate items like clothing, food, and sleeping gear inside your pack. For water bottles, stick to internal pockets or insulated sleeves - external mesh pockets can cause them to freeze in sub-zero temperatures.
"Damp clothing can quickly lead to hypothermia, even in mild conditions." - Wild Hikes Finland
To stay comfortable and mobile, aim for a total pack weight between 20–30 lbs. If you're tackling a steep climb, take off a layer to avoid sweating, which can quickly turn dangerous in freezing weather. The compact design of Snowfeet* Skiblades (65 cm, or about 26 in) and Skiskates (44 cm, or about 17 in) makes them easy to stow inside or alongside your pack. This frees up space for critical safety gear and extra dry layers.
Clothing Layers and Safety Equipment for Cold Weather
Required Clothing Layers
Staying warm and dry in cold weather starts with the right clothing system. Begin with a merino wool base layer (150–200 g/m²) for its moisture-wicking and odor-resistant properties. For your mid-layer, choose something like a lightweight fleece or a breathable synthetic option - great examples include the Arc'teryx Proton Hoody ($350) or the Patagonia R1 Air Full-Zip ($199). These help regulate sweat and keep you comfortable during activity. Over that, a 3-layer Gore-Tex jacket - like the Arc'teryx Rush ($800) - is ideal for blocking wind and snow while allowing moisture to escape.
For static periods, pack a high-loft down jacket with an 850+ fill power, such as the Norrøna Lyngen Down850 ($489). This provides critical insulation when you're not moving. When it comes to gloves, variety is key: bring a thin liner for dexterity, a breathable pair for working uphill, and a heavy waterproof pair for descents or emergencies. And don't forget - always wear dry ski socks when you hit the trailhead.
"The golden rule is simple: never sweat. If you start overheating, remove a layer immediately. Damp clothing can quickly lead to hypothermia, even in mild conditions." – Wild Hikes Finland
If your mid-layer gets damp, you can put a synthetic insulated jacket over it at camp. Your body heat will help dry it out through the jacket's breathable material.
Safety Equipment and Emergency Supplies
Once your clothing is sorted, focus on your safety gear. Avalanche tools are non-negotiable: you'll need a digital 3-antenna transceiver ($250–$400), a collapsible probe (at least 260 cm), and a metal shovel ($40–$80). These should always be stored in a quick-access pocket for emergencies.
Modern avalanche beacons operate on a 457 kHz signal and offer search ranges up to 70 meters (about 230 feet). Additionally, pack a first aid kit, a repair kit (including Voile straps and a multi-tool), an emergency shelter or tarp, a headlamp, fire-starting tools, and extra food. A satellite communicator, like the Garmin inReach ($250–$400 plus subscription), is also a smart addition. And don't rely solely on tech - carry a physical map and compass as backups.
Thanks to the compact design of Snowfeet* Skiblades (available in 65, 99, and 120 cm) and Skiskates (44 cm), you can save pack space for these safety essentials while keeping your overall load within the 20–30 lb range. Unlike traditional touring skis, which can force tough choices between safety gear and comfort items, Snowfeet* helps you avoid those compromises.
Conclusion
Efficient winter touring boils down to smart planning and packing. For multi-day winter tours, it’s all about making purposeful choices. Systems like the 3-to-1 clothing method and 3-zone packing strategy help you stay organized while ensuring quick access to essential safety gear.
Traditional touring skis can be cumbersome, requiring larger packs and adding to the challenge. Snowfeet* gear changes the game by cutting down on bulk without compromising safety or performance. With options like Snowfeet* Skiblades (65 cm, 99 cm, and 120 cm) and Snowfeet* Skiskates (44 cm), you can significantly reduce the load while keeping all critical safety items on hand.
"Packing smart makes the difference between a smooth Arctic adventure and a daily wrestling match with your gear." – Wild Hikes Finland
Start your journey with 1 liter of water and distribute heavier items, like emergency shelters and stoves, among your group to lighten the load.
FAQs
What pack size should I use for a 2–4 day winter tour?
For a winter tour lasting 2–4 days, a pack with a capacity of 35L to 45L hits the sweet spot. This size gives you enough room for essentials like extra layers, food, and safety gear, all while keeping things manageable and lightweight. If you're bringing along Snowfeet products like Skiblades or Skiskates, you're in luck - they're compact and fit easily in a pack of this size. The goal here is to strike a balance: pack light, but don’t skimp on what you need to stay safe and comfortable out there.
Are Snowfeet* Skiblades or Skiskates better for deep snow?
Snowfeet* Skiblades, particularly the 99 cm model, excel in deep snow thanks to their longer length. This added surface area boosts flotation and stability, making it easier to stay in control. On the other hand, Skiskates, with their compact 44 cm design, shine on lighter, groomed, or packed snow. Their shorter length makes them incredibly agile and perfect for quick turns. If you're heading into deep snow, the longer Skiblades are the better choice, all while keeping Snowfeet's hallmark portability and versatility intact.
How do I keep water from freezing in my pack?
To stop your water from freezing while winter touring, try using insulated bottles or hydration bladders with insulated covers. These help shield your water from the cold air. Another tip? Keep your water close to your body or tucked inside your clothing. This extra warmth can make a big difference in keeping your water from turning into ice.


Leave a comment
This site is protected by hCaptcha and the hCaptcha Privacy Policy and Terms of Service apply.