


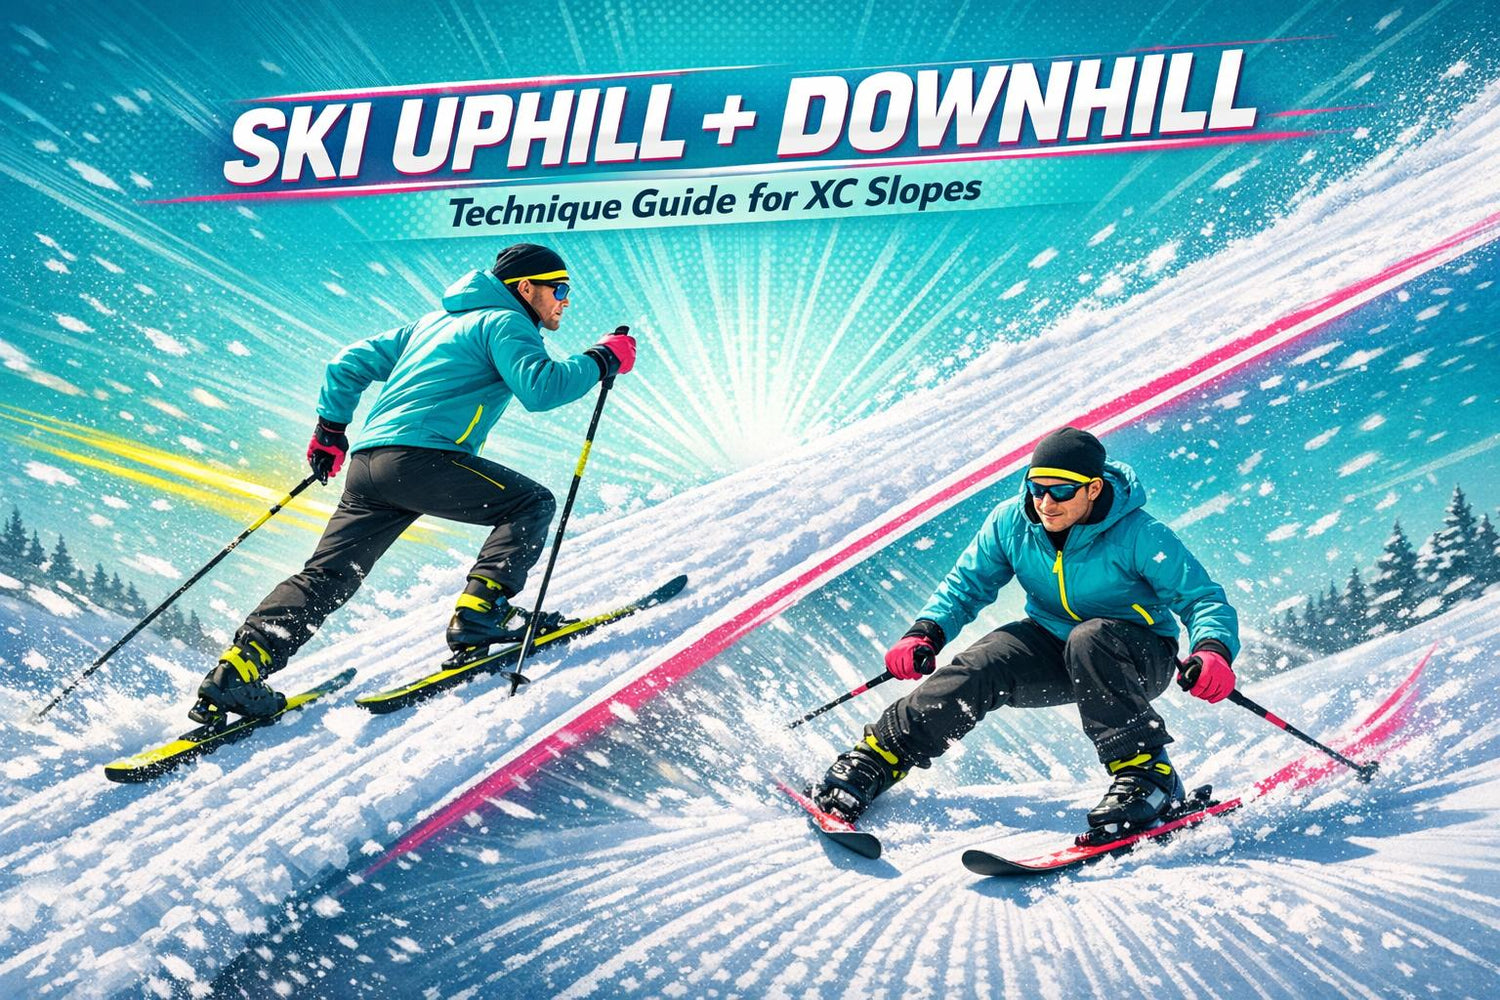
Cross-country skiing on slopes - whether uphill or downhill - can feel tricky at first. But with the right techniques and equipment, it gets much easier. Here’s the deal:
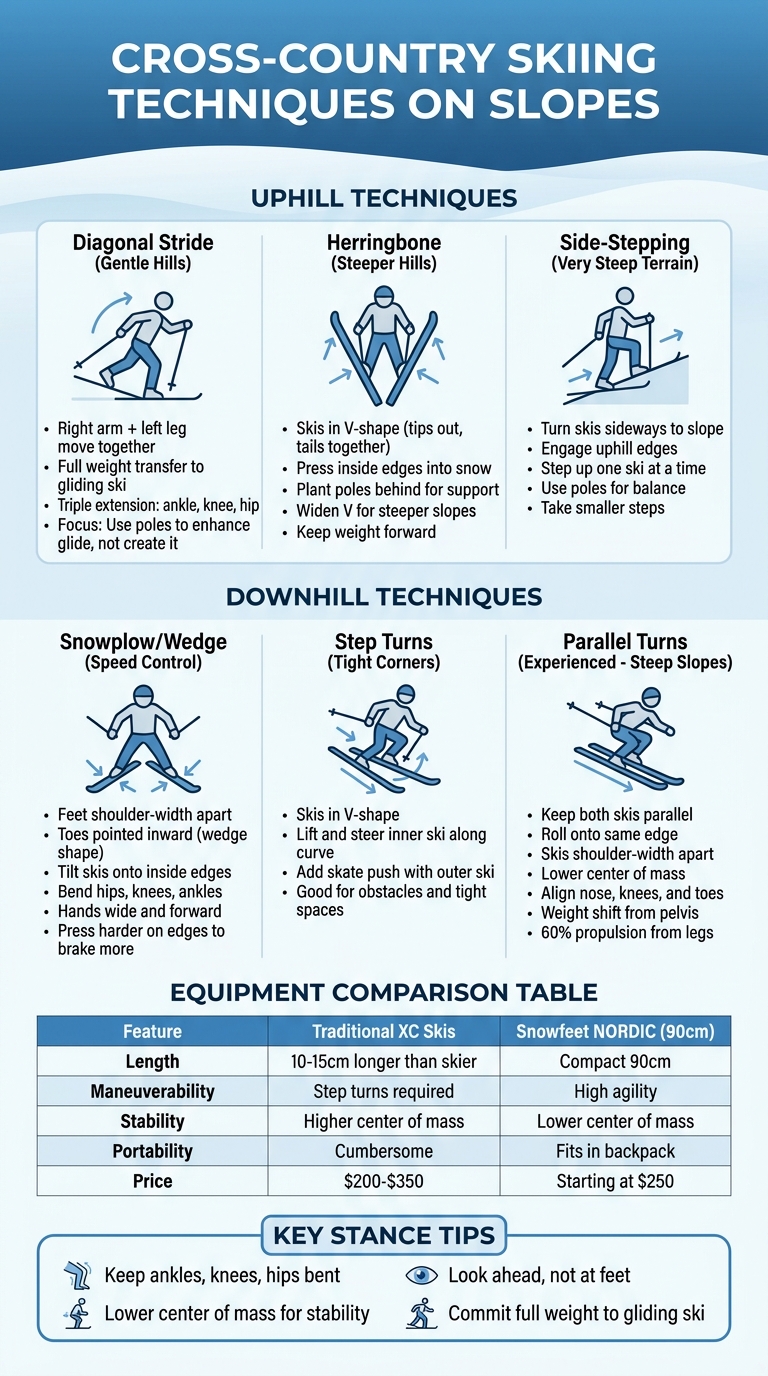
- Uphill: Use methods like the diagonal stride for gentle hills, the herringbone for steeper climbs, or side-stepping for very steep terrain. Focus on weight transfer, balance, and proper pole placement.
- Downhill: Master the snowplow to control speed, step turns for tight corners, and parallel turns for steeper descents. Keep a low stance for stability.
- Gear Tip: Shorter skis, like the 90 cm Snowfeet* NORDIC Cross-Country Skate Skis, are easier to handle and reduce fatigue, especially on slopes.
The key is matching your technique to the terrain and using equipment that complements your skills. Ready to hit the trails? Let’s dive into the details!
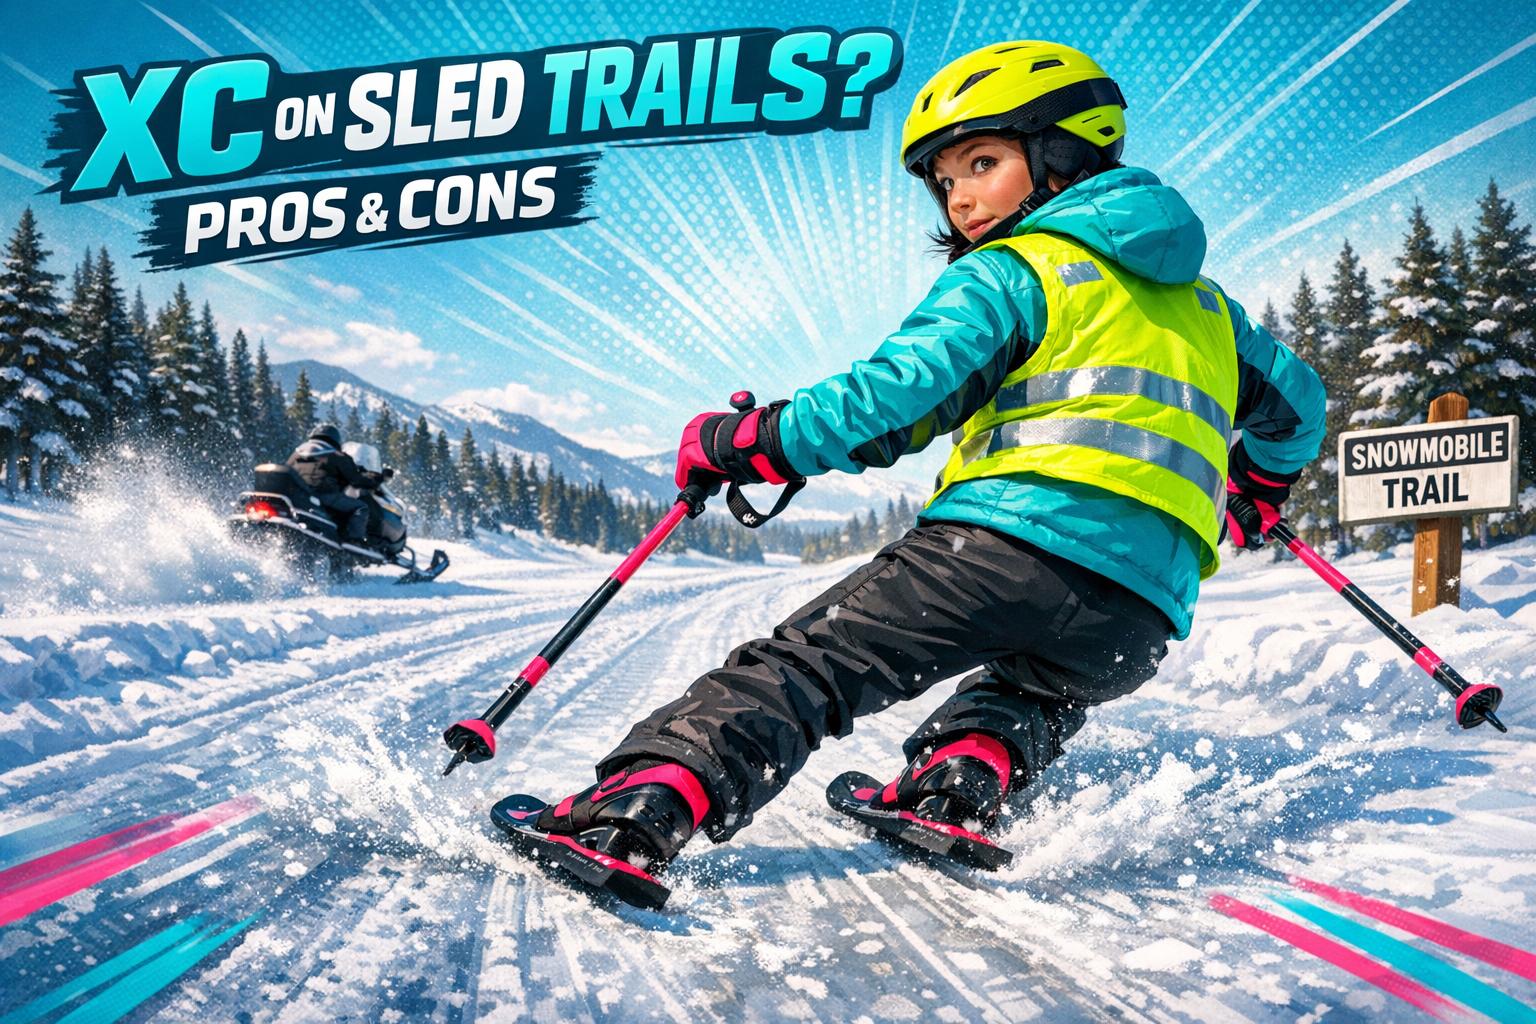
Cross-Country Skiing Techniques for Uphill and Downhill Terrain
Calling all Cross Country Skiers who are Afraid of Descending Hills
How to Ski Uphill: Techniques for Climbing
Uphill skiing can be tricky for beginners, but the challenge often lies in technique rather than physical fitness. David Lawrence from the PSIA Nordic Team explains:
"In most cases, the foundational problem to skating uphill is technique, not fitness."
Once you get the basics - like weight transfer, balance, and pole placement - under control, climbing becomes much more manageable.
Start with a stable stance: keep your legs shoulder-width apart, bend your knees, and lean slightly forward. This stance not only improves your form but also makes the most of Snowfeet* skis. For example, the Snowfeet* NORDIC Cross-Country Skate Skis, which are just 90 cm long, require less movement per stroke compared to longer skis. This reduced motion lowers the strain on your muscles, helping you avoid fatigue during climbs. Once you’ve got this foundation down, you can tackle specific uphill techniques.
Diagonal Stride for Gentle Hills
The diagonal stride is like an exaggerated walking motion. Your right arm and left leg move forward together, then you alternate. Shift your full weight onto the ski that’s gliding, give a sharp kick to engage the grip zone, and plant the opposite pole at the same time. To maximize power, focus on "triple extension" - fully extend your ankle, knee, and hip during each kick.
Weight transfer is key here. A slight side-to-side motion adds propulsion to your stride. Lawrence offers this advice:
"Use your poles to compliment and enhance glide, not create glide."
A good way to practice this is by lightly touching your poles with just your fingertips to develop a smooth rhythm. The compact Snowfeet* NORDIC skis help with control and reduce fatigue, making them a great choice for longer climbs.
Herringbone Technique for Steeper Hills
For steeper slopes, switch to the herringbone technique. Position your skis in a V-shape, with the tips pointing outward and the tails close together. Step up one ski at a time, pressing the inside edges into the snow for grip. Plant your poles behind you for extra support. If the slope gets even steeper, widen the V-shape for better traction. Keep your weight forward to avoid sliding backward - this is a stepping motion, not a gliding one.
Long skis can make this technique awkward, especially on narrow trails. The shorter Snowfeet* NORDIC skis are easier to maneuver, reducing the strain on your legs and making the climb feel less exhausting.
Side-Stepping for Very Steep Terrain
When the hill gets so steep that even the herringbone technique isn’t enough, side-stepping is your best bet. Turn your skis sideways to the slope and step up one ski at a time. Keep the uphill edges of your skis engaged with the snow, and use your poles for balance. While this method is slower, it’s the safest option for extreme inclines.
Take smaller steps instead of big, energy-draining strides. This reduces the overall effort required, so you can climb longer without wearing yourself out. Again, the compact Snowfeet* NORDIC skis shine here. Their shorter length means less effort compared to heavier, traditional cross-country skis, making steep climbs feel more manageable.
How to Ski Downhill: Control and Braking Techniques
Skiing downhill can be thrilling, but staying safe means mastering techniques to control your speed and balance. While climbing uses different muscles, descending demands precise braking and well-timed weight shifts. Nordic skiing gear, being lighter and less stable than Alpine equipment, can make braking a bit trickier.
Techniques like the snowplow, step turns, and parallel turns each have their place, depending on the slope, your speed, and how tight the turns are. The compact 90 cm Snowfeet* skis make maneuvering easier than traditional cross-country skis, which can feel bulky when braking or turning quickly. Start with the basics - like the snowplow technique - to get comfortable with controlling your speed.
Snowplow Technique for Speed Control
The snowplow, also known as the wedge, is a go-to braking method for gentle to moderate slopes. It works by creating friction as your skis scrape the snow. Here’s how to do it:
- Start with your feet shoulder-width apart.
- Point your toes inward to form a wedge shape.
- Tilt your skis onto their inside edges to “bite” into the snow.
- Bend your hips, knees, and ankles, and keep your hands wide and in front for balance.
"The snowplough turn... is the first turn taught to beginners, but still is useful to advanced skiers on steep slopes." - Wikipedia
To brake harder, press more firmly on the inside edges of your skis. If you need to turn while snowplowing, shift your weight to the outside ski of the turn - press on your right ski to turn left, for example. On easier slopes, you can try a “half-wedge” by angling just one ski out while keeping the other in the track. Snowfeet* skis make holding the wedge position simpler due to their smaller surface area.
Step Turns for Tight Corners
Step turns are great for navigating tight corners or dodging obstacles while keeping your momentum. To perform a step turn:
- Position your skis in a V-shape, with the tails together and the tips apart.
- Lift and steer your inner ski along the curve of the turn.
- Add a “skate push” with the outer ski for extra speed if the terrain allows.
The short 90 cm Snowfeet* NORDIC skis make edge-to-edge movements easier compared to traditional skis. Their compact size reduces the effort needed to maneuver, which is a big help when you’re tired or leaning too far back. If you enter a turn too quickly, use a snowplow or skid to slow down before transitioning into a step turn for a smooth exit.
Once you’re confident with step turns, you can move on to parallel turns for more control on steeper slopes.
Parallel Turns for Experienced Skiers
Parallel turns, or parallel skidding, involve keeping both skis parallel and rolling them onto the same edge - either left or right - to scrape against the snow. This technique can be tricky in Nordic skiing because the equipment is lighter, the center of mass is higher, and the skis often lack metal edges. Still, it’s an effective way to manage speed on steeper terrain.
For stability, keep your skis shoulder-width apart and lower your center of mass by bending your hips, knees, and ankles. Focus on aligning your “nose, knees, and toes” for balance. Distribute your weight evenly across your feet and use your pelvis to shift weight rather than leaning your upper body. Keep your eyes on where you’re headed - not your feet - to maintain a neutral spine and steady balance.
"The ability to balance and be stable on one leg is where the rubber meets the road (or ski hits the snow)." - Ned Dowling, Physical Therapist
Snowfeet* NORDIC skis, with their lightweight and shorter design, let you shift weight quickly and commit more securely to your glide. Their compact length makes it easier to steer your skis. For high-speed turns, start with a strong, early parallel skid to slow down before transitioning smoothly into the turn.
sbb-itb-17ade95
Choosing the Right Equipment
When tackling steep slopes, having the right gear can make all the difference. Traditional cross-country skis, with their longer length, can be hard to control and less stable on descents. Enter Snowfeet* NORDIC Cross-Country Skate Skis - at just 90 cm (about 35 inches), they offer better control and agility, making them a smarter choice for varied terrain.
Snowfeet* NORDIC vs. Traditional Cross-Country Skis
Traditional cross-country skis are, well, long - often taller than the skier. Skate skis are slightly shorter, but they're still unwieldy on narrow trails or tight corners. Their linear sidecut doesn't help either, as it prevents smooth carving turns like alpine skis. Instead, you're stuck doing step turns, which feel awkward and disconnected.
"Alpine skiers carve turns... Nordic skis have straighter, smaller side cuts and have to be stepped around turns." - Nordic Ski Lab
Another challenge with traditional Nordic skis is their instability. Their lightweight, springy build raises your center of mass, making icy or uneven downhill sections tricky. Plus, most race models lack metal edges, reducing control even further.
Now, compare that to Snowfeet* NORDIC skis. Their compact 90 cm length makes them easier to maneuver in tight spots and on technical terrain. They're also incredibly portable - you can toss them in a backpack or store them in your car without dealing with the bulk of traditional skis.
On climbs, their lightweight design helps reduce fatigue. During uphill techniques like the V1 Offset skate, where 60% of propulsion comes from your legs, every extra ounce of weight matters. Snowfeet* NORDIC skis keep the effort manageable, letting you focus on technique instead of exhaustion.
Here's a quick comparison:
| Feature | Traditional Cross-Country Skis | Snowfeet* NORDIC (90 cm) |
|---|---|---|
| Length | Typically 10–15 cm longer than the skier | Compact 90 cm |
| Maneuverability | Requires step turns due to a linear sidecut | High agility in tight terrain |
| Stability | Higher center of mass; less stable | Lower center of mass; improved control |
| Portability | Cumbersome to transport | Easily fits in a backpack |
| Price | Approximately $200–$350 | Starting at $250 |
While entry-level classic skis cost $200–$250 and skate skis run $250–$350, Snowfeet* NORDIC skis start at $250. For that price, you get not only portability but also better performance on varied terrain.
Poles, Bindings, and Boots: What You Need
To get the most out of Snowfeet* NORDIC skis, you'll need the right boots and poles. Since these skis are designed for skate skiing, pairing them with skate-specific gear is a must.
Skate boots, like the Salomon RC8, are built with a taller, stiffer cuff to give you the lateral ankle support needed for the V-shaped skating motion and for edging on slopes. Classic boots, on the other hand, are low-cut and flexible, which works for flat walking strides but falls short on inclines or technical terrain. A good pair of intermediate skate boots will cost around $250–$300.
Poles are equally important. Skate poles should be 10–15 cm taller than classic ones, reaching somewhere between your chin and nose. This added length gives you more leverage for double-poling on flats and climbing efficiently. Lightweight carbon or high-grade aluminum poles, priced between $80 and $150, also help maintain a lower center of mass for better balance.
Bindings are pretty straightforward. Most modern systems - NNN, Prolink, and Turnamic - are cross-compatible and maintain the free-heel design that's essential for uphill climbs and step turns.
One last tip: avoid boots designed for walking. They don't provide the edge control needed for proper momentum, and you’ll likely find yourself struggling with tip digging. Stick with skate-specific boots for the best results.
Practice Drills and Skill Progression
Beginner Drills on Flat Ground
Start your training without poles. This helps you focus on leg technique and weight transfer, laying the groundwork before introducing poles. A great starting point is practicing one-ski gliding - it builds stability and balance, which are key for skiing.
Mix in drills like "Wings Away", "Step, Step, Glide", and "Baby Steps" to improve weight transfer, rhythm, and the basics of diagonal stride. If you're learning to skate ski, begin with the V-position stance. Practice shifting your weight while standing still before moving forward.
Here’s a tip: instead of mimicking a walking stride, roll through the inner edge of your ski. For double poling, stick to flat ground. This allows you to focus on engaging your core without worrying about coordinating leg kicks.
Using Snowfeet* NORDIC skis can make these drills even more effective. Their maneuverability helps you gain the precise control needed for both easy and challenging terrain. Once you’ve nailed these basics on flat ground, you’re ready to venture onto gentle slopes for more practice.
Moving to Steeper Slopes
When you’re ready to take on steeper terrain, start small. Look for wide, gentle slopes with long, flat, or uphill run-outs at the bottom - this gives you a safe space to stop. Begin by climbing just a short distance uphill to keep your descent speed manageable. Always check snow conditions beforehand, as soft snow can quickly turn icy.
As the terrain gets steeper, tweak your technique. For classic skiing, switch from the diagonal stride to a herringbone pattern on steep climbs. Skate skiers should move from the V2 (symmetric) stance on flat ground to the V1 (offset) stance for more power uphill. When descending, use a low, wide stance with bent hips, knees, and ankles, keeping your hands forward for balance. Practice "Quick Feet" drills on gentle downhills to improve agility for step turns.
Snowfeet* skis are especially helpful here, thanks to their agility, making it easier to adapt to varied slopes. Gradually increasing the difficulty of the terrain will help you strengthen your technique and manage descents with confidence.
Common Mistakes and Safety Tips
One common error is not fully committing your weight to the gliding ski. This cuts your glide short and wastes energy. Remember to engage your legs and core instead of relying too much on your poles. Another mistake is standing too upright - keeping your ankles, knees, and hips slightly bent lowers your center of gravity and boosts your stability. Also, avoid staring down at your feet; looking ahead improves balance and spatial awareness.
"In Offset, approximately 60% of the propulsion should come from the legs." - Nordic Ski Lab
For downhills, it’s a good idea to remove your hands from the pole straps when the terrain is unpredictable. This reduces the risk of wrist injuries if you fall. Brake early using a snowplow to avoid picking up too much speed. And if a slope feels too icy or steep, don’t hesitate to walk down in your boots or even slide down on your seat - it’s better to stay safe than risk a fall.
Conclusion
Mastering cross-country skiing on slopes is all about matching the right technique to the terrain and keeping your body in the proper position. For gentle uphill sections, the Diagonal Stride keeps you moving smoothly, while the Herringbone technique is your go-to for steeper climbs. On the way down, the Snowplow helps you manage your speed, and Step Turns let you handle corners without losing flow. Remember to keep your ankles, knees, and hips flexed - this lowers your center of mass and helps distribute your weight evenly.
The right equipment can take your skills even further. Traditional long skis, while classic, can be less stable and lack metal edges for effective braking. Enter Snowfeet NORDIC skis - just 90 cm (about 35 inches) long. Their shorter length naturally lowers your center of mass, making you more stable, especially on tricky terrain. They simplify Step Turns, make controlling your descent easier, and reduce fatigue on longer outings. Beginners will appreciate how these skis help reinforce proper technique, avoiding the common "walking feet" habit. For seasoned skiers, they offer easier handling on tough slopes while still delivering the glide and efficiency needed for serious training.
Whether you're gliding through groomed trails or exploring the backcountry, the right gear can transform your experience. Pair reliable techniques with the nimble performance of Snowfeet NORDIC skis, and you'll enjoy a smarter, more controlled, and more fun skiing adventure - proving that shorter skis can deliver big on performance without cutting corners.
FAQs
How do I choose the right uphill technique for a hill?
When choosing the right uphill technique, it’s all about the slope and your experience. For easier, more gradual slopes, a steady diagonal stride or a skate stride works well. When the hill gets steeper, shift to techniques that emphasize strength and smooth weight transfer, like double poling or skate climbing. Snowfeet’s lightweight build gives you better balance and control, making it simpler to adjust to different slopes compared to bulky skis or snowboards.
What’s the safest way to slow down on a steep downhill?
The best way to stay safe while slowing down on a steep downhill in cross-country skiing is to stay in control and use the right techniques. Start by keeping your feet about shoulder-width apart. Flex your hips, knees, and ankles to maintain a balanced and stable stance. To reduce speed, try the snowplow or wedge technique - these help create friction against the snow. Avoid making sudden movements, and always adapt to the trail conditions to ensure a smooth and safe descent.
Do I need skate boots and poles for Snowfeet* NORDIC skis?
Nope, you don’t need skate boots or poles to use Snowfeet* NORDIC skis. These skis are built to be lightweight and easy to handle, making them a great option for beginners. They offer a fun, accessible way to enjoy cross-country skiing without the need for specialized gear. So, you can skip the extra equipment and still have a blast on the snow!


Leave a comment
This site is protected by hCaptcha and the hCaptcha Privacy Policy and Terms of Service apply.