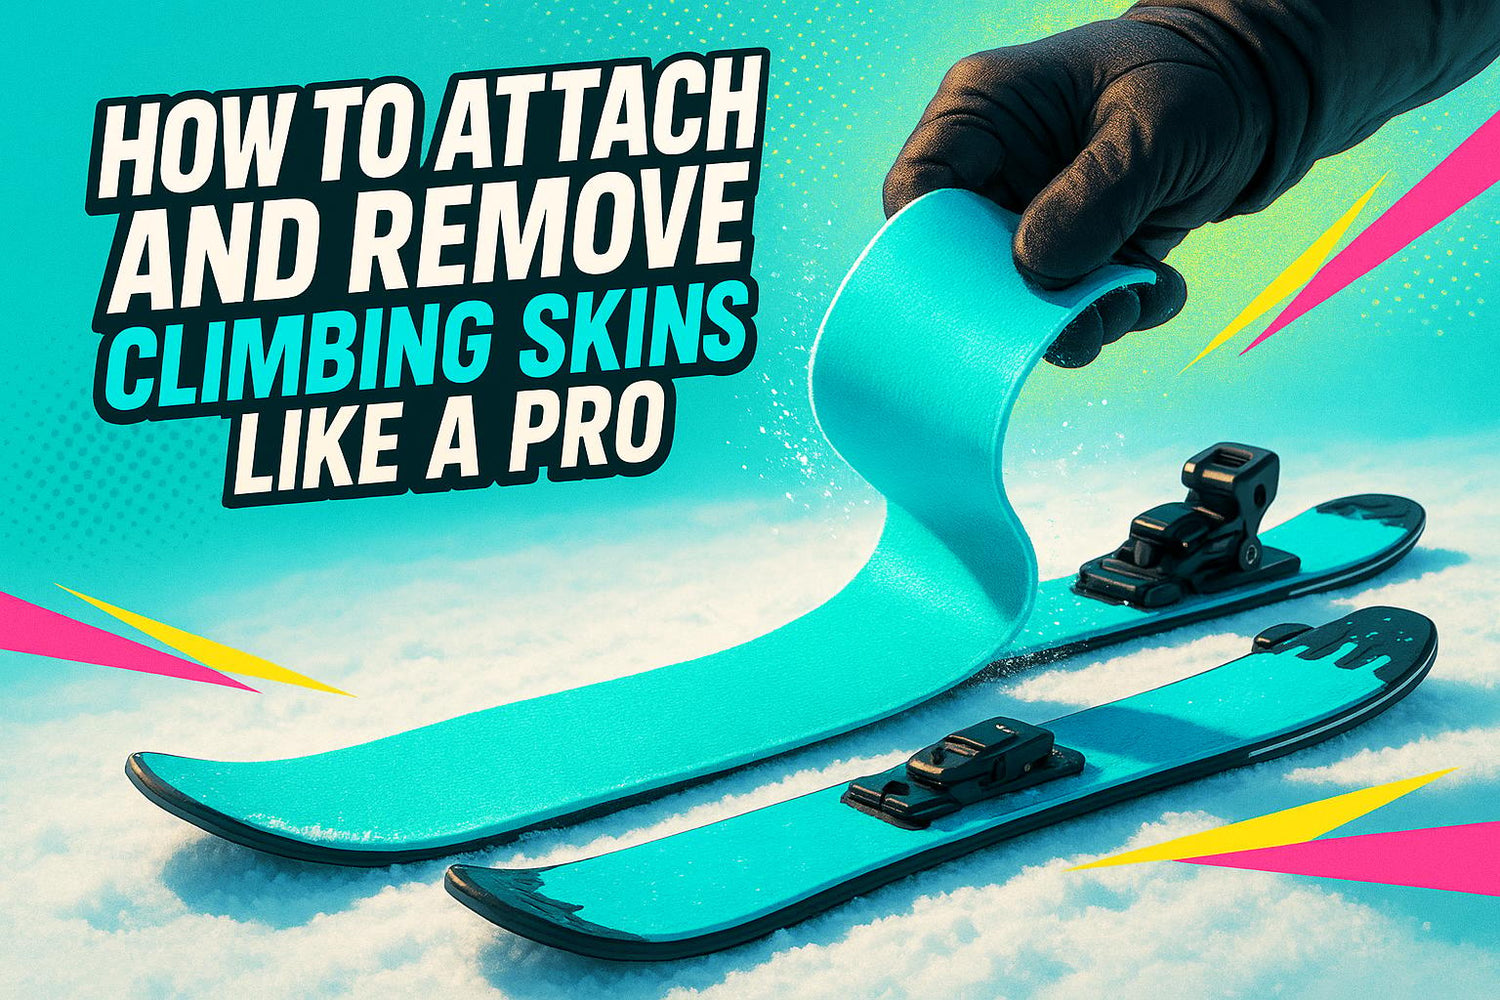
Vil du have klatrehud til at arbejde for dig og ikke imod dig? Her er sagen: at sætte og fjerne hud på den rigtige måde kan spare dig tid, energi og penge. Gøres det forkert, risikerer du at glide, spilde kræfter og endda komme i farlige situationer på stejlt terræn. Uanset om du bruger Snowfeet* korte ski eller noget lignende, er det en nødvendighed at mestre denne færdighed.
Vigtige pointer:
- Hvorfor det er vigtigt: Korrekt håndtering af skins forbedrer grebet, sparer energi og forlænger skinens levetid (de kan koste 150–300 $, så det er det værd).
- Værktøj du skal bruge: Mikrofiberklud, skin wax, waterproofing spray og en opbevaringspose.
- Fastgørelse af skins: Start ved spidsen, juster ned langs skiens midte, og fastgør haleclipsen.
- Fjernelse af skins: Løsne halen, træk af fra hale til spids, og fold lim mod lim for at beskytte klæbemidlet.
- Vedligeholdelsestips: Rengør skins, påfør voks for at forhindre sneklumper, og opbevar dem et tørt sted.
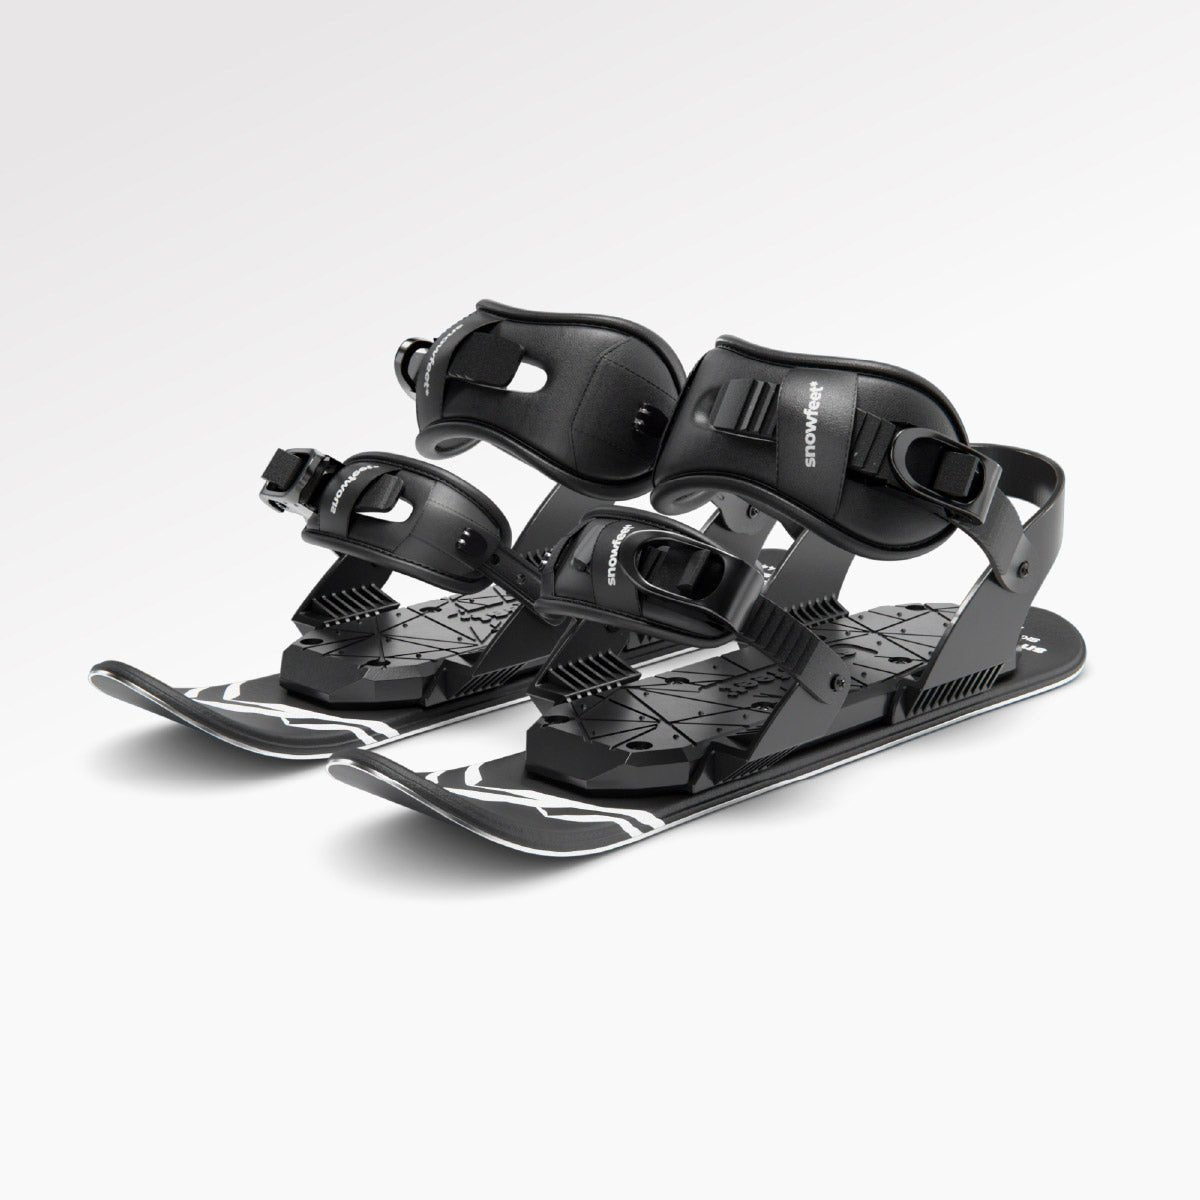
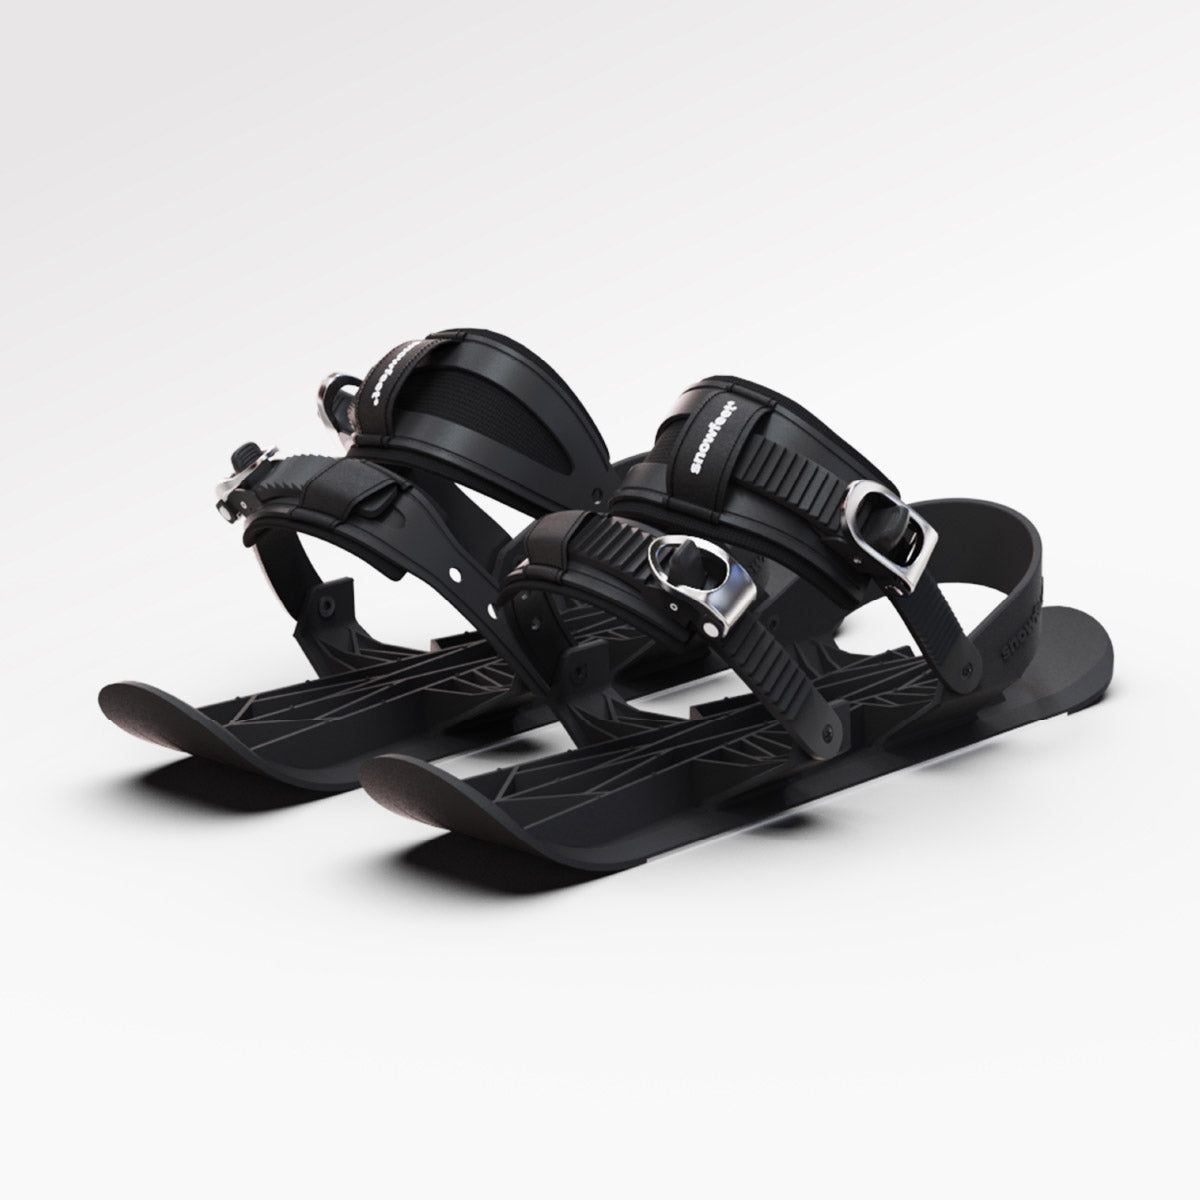
Snowfeet* korte ski gør denne proces lettere takket være deres kompakte størrelse. Så uanset om du er på 65 cm Skiblades eller 120 cm touringmodeller, vil du bruge mindre tid på at rode med udstyret og mere tid på at nyde pisterne. Lad os dykke ned i detaljerne!
Sådan bruger du climbing skins ved skitouring i fjeldet
Værktøj og forberedelse du har brug for
At gøre dine skins klar og fastgøre dem kræver ikke meget, men at have de rigtige værktøjer ved hånden kan gøre processen meget nemmere - især når du er ude i kulden.
Det du skal bruge
For at fastgøre climbing skins skal du bruge blot nogle få essentielle ting:
- En mikrofiberklud: Et must til at tørre snavs, is og fugt af din skibund uden at lave ridser. Rene ski betyder bedre vedhæftning.
- Et skin trimming tool eller en skarp hobbykniv: Selvom Snowfeet* modeller er designet med standardiserede kortere længder, der sjældent behøver trimning, er det godt at have dette ved hånden, bare for en sikkerheds skyld.
- En opbevaringspose: Den holder dine skins pæne og beskyttede, når de ikke er i brug. Snowfeet* skins kan foldes småt sammen, hvilket gør dem nemme at have med i en dagstursrygsæk - perfekt til at skifte mellem skind og ski under en tur i fjeldet.
- Skin wax: Hjælper med at bevare limens klæbeevne, selv når temperaturen svinger.
- Waterproofing spray: Holder stoffet i god stand ved at beskytte det mod fugt.
- Ski straps: Nyttige til at sikre dine ski, når du holder pause.
- Duct tape: Din go-to til hurtige reparationer, hvis limen eller stoffet begynder at svigte.
Med disse værktøjer er du klar til at forberede dine Snowfeet* ski til en succesfuld dag på pisterne.
Forberedelse af dine Snowfeet* ski

Start med at give din Snowfeet* skibund en grundig rengøring. Dette trin er nøglen til at sikre, at skindene hæfter ordentligt. Fjern sne, is eller snavs, især omkring spidser og ender, hvor skindene fastgøres. En ren overflade betyder bedre vedhæftning og færre problemer senere.
Før du tager afsted, lav en hurtig test: pil et hjørne af skindet tilbage og pres det let på skien. Limen skal føles akkurat klistret nok til at hæfte, men må ikke efterlade nogen rester. Hvis dine skind har ligget i kulden, så lad dem varme lidt op, før du tester eller påfører dem.
Sørg for, at dine skind er kompatible med din Snowfeet* model. Deres kompakte design betyder normalt mindre besvær sammenlignet med fuldlængde ski, men en hurtig kontrol sikrer, at alt passer tæt.
Takket være den mindre størrelse på Snowfeet* skind er de hurtigere at forberede og nemmere at håndtere end traditionelle lange skimodeller. Når du har gjort det et par gange, bliver processen anden natur, hvilket gør dine fjeldeventyr glattere og mere fornøjelige.
Sådan fastgør du klatreskind
Gør dine Snowfeet* ski klar til fjeldet? At fastgøre klatreskind er nemmere, end du måske tror, takket være Snowfeet* korte skis kompakte design. Deres størrelse gør processen hurtigere og mere ligetil, så du kan komme ud på sporet på ingen tid. Her er en trin-for-trin guide til at sikre en sikker pasform.
Fastgørelse af skind til Snowfeet* Skiblades og WALKSKI modeller

At fastgøre skind til Snowfeet* korte ski er en simpel proces. Følg bare disse trin:
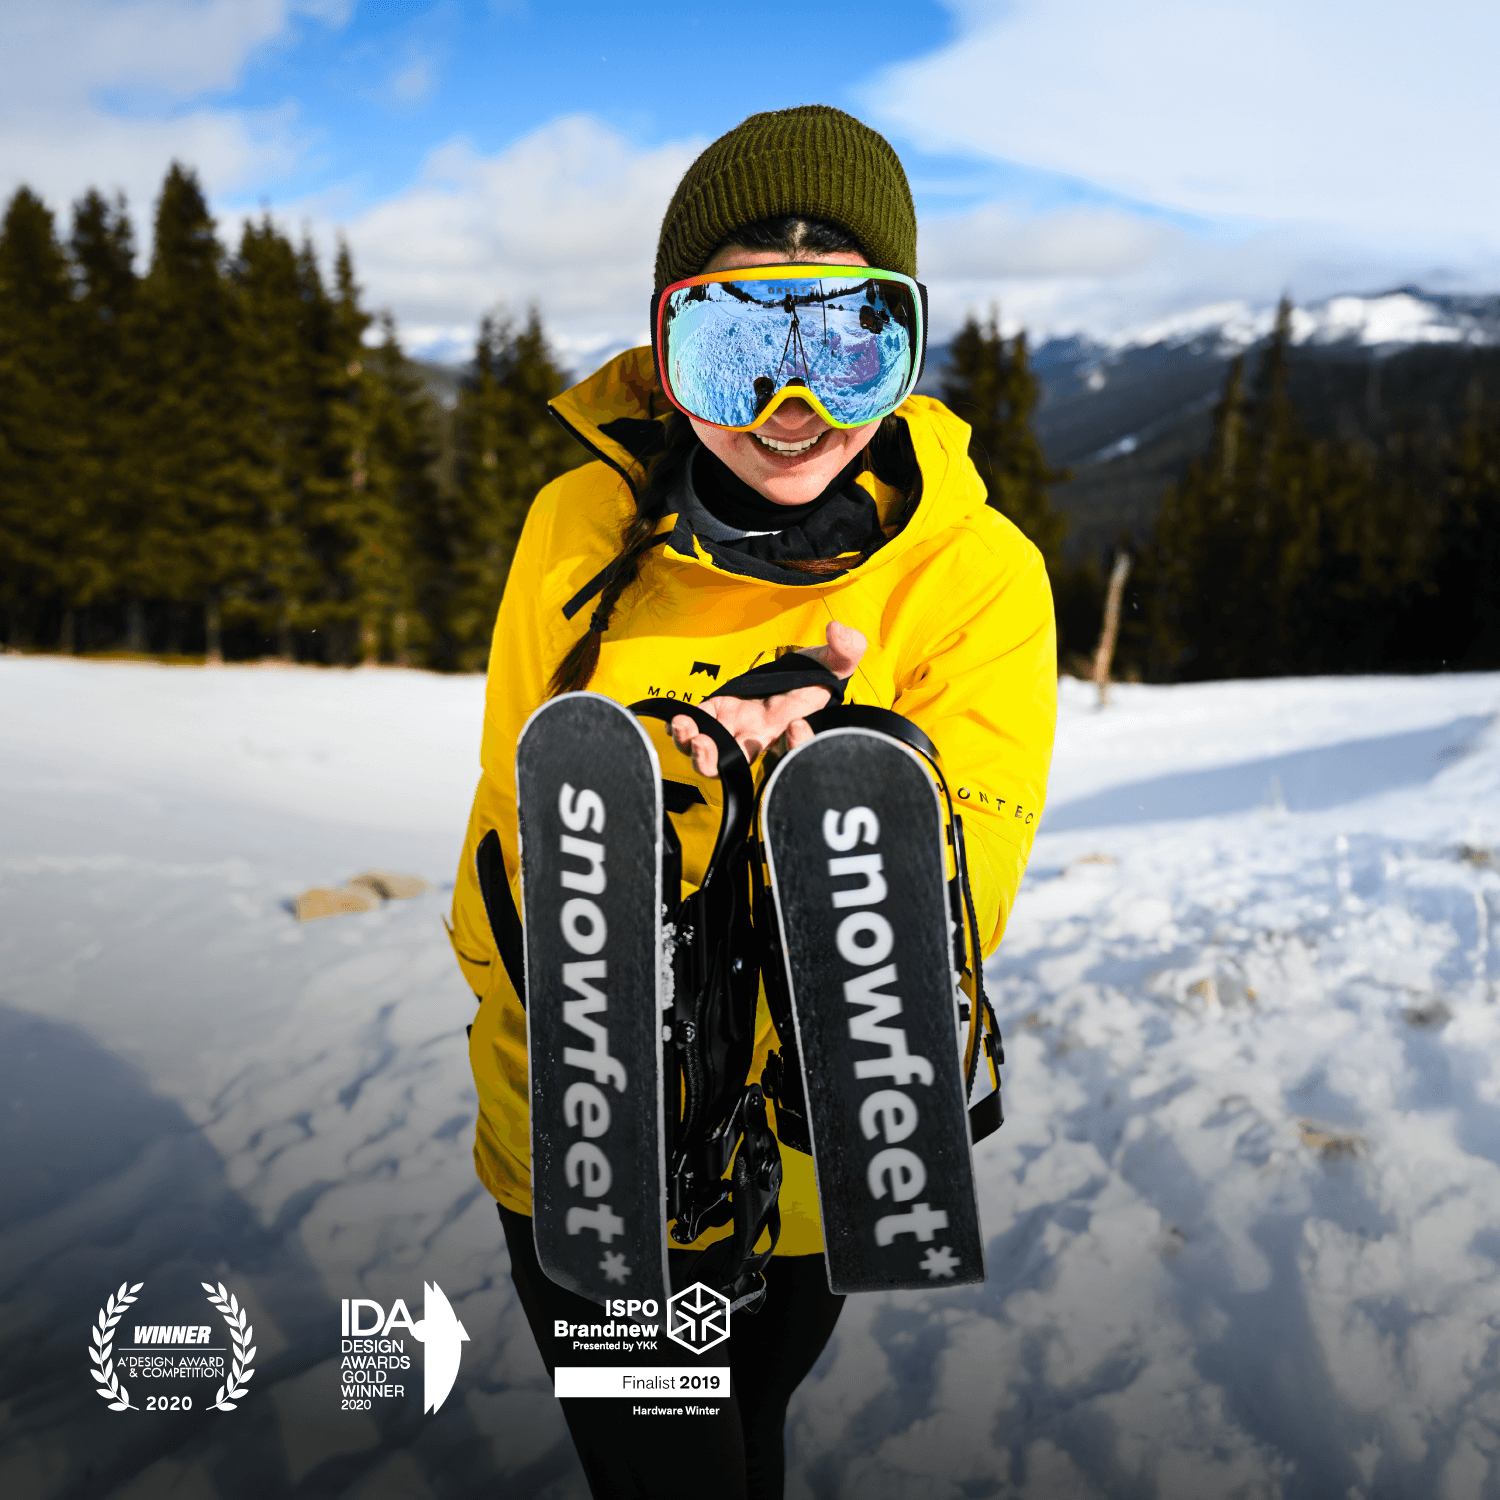
- Start med at stille skien lodret med spidsen pegende opad, og hæng tipbøjlen eller krogene på skiens spids. Dette skaber et solidt ankerpunkt.
- Støt skistaven mod din fod eller hofte. Den kortere længde på Snowfeet* ski giver dig bedre kontrol under dette trin.
- Pres limsiden af skindet på området under foden. Dette fungerer som dit referencepunkt for justering.
- Justér skindet ned langs midten af skiens bund, og sørg for, at begge metalægger forbliver eksponerede. At holde æggen fri sikrer bedre greb på iset eller hårdtpakket sne samtidig med, at du undgår limophobning fra sne.
- Glat skindet fast fra spids til hale for at sikre, at det sidder ordentligt fast.
- Sikre hale-klipsen med nok spænding til at holde skindet på plads.
Snowfeet*-godkendte fastgørelsestips
Vil du holde dit setup i topform? Her er et par ekstra tips:
- Fold altid dine skind lim-mod-lim, når du opbevarer dem. Det forhindrer snavs og luft i at kompromittere klæbemidlet.
- Når du påfører skindet, centrer det under spænding for at bevare dets position under din tur. Dette lille trin kan gøre en stor forskel i ydeevnen.
Sådan fjerner og opbevarer du klatreskind
At tage dine klatreskind af på den rigtige måde er lige så vigtigt som at sætte dem på. Takket være den kompakte størrelse på Snowfeet* ski er processen lettere, men det er stadig vigtigt at bruge den korrekte teknik.
Fjernelse af skind uden skade
For at fjerne skind uden at skade dem, følg en systematisk tilgang, der beskytter klæbemidlet. Start med at løsne hale-fastgørelsen for at frigøre spændingen. Derefter skal du trække skindet af fra hale til spids i en glidende bevægelse. Dette hjælper med at undgå udstrækning eller rivning af klæbemidlet.
Snowfeet* ski gør denne proces mere håndterbar på grund af deres kortere længde. For eksempel er Snowfeet* Mini Ski Skates kun omkring 15 tommer (38 cm), og selv 120 cm Skiblades (ca. 47 tommer) er langt nemmere at håndtere end traditionelle ski, som kan være fra 67 til 75 tommer lange. Med Snowfeet* kan du nemt styre fjernelsesprocessen med dine hænder - uden akavet udstrækning.
Hold klæbemidlet rent og fri for snavs, støv, fyrregrene eller andet affald, da disse kan forurene limen og føre til tidlig svigt. Lad heller ikke sne eller is samle sig på klæbesiden, da fugt kan få det til at miste sin klæbeevne.
Hvis det blæser, skal du handle hurtigt og beskytte klæbesiden mod eksponering. Stærk vind kan få skindene til at blafre, samle snavs eller endda blive beskadiget under fjernelse. Når du har fjernet skindene, er korrekt opbevaring næste skridt for at holde dem i god stand.
Korrekt opbevaring af skind
At opbevare dine skind korrekt kan gøre en stor forskel for deres levetid. Efter fjernelse, fold skindene lim-mod-lim med det samme for at beskytte klæbemidlet og holde det klar til dit næste eventyr.
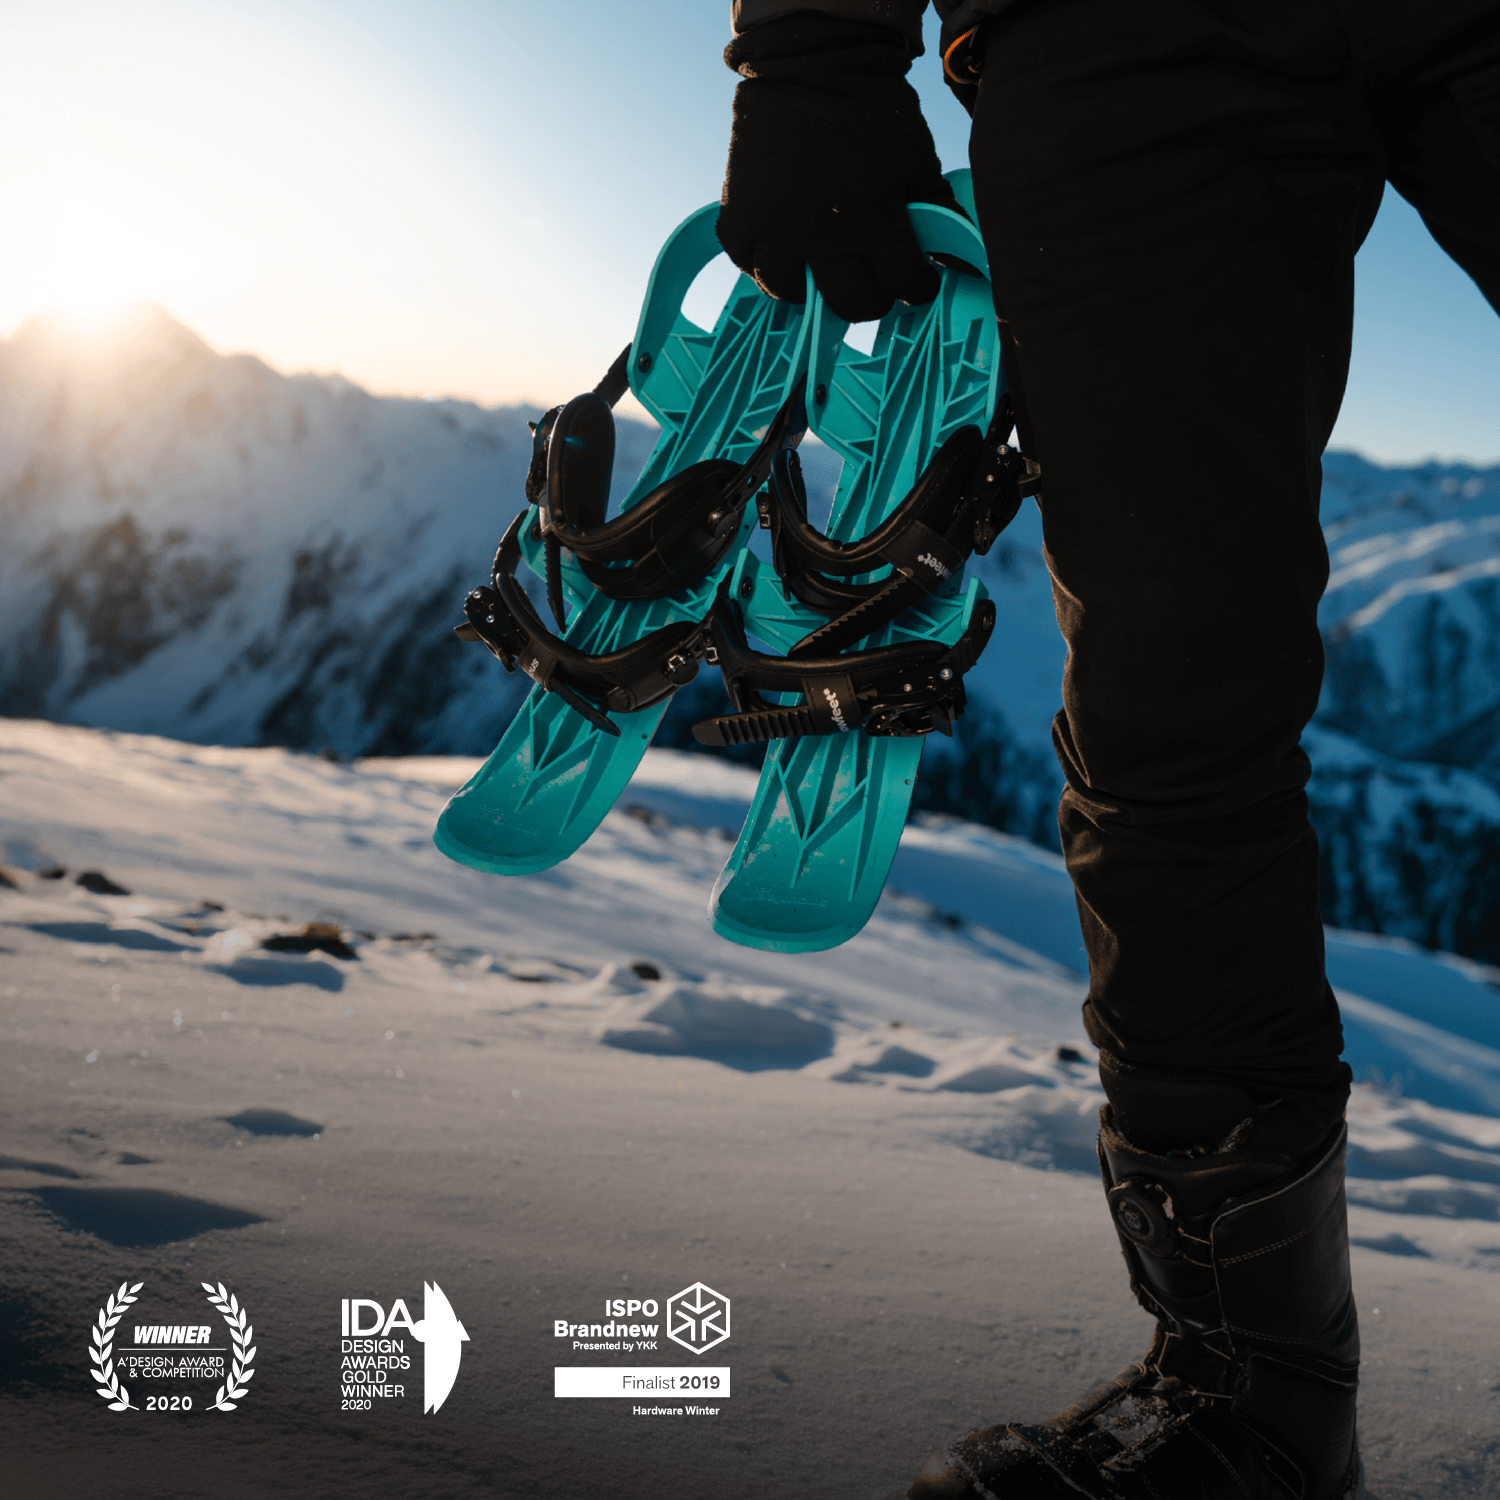
Her kommer det kompakte design af Snowfeet* produkter virkelig til sin ret. I modsætning til traditionelle skihud til 75-tommer ski, som kan danne lange, klodsede bundter, folder Snowfeet* skins sig til små, pæne pakker. Mini Ski Skates’ skins er for eksempel så kompakte, at de endda kan være i en jakkelomme.
Når du folder lim-mod-lim, håndter dem forsigtigt - træk eller riv ikke for hårdt. Fold dem ud omhyggeligt, især hvis du ikke bruger beskyttelsesark. Opbevar de foldede skins et tørt sted, væk fra ekstrem varme eller kulde, da både fugt og temperaturudsving kan nedbryde klæbemidlet over tid.
For ekstra beskyttelse og organisering kan du overveje at bruge dedikerede opbevaringsposer til skins. Takket være Snowfeet*’s kompakte design kan du bære flere par skins uden den klodsede volumen, der følger med traditionelt skiudstyr.
Sørg til sidst for, at dine skibunde er rene og tørre, før du genpåfører skins. Eventuelle rester eller fugt fra tidligere brug kan forstyrre klæbemidlet og mindske, hvor godt de sidder under din næste tur.
sbb-itb-17ade95
Vedligeholdelses- og plejetips
At passe på dit udstyr er lige så vigtigt som at bruge det korrekt. Når det gælder Snowfeet* produkter, vil en god vedligeholdelsesrutine hjælpe dine skins med at yde godt og holde længere. Deres kompakte design gør vedligeholdelsen nemmere end med traditionelt skiudstyr, men lidt opmærksomhed går langt for at sikre, at de er klar til dit næste eventyr.
Regelmæssig vedligeholdelse af skins
For at holde dine skins i god stand, rengør dem hver par gange. Brug lunkent vand og mild sæbe til at vaske snavs væk, og lad dem lufttørre helt, før du lægger dem væk. Undgå varmt vand eller stærke kemikalier - de kan beskadige klæbemidlet og materialerne.
Tag et øjeblik til regelmæssigt at inspicere dine skins. Kig efter flossede kanter, slidt klæbemiddel eller problemer med fastgørelserne. Hvis du ser flossede tråde, klip dem forsigtigt med en skarp saks. Klæbemidlet sidder ikke godt? Snavs, fugt eller UV-eksponering kan være synderen. Brug en specialiseret skin cleaner eller isopropylalkohol til at rense det, og lad det tørre grundigt, før du bruger det igen.
Voksning er nøglen til at holde dine skins i topform. Snowfeet* tilbyder en Liquid Wax (Universal +5°C / -20°C | 41°F / -4°F, 75ml) til 29 $, som er perfekt til at forhindre sneklumper og isophobning. Den hjælper også med at forbedre både glid og greb, hvilket gør din backcountry-oplevelse glattere.
"Hav også noget skihudsvoks ved hånden for at forhindre frost eller is/sneophobning." - REI Expert Advice
"Regelmæssig voksning forbedrer glidet og modvirker sneklumper og ophobning." - DYNAFIT
Påfør voks, når du bemærker, at sne klæber til dine skins, eller når temperaturen ligger omkring frysepunktet. Fordi Snowfeet* skins er mindre end traditionelle skihud, bruger du mindre voks pr. påføring, så din flaske varer længere - en ekstra bonus!
Snowfeet* tilbehør til skindpleje
Snowfeet* tilbyder en række tilbehør, der gør vedligeholdelsen endnu nemmere og mere effektiv. Deres Liquid Wax er specielt designet til de temperaturer, du møder med korte ski, og giver fremragende beskyttelse mod is- og sneophobning.
Udskiftningsstropper, fra 12 $, er et andet must-have. Disse stropper er nemme at installere og langt mere prisvenlige end traditionelle skibindinger. Tjek dem regelmæssigt for tegn på slid, udstrækning eller skader på fastgørelsespunkterne. At udskifte dem i tide sikrer, at dit udstyr forbliver sikkert og funktionelt.
Det er også en god idé at have et lille vedligeholdelsessæt med dit udstyr. Inkluder nødvendigheder som voks, udskiftningsstropper og grundlæggende rengøringsmidler. Takket være den kompakte størrelse på Snowfeet*-produkterne kan hele dit sæt være i en lille taske - ingen behov for klodsede værktøjer som ved traditionel skivedligeholdelse.
Opbevar dit voks et køligt, tørt sted, og udskift stropperne, før de viser alvorlig slitage. Snowfeet*s prisvenlige tilbehør gør det nemt at have reservedele ved hånden, så du undgår besværet og omkostningerne ved dyre reparationer, som er almindelige med traditionelle skiopsætninger.
Med regelmæssig pleje og Snowfeet*-godkendte produkter vil dine klatreskind forblive pålidelige sæson efter sæson. Deres enkle design betyder også, at du kan klare de fleste vedligeholdelsesopgaver selv - ingen dyre ture til skibutikken er nødvendige.
Snowfeet* vs. traditionelle ski- og snowboardmærker
Lad os dykke ned i, hvordan Snowfeet* klarer sig i forhold til traditionelle ski- og snowboard-opsætninger. Hvis du nogensinde har kæmpet med at håndtere klatreskind på lange ski, vil du sætte pris på den enkelhed, Snowfeet* bringer til bordet.
Nøglefordele ved Snowfeet* Produkter
En af de mest fremtrædende egenskaber ved Snowfeet* er, hvor nemt det er at sætte skind på. Med Skiblades fra kun 65 cm til 120 cm betyder den kompakte størrelse hurtigere påsætning og færre problemer med justering. Det er en problemfri løsning, der sparer dig tid uden at gå på kompromis med funktionaliteten.
Bærbarhed er endnu en stor fordel. Hele Snowfeet*-udstyret, inklusive skindene, passer pænt ned i en almindelig rygsæk. Sammenlign det med traditionelt skitouring-udstyr, som ofte kræver klodsede, specialiserede tasker og ekstra planlægning - især hvis du flyver. Snowfeet* holder det enkelt og rejsevenligt.
Og her er en game-changer: universel støvlekompatibilitet. I stedet for at betale for dyre, specialiserede skistøvler, fungerer Snowfeet* med alle vinterstøvler, du allerede ejer. Det sparer ikke kun penge, men gør også udstyret mere tilgængeligt, især for begyndere.
Vedligeholdelse? Det er en leg. I modsætning til traditionelle lange ski, der kræver professionel tuning, hyppig kantslibning og detaljeret voksning, er Snowfeet* designet til nem, gør-det-selv vedligeholdelse. Du sparer tid, penge og besværet med hyppige ture til butikken.
Overordnet sammenligning
Her er hvorfor Snowfeet* skiller sig ud:
- Hurtig og problemfri fastgørelse af skind takket være det kompakte design
- Portabilitet, der lader dig pakke hele dit setup i en almindelig rygsæk
- Universel støvlekompatibilitet, der eliminerer behovet for dyre, specialiserede støvler
- Begyndervenligt med en kortere indlæringskurve til backcountry-eventyr
- Lavt vedligeholdelsesdesign, der reducerer dyre professionelle services
Hvis du leder efter en enklere, mere effektiv måde at nyde backcountry-skiløb på, leverer Snowfeet* på alle fronter. Det handler om at gøre dit eventyr lettere, lettere og mere tilgængeligt.
Konklusion: Mestre fastgørelse og fjernelse af klatreskind
Nu har du al den viden, du behøver for at håndtere klatreskind som en professionel. Det væsentlige er enkelt: forbered dit udstyr, behandl det forsigtigt, og hold vedligeholdelsen opdateret. Gør du det, vil dine skind levere i mange år.
Snowfeet* udstyr gør denne proces endnu nemmere. Takket være dets kompakte design er det meget enklere at fastgøre skind sammenlignet med traditionelle lange ski. Mindre bøvl betyder mere tid til at carve gennem vildmarken.
Her er fremgangsmåden: rengør din skibund, fastgør skindene fra spids til hale uden at tvinge dem, og når det er tid til at fjerne dem, skal du skrælle langsomt fra halen fremad. Denne rolige tilgang beskytter både dine skind og din skibund. Opbevar dem med beskyttelsesarkene, så er de klar til dit næste eventyr.
Det fantastiske ved Snowfeet* er, hvor brugervenligt det er. Med universel støvlekompatibilitet og et lavt vedligeholdelsesdesign kan du fokusere på at perfektionere din teknik i stedet for at kæmpe med kompliceret udstyr. Uanset om du kører med 65 cm Skiblades til hurtige park-sessioner eller 120 cm modeller til længere ture, gælder de samme principper.
Kom ud og øv dig. Jo mere du gør det, jo glattere bliver det - mens andre stadig fumler med deres udstyr, vil du glide ubesværet. Det er Snowfeet* forskellen: enkelt udstyr, der lader dig fokusere på den sjove del - skiløb. Følg disse tips, og du vil se, hvor nemt og sjovt Snowfeet* kan gøre dine eventyr.
Ofte stillede spørgsmål
Hvilke fejl bør jeg undgå, når jeg sætter climbing skins på eller fjerner dem?
For at holde dine climbing skins i topform og klar til action, undgå disse almindelige faldgruber:
- At springe en ren ski base over: Sørg altid for, at din skibund er fri for snavs, sne eller affald, før du sætter dine skins på. En ren overflade betyder bedre greb og ydeevne.
- At lade den klæbrige side røre sne eller snavs: Når limsiden bliver beskidt, er det svært at få den til at fungere ordentligt igen. Undgå kontakt med jorden eller sne for enhver pris.
- At lade limen være udsat for luft for længe: Langvarig eksponering kan tørre limen ud, så den bliver mindre klæbrig over tid. Dæk den til, når den ikke er i brug.
- At pille skins af i blæsende vejr: Vinden kan piske dine skins rundt, hvilket gør dem sværere at håndtere og risikerer skader. Find et læsted til fjernelse.
Følg disse tips, og dine Snowfeet* climbing skins vil forblive pålidelige og klar til din næste store opstigning!
Hvordan er Snowfeet* short skis bedre end traditionelle ski til at sætte og vedligeholde climbing skins?
Snowfeet* short skis fjerner besværet ved at sætte climbing skins på og vedligeholde dem. Takket være deres kompakte størrelse og lette konstruktion er der mindre overflade at håndtere, hvilket gør processen hurtigere og nemmere - især hvis du lige er begyndt.
Desuden er Snowfeet* produkter designet med funktioner, der holder climbing skins sikkert på plads. Denne tætte pasform hjælper med at forhindre, at de skaller af eller glider, mens du er i bevægelse. I modsætning til traditionelle ski, som kan føles klodsede og kræve mere indsats at håndtere, tilbyder Snowfeet* short skis en enklere, mere brugervenlig oplevelse - alt sammen uden at gå på kompromis med ydelsen.
Hvad kan jeg gøre, hvis mine climbing skins mister deres klæbrighed, mens jeg er ude på pisterne?
Hvis dine climbing skins begynder at miste deres klæbrighed midt på turen, så panik ikke - du kan vække dem til live med et simpelt trick. Tag et voksjern, indstil det til medium varme, og læg skin med limsiden opad på en ren, flad overflade. Tryk forsigtigt jernet mod limen og varm det jævnt op over hele overfladen. Når du er færdig, lad skins køle helt af, før du folder dem lim-side mod lim-side til opbevaring. Det hjælper limen med at nulstille korrekt.
Brug for en hurtig løsning, mens du er ude i backcountry? En lille smule skin voks eller en Snowfeet-godkendt skin lim kan midlertidigt genoprette grebet. Disse praktiske løsninger kan holde dine skins glidende og redde din tur fra at blive en glat affære.






Efterlad en kommentar
Denne side er beskyttet af hCaptcha, og hCaptchas Politik om beskyttelse af persondata og Servicevilkår er gældende.