


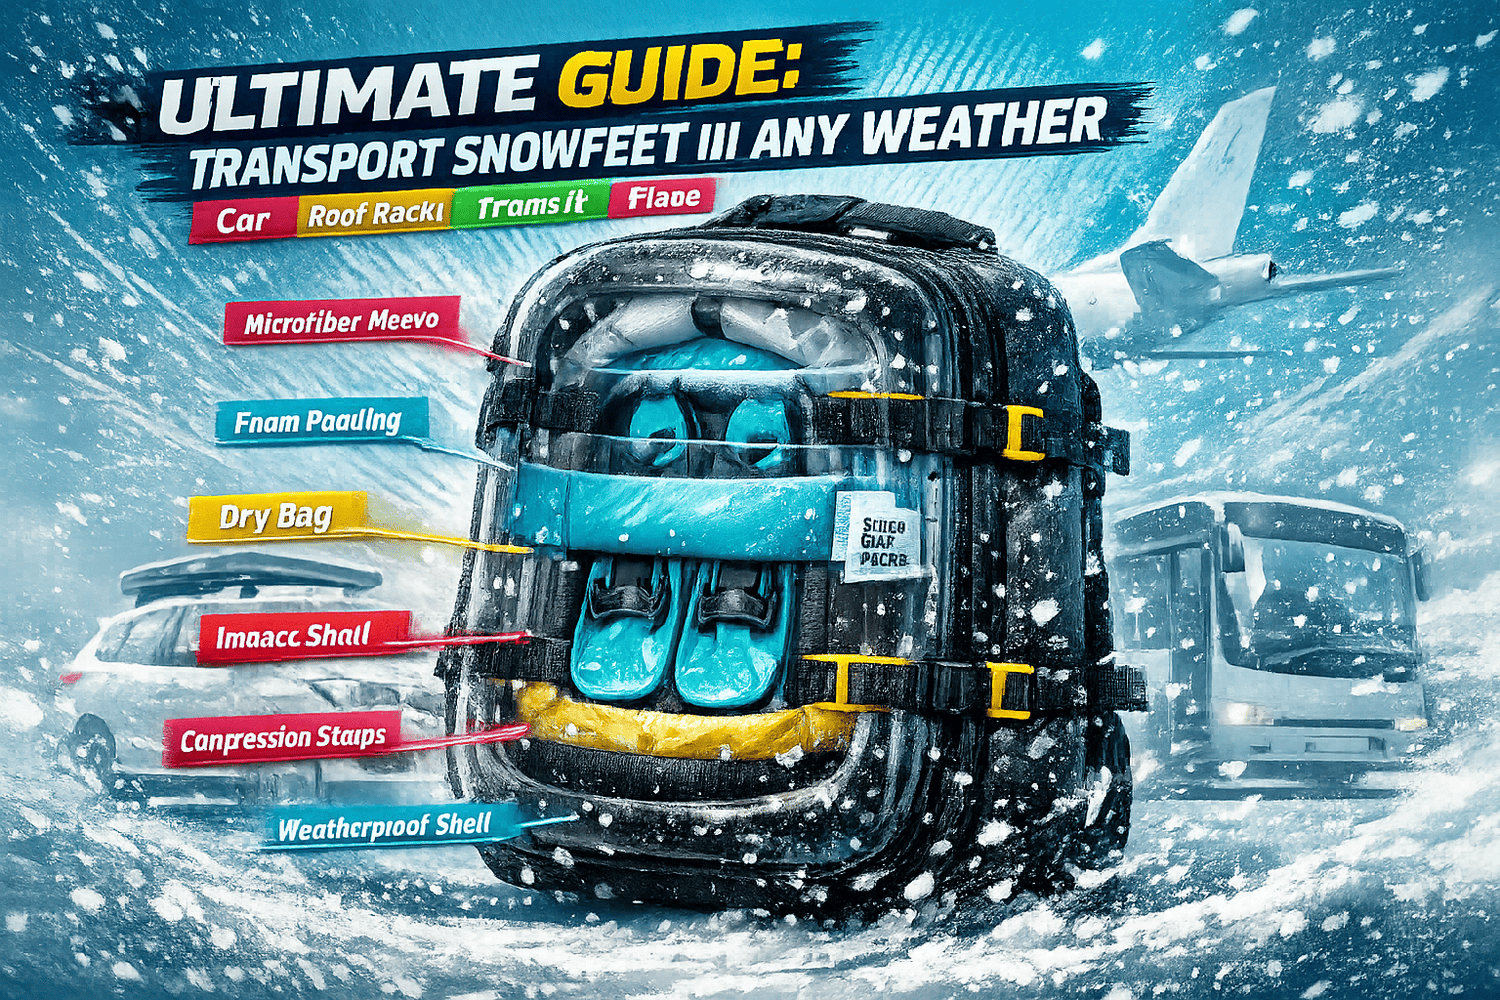
Transporting Snowfeet gear is straightforward and hassle-free, thanks to its compact size and smart design. Whether you're driving, flying, or using public transit, here's what you need to know to keep your gear safe and ready for action:
- Why It’s Easy: Snowfeet gear is small (38–120 cm), fitting in backpacks, suitcases, or car trunks without needing roof racks or oversized bags.
- Top Risks: Moisture, rust, road salt, and impact damage are the main threats during transport.
- How to Protect It: Use padded bags, edge protectors, and silica gel packets. Always clean and dry your gear before packing.
- By Vehicle: Lay your bag flat, secure it with straps, and avoid wet or salty areas in the car.
- By Flight: Pack Snowfeet in standard luggage to avoid oversized baggage fees. Use a padded sleeve and soft clothing for cushioning.
- On Public Transit: Wipe off snow, use a waterproof bag, and store it under your seat to avoid blocking aisles.
- Post-Transport Care: Inspect for moisture, tighten screws, and dry everything thoroughly to prevent rust or damage.
Snowfeet gear makes winter adventures simpler by eliminating the bulk and hassle of traditional skis. Whether you're hitting the slopes for a weekend or traveling cross-country, a little prep and care go a long way in keeping your gear in great shape.
Core Packing Principles for Snowfeet Gear

Packing Materials You Need
Start with a padded ski or multi-sport gear bag - it’s your first line of defense against impacts from car trunks, baggage handlers, or overhead bins. Snowfeet* gear fits snugly in compact padded bags made specifically for its size, making it easy to protect.
Next, grab plastic or rubber edge protectors (around $10–$25 per set). Even small skis or skiskates have sharp steel edges that can slice through fabric or scratch other items in your bag during travel. Add a few microfiber towels to wipe down metal surfaces and cushion your gear inside the bag. Lastly, toss in some silica gel packets near the bindings to soak up moisture and keep rust at bay during long trips. These simple materials help set the stage for safe and organized packing.
How to Prepare Gear Before Transport
Once you’ve got the right materials, it’s time to prep your gear. Start by making sure everything is completely dry. Clean off snow, slush, and salt, then let your gear air dry at room temperature. Packing wet gear is a recipe for rust - unprotected steel can start showing rust marks in just 24–48 hours.
After drying, apply a thin layer of wax to the bases. This helps prevent oxidation and keeps the base material from drying out during transport. Before zipping up the bag, give all bindings and screws a quick once-over to ensure everything is secure. Loose screws can become a bigger issue after the vibrations of travel. Thanks to Snowfeet* gear's compact design, these steps are much simpler compared to prepping traditional skis or snowboards. Once your gear is dry, waxed, and inspected, it’s ready to pack.
How to Pack and Secure Snowfeet Gear
Now for the final step: packing and securing your gear. Start by lining the bottom of your bag with something soft, like a jacket or towel. Place your gear with the bases facing each other, then cover them with another soft layer. This “sandwich” method keeps hard components from rubbing against each other and minimizes movement during transit. If your bag has internal compression straps, use them. If not, a basic Velcro ski strap works just as well to hold everything in place.
When loading into a vehicle, lay the bag flat in the trunk or cargo area and secure it with straps or a non-slip mat. Keep it away from wet boots or loose items that could shift and damage the gear. Once you arrive at your destination, open the bag right away to let out any trapped humidity, even if you’re planning to repack later that day. This small step helps keep your gear in top shape for your next adventure.
Transporting Snowfeet Gear by Vehicle in Winter
Snowfeet Gear vs. Full-Length Skis: Transport Comparison
Packing Gear Inside Your Vehicle
Transporting Snowfeet* gear is a breeze thanks to its compact size. These items can lie flat in most trunks, fit snugly in rear footwells, or slide behind front seats - no need to fold anything down.
But, there are a few things to watch out for: shifting gear, water buildup, and road salt corrosion. To avoid issues, place your gear bag on a rubber cargo mat or an all-weather floor liner to catch any meltwater. Secure the bag with a cam strap attached to a cargo hook to keep it from sliding around during sudden stops. Before loading your gear, knock off any snow to minimize moisture inside the vehicle. Remember, unsecured gear can turn into a hazard. Once you arrive, crack a window or run the defroster briefly to let out humidity. Leaving wet gear in a warm car can speed up rust formation.
If inside storage isn’t an option, a roof rack can work - just take the right precautions.
Using a Roof Rack Safely
Road salt in the U.S. is no joke - it can be tough on roof-mounted gear. If you’re using a roof rack, protect your Snowfeet* gear by placing it in a water-resistant ski bag or padded sleeve.
When securing your gear, use cam straps in an over-under-over pattern around the crossbar. This method helps maintain tension, even if the buckle loosens slightly. After driving for 10–15 minutes on the highway, pull over to double-check the strap tension. Once you’ve reached your destination, rinse off your gear and dry it thoroughly, paying extra attention to binding screws and metal edges.
Snowfeet* gear’s compact design makes these transport steps much easier compared to full-length skis.
Snowfeet* vs. Full-Length Skis: Transport Comparison
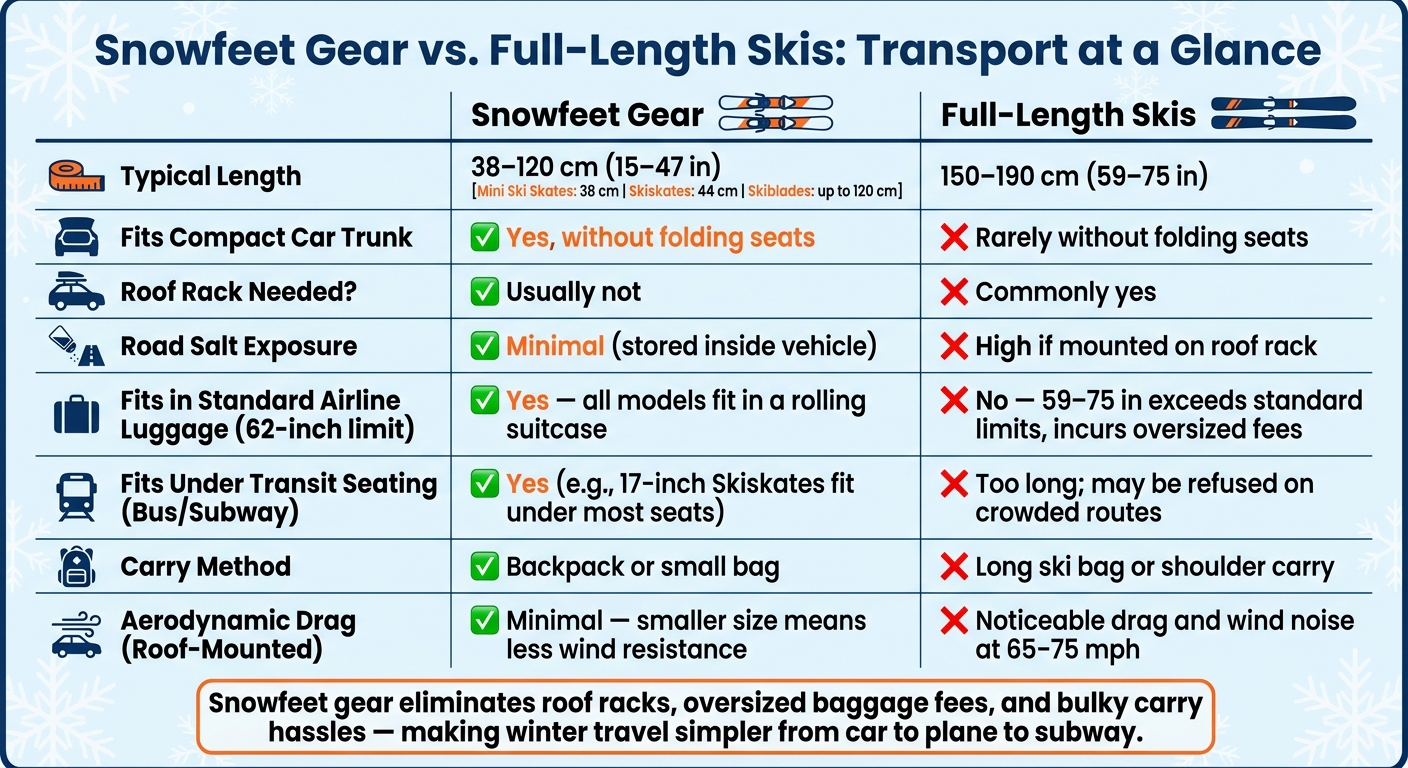
Snowfeet* gear shines when it comes to portability. Traditional alpine skis for adults are typically 150–190 cm (59–75 in) long, making them a challenge for compact cars and sedans unless you fold seats down or use a roof rack. By contrast, Snowfeet* Mini Ski Skates are just 38 cm (15 in), Skiskates measure 44 cm (17 in), and even the longer Skiblades max out at 120 cm (47 in). These sizes easily fit in a trunk or rear footwell.
| Feature | Snowfeet* Gear | Full-Length Skis |
|---|---|---|
| Typical length | 38–120 cm (15–47 in) | 150–190 cm (59–75 in) |
| Fits compact car trunks | Yes, without folding seats | Rarely without folding seats |
| Roof rack needed? | Usually not | Commonly yes |
| Exposure to road salt | Minimal (stored inside) | High if on a roof rack |
| Carry from car to lodge | Backpack or small bag | Long bag or shoulder carry |
Additionally, full-length skis on a roof rack can increase aerodynamic drag and cause wind noise - especially at highway speeds of 65–75 mph. Snowfeet* gear avoids these issues when stored inside, and even when roof-mounted, its smaller size means less wind resistance and reduced exposure to road salt compared to bulky skis.
Taking Snowfeet* Gear on Public Transit and Flights
Packing Snowfeet* Gear for Air Travel
Snowfeet* gear isn’t just easy to toss into your car - it’s a breeze to pack for flights, too. Most U.S. airlines consider checked bags within a 62-linear-inch size limit and a 50-lb weight cap as standard for economy fares. Traditional skis, which are often 59–75 inches long, can easily exceed those limits, leading to oversized baggage fees and the hassle of lugging around a bulky ski bag. Snowfeet* gear? That’s a whole different story. With Mini Ski Skates at about 15 inches, Skiskates around 17 inches, and the 99 cm Skiblades measuring roughly 39 inches, every model fits neatly into a standard rolling suitcase. You’ll even have room left for clothing and boots.
To pack your gear safely, make sure it’s clean and completely dry to avoid rust. Wrap it in a padded sleeve or soft clothing for protection, and use a dry bag to catch any leftover moisture. Place the gear flat at the base or side of your suitcase, and surround it with soft clothing to cushion the tips, buckles, and edges. If you’re taking along the 99 cm Skiblades, you might want to split the pair between two suitcases to stay under weight limits and avoid oversized baggage fees.
For TSA screenings, checked luggage with Snowfeet* gear usually passes through without any extra steps. However, if you’re packing it in a carry-on, you’ll need to remove the gear for separate screening because of the metal edges and buckles. Tools like wrenches or edge sharpeners are best placed in checked bags to avoid any issues.
"A lot easier to haul around the hills & on vacation than traditional skis!" - heyjerz, Verified Reviewer
Once your gear is flight-ready, similar precautions will make ground transit just as smooth.
Carrying Gear on Buses and Subways
When it comes to public transit, the biggest challenge isn’t the size of Snowfeet* gear - it’s managing the meltwater. Before hopping on a bus or subway, take a moment to remove any snow and wipe down your gear. A waterproof bag is a smart move to contain any drips and keep fellow passengers happy.
Onboard, keep your bag upright between your knees or tucked under the seat, rather than letting it block the aisle. Unlike traditional skis, which can be too long to fit under seats and might even be refused on crowded routes, Snowfeet* gear - like the 17-inch Skiskates - fits snugly under most transit seating. No awkward balancing acts required!
Why Snowfeet* Works Well for Multi-Stop Travel
Whether you’re flying or navigating city transit, Snowfeet* gear makes multi-stop travel simple. Its compact size and lightweight design mean you can easily switch between transport modes. Pack it in your rolling suitcase for the flight, then transfer it to a backpack for days when you’ll be walking or using public transit. Airport terminals, subway stairs, shuttle buses - Snowfeet* gear handles them all without breaking a sweat or needing extra hands.
"I loved how easy they are to carry in a backpack with their handy waterproof bag! Highly recommended for fun for experts and beginners alike!"
One final tip: when moving from cold outdoor conditions into a warm terminal or subway station, condensation can form on the cold metal parts of your gear. To prevent this, partially unzip your gear bag for a few minutes to let the moisture escape. Keeping a small microfiber towel in your bag can also help soak up any leftover drips.
sbb-itb-17ade95
Caring for Snowfeet* Gear After Transport
Post-Transport Inspection Checklist
As soon as you get home, unzip your bag and inspect your gear for moisture before stashing it away. Here's what to check:
- Edges: Use a dry cloth to wipe along the edges. Feel for rough spots, nicks, or any signs of rust like orange-brown spots or white residue near screws.
- Screws and Bindings: Grab a screwdriver and check that all screws are tight. Transport vibrations can loosen hardware, so also look for cracks in plastic housings or worn straps.
- Base: Look for deep scratches or impact marks, which can happen if your gear gets bumped around during the trip.
- Straps and Buckles: Check for fraying, stretched holes, or damaged ratchets.
Snowfeet* gear is easier to maintain than traditional skis thanks to its compact design. After your inspection, make sure to address any moisture right away to avoid potential damage from condensation.
Managing Condensation and Freeze-Thaw Cycles
Bringing cold gear into a warm room can cause condensation to form on metal parts - just like a cold soda can "sweats" on a hot day. This moisture can speed up rust on edges and screws. If your gear goes through repeated freeze-thaw cycles, it can get worse. Water expands when it freezes, which can stress materials and seep into small gaps around bindings.
To avoid this, unzip your gear bag right when you get home. Wipe all metal parts with a microfiber towel, then place your gear on a towel in a well-ventilated area to dry completely. Keep it near - but not directly on - a heat source. Radiators, fireplaces, and hot car trunks can warp plastic parts or mess with adhesives.
"A good thing is also not to leave your Snowfeet wet after you come home from a fun day on the slopes." - Snowfeet Team
Preventing Rust and Storing Gear Correctly
Once your gear is dry, take steps to protect it from rust. As the Snowfeet Team suggests:
"When you are done using Snowfeet*, make sure you dry the edges so they don't get rusty before you put them into your backpack and store them. You can also wipe the edges using oil before storage." - Snowfeet Team
If you spot light rust, tackle it right away with a gummy stone or fine diamond stone. Ignoring rust can lead to pitting, which weakens the edges. To keep the base in good shape, apply liquid wax regularly. This helps it stay slick and shields it from moisture.
The compact size of Snowfeet* gear makes drying and inspecting it a breeze, giving you an edge in keeping rust at bay.
| Storage Scenario | Key Steps | What to Avoid |
|---|---|---|
| After each trip | Wipe dry, inspect edges and screws, air-dry fully | Sealing wet gear in a closed bag |
| Short-term (days/weeks) | Store in a cool, dry space; loosely strap bindings | Hot car trunks or uninsulated garages |
| Long-term/off-season | Clean, dry, oil edges, apply storage wax to base | Direct sunlight, airtight plastic containers |
For off-season storage, use a breathable bag or keep your gear on a shelf in a stable indoor spot. Avoid UV light and heat sources that can damage plastics and composites. The smaller size of items like Mini Ski Skates or Skiskates makes them easy to store - perfect for a closet shelf or gear drawer, unlike bulky full-length skis.
Conclusion: Making Gear Transport Simple with Snowfeet
Transporting winter gear doesn’t have to be a hassle, especially with Snowfeet*. Whether it’s Mini Ski Skates, Skiskates, or Skiblades, their compact size means they can easily fit into a standard suitcase or backpack. No need for roof racks or paying those hefty oversized baggage fees. Snowfeet* gear eliminates many of the transport headaches that come with traditional skis and snowboards.
But it’s not just about portability - Snowfeet* makes your entire winter adventure easier. Since these work with regular waterproof winter shoes or snowboard boots, you can skip the hassle of lugging around separate ski boots. That’s one less thing to worry about when you’re on the go.
Keeping your gear in great shape is also simple. Follow this quick routine: clean it, pack it properly, transport it safely, and always inspect and dry it before storing. A few minutes of care after each outing can make all the difference, ensuring your gear stays in top condition for years instead of wearing out after just a few trips.
"Because they fit into a backpack, you can take them pretty much anywhere." - Snowfeet FAQ
Whether you’re heading out for a weekend road trip, catching a bus to a nearby hill, or flying across the country to hit the slopes, Snowfeet* gear is designed to travel with you effortlessly. Smaller skis aren’t just a blast on the snow - they’re a breeze to handle off it, too.
FAQs
Do I need a roof rack for Snowfeet* gear?
No, you don’t need a roof rack for Snowfeet* gear. Unlike traditional skis or snowboards that are big and awkward to transport, Snowfeet* products are small and easy to carry. With lengths between 15 and 39 inches, they can fit right into a standard 30L backpack. This means no oversized storage headaches and no extra airline baggage fees.
Can Snowfeet* fit in a carry-on suitcase?
Snowfeet* products are built with portability in mind. They’re compact enough to fit into a standard backpack or even a TSA-approved carry-on suitcase. Unlike traditional skis that can stretch 5–6 feet and demand cumbersome luggage, Snowfeet* gear is only 15 to 39 inches long. This makes traveling a breeze - no need for checked baggage, and your gear can stay with you in the overhead bin for a smooth, stress-free trip.
How do I prevent rust after travel?
To keep your Snowfeet* gear in top shape after traveling, make sure to dry the metal edges completely before packing them away in your backpack. For added protection, you can give the edges a quick wipe with oil - this helps shield them from moisture. Thanks to Snowfeet*'s compact design, it's much simpler to keep your gear dry and rust-free compared to traditional ski equipment. That way, it'll be all set for your next outing!


Efterlad en kommentar
Denne side er beskyttet af hCaptcha, og hCaptchas Politik om beskyttelse af persondata og Servicevilkår er gældende.