


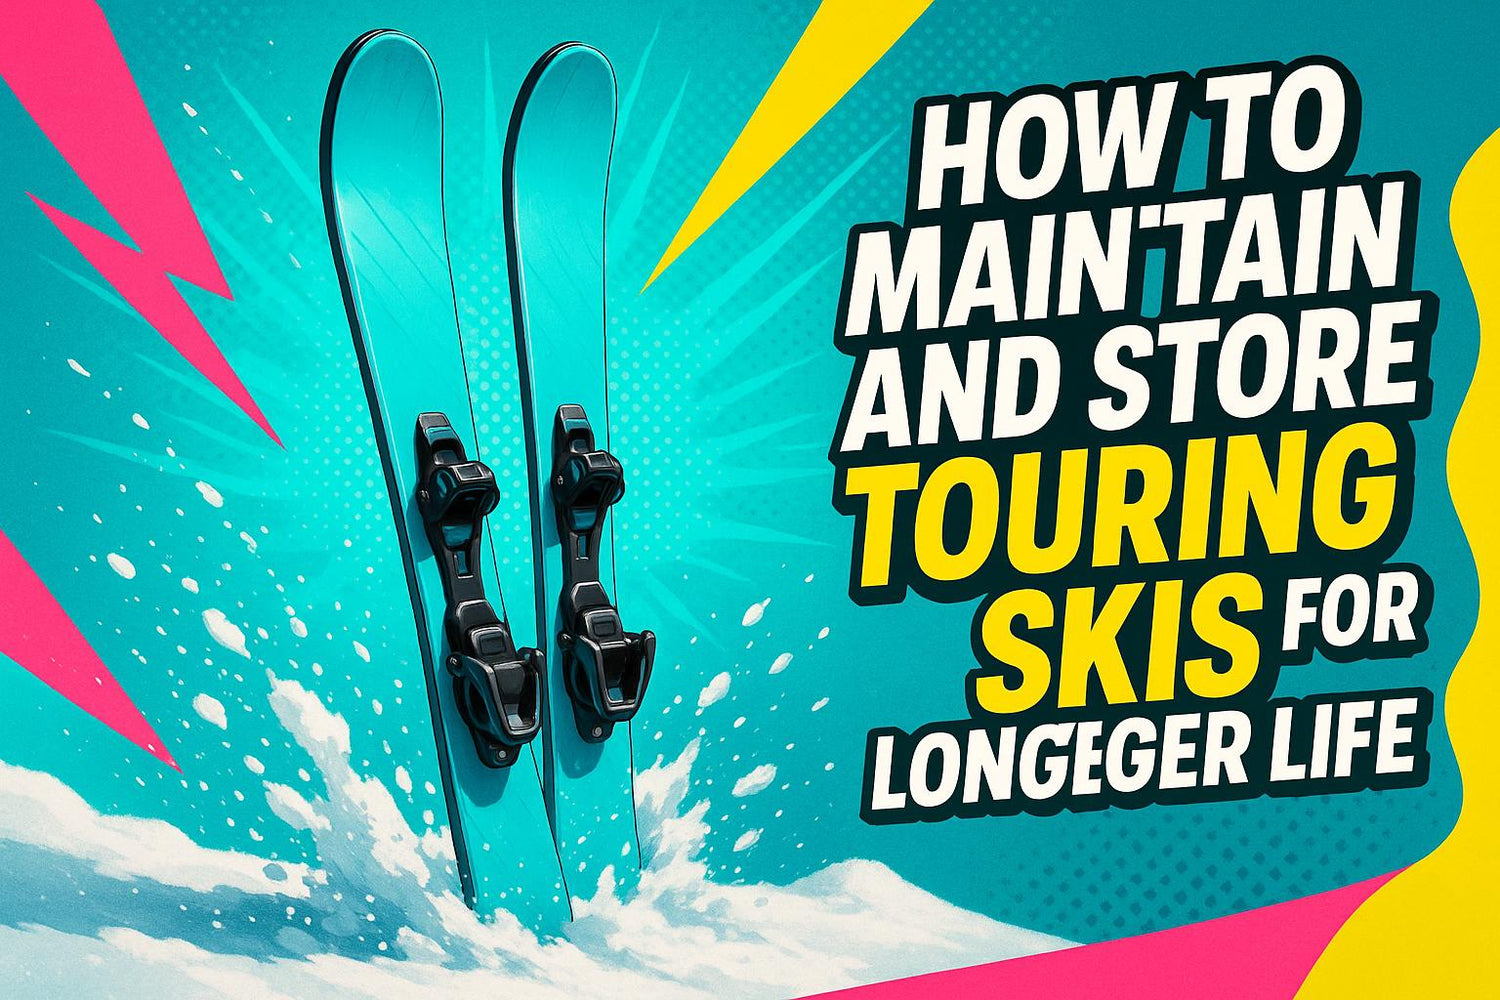
هل تريد أن تدوم زلاجات التورينج الخاصة بك لفترة أطول وتؤدي بشكل أفضل؟ كل شيء يتعلق بالعناية المنتظمة والتخزين الصحيح. إليك الحقيقة: إهمال الصيانة يؤدي إلى الصدأ، حواف باهتة، وأضرار مائية - أخبار سيئة لمعداتك وسلامتك. لكن لا تقلق، الحفاظ على زلاجاتك في أفضل حالة أسهل مما تعتقد، خاصة إذا كنت تستخدم نماذج مدمجة مثل Snowfeet* WALKSKI.
النقاط الرئيسية:
- نظف وجفف بعد كل استخدام: امسح الرطوبة لمنع الصدأ والتآكل.
- قم بالتلميع بانتظام: يحمي القاعدة ويحسن الانزلاق.
- افحص للأضرار: تحقق من القاعدة، الحواف، والربطات لأي تآكل أو مشاكل.
- خزن بذكاء: استخدم مكانًا جافًا وجيد التهوية بعيدًا عن الحرارة وأشعة الشمس.
زلاجات Snowfeet* WALKSKI، بطول 100 سم فقط، خفيفة الوزن وسهلة الصيانة. حجمها الصغير يبسط التنظيف، التلميع، والتخزين - مثالية لأي شخص يعاني من ضيق في المساحة أو الوقت. هل أنت مستعد لتعلم العملية خطوة بخطوة? هيا بنا!
كيفية تنظيف وتجفيف زلاجات التورينج
لماذا تحتاج إلى تنظيف وتجفيف زلاجاتك
الرطوبة هي عدو زلاجات التورينج. إذا تخطيت التنظيف والتجفيف الصحيحين، يمكن أن يتسلل الصدأ إلى حواف الفولاذ، وقد تتآكل أجزاء الربط المعدنية - مما يقصر عمر زلاجاتك. زلاجات التورينج التقليدية، بحجمها الأكبر، قد تجعل التنظيف مهمة شاقة.
تعرف على Snowfeet* WALKSKI. بطول 100 سم فقط (حوالي 39 بوصة)، تصميمه المدمج يجعل الصيانة سهلة للغاية. يمكنك تنظيفه في أماكن ضيقة مثل شقة صغيرة أو حتى غرفة فندق. تؤكد Dynafit® USA على أهمية تجفيف زلاجات التورينج بعد كل استخدام لمنع الصدأ والحفاظ على حواف الفولاذ في أفضل حالة. إليك روتين بسيط للحفاظ على زلاجاتك في حالة ممتازة.
عملية التنظيف والتجفيف خطوة بخطوة
-
امسحها فورًا:
بعد كل استخدام، خذ قطعة قماش ناعمة وامسح أي رطوبة أو أوساخ. بفضل الحجم الأصغر لـ WALKSKI، هذه الخطوة سريعة وسهلة. -
اغسلها عند الحاجة:
إذا كانت زلاجاتك متسخة جدًا، اغسلها بمحلول صابون خفيف. -
تنظيف عميق قبل التلميع:
استخدم منظف قاعدة مخصص للتزلج مثل SVST Agent Orange Citrus Base Cleaner لتحضير زلاجاتك للشمع. -
اتركها تجف في الهواء:
بمجرد التنظيف، اترك زلاجاتك تجف في الهواء تمامًا في مكان دافئ وجيد التهوية.
تصميم WALKSKI المحمول يعني أنه يمكنك تجفيفه على الأسطح المنزلية العادية - لا حاجة لأرفف تجفيف فاخرة أو معدات، على عكس الزلاجات التقليدية.
لروتين تنظيف أكثر شمولاً، قد ترغب في استخدام أدوات مثل منشفة Swix Fiberlene ومثبتات فرامل الزلاجات المطاطية من Utah Ski Gear. هذه الأدوات المفيدة تجعل صيانة Snowfeet* WALKSKI أسهل وأكثر كفاءة.
التشحيم وصيانة الحواف لزلاجات التورينج
كيفية التشحيم لتحسين الانزلاق وحماية القاعدة
تشحيم زلاجاتك ليس فقط من أجل السرعة - بل أيضًا لحماية القواعد والحفاظ عليها في أفضل حالة. معظم المتزلجين الترفيهيين يشحمون زلاجاتهم الجبلية كل 4–5 أيام على المنحدرات. لكن إذا كنت تتزلج في ظروف أصعب، مثل المسارات الجليدية أو الثلج الصناعي، قد تحتاج إلى التشحيم كل يومين.
تستخدم WALKSKI؟ خبر جيد: سطحه الأصغر يجعل عملية التشحيم أسرع وأسهل مقارنة بالزلاجات كاملة الطول. ابدأ بـ شمع تحضير القاعدة، الذي يساعد على تمديد فعالية شمع الانزلاق.
إليك كيفية القيام بذلك: سخّن مكواة الشمع إلى 250–270°F (تحقق من تعليمات الشمع للتفاصيل). قم بتقطير الشمع بنمط متعرج على طول القاعدة، ثم وزعه بالتساوي بالمكواة. وبما أن WALKSKI صغير الحجم، فإن إعداد محطة تشحيم في مساحة عمل أصغر أسهل بكثير.
هذه الروتين البسيط لا يعزز انزلاقك فحسب، بل يحافظ أيضًا على جاهزية زلاجاتك للعمل لفترة أطول.
كيفية صيانة حواف الزلاجات الخاصة بك
التشحيم يعتني بالانزلاق، لكن الحواف الحادة هي التي تمنحك السيطرة - خاصة على الثلج الجليدي أو المضغوط. الحواف الباهتة أو الصدئة قد تجعل التزلج أقل أمانًا وأقل متعة، لذا من الذكاء فحصها بانتظام للبحث عن نتوءات أو صدأ أو بقع باهتة.
للمسات السريعة، امسك حجر الماس ومرره على الحافة بزاوية 88–90° لشحذها. استخدم الحجر المطاطي لتنعيم أي نتوءات. وبفضل الحجم الصغير لـ WALKSKI، يصبح من الأسهل تطبيق ضغط متساوٍ والحفاظ على الزاوية الصحيحة أثناء الضبط.
إذا لاحظت مشاكل أعمق - مثل الخدوش الكبيرة في القاعدة، أو تلف حاد في الحافة، أو تآكل غير متساوٍ - فمن المحتمل أن الوقت قد حان لأخذ زلاجاتك إلى محترف لضبطها. ولا تنسَ العناية بأدواتك: خزن أحجار الماس والأحجار المطاطية في مكان جاف ونظفها بانتظام لتحافظ على فعاليتها.
كيفية فحص وإصلاح زلاجات التجوال
قائمة التحقق من الفحص المنتظم
الحفاظ على زلاجات التجوال في حالة جيدة يبدأ بالفحوصات المنتظمة. كل عدة رحلات، قم بإلقاء نظرة سريعة على زلاجاتك لالتقاط أي مشاكل صغيرة قبل أن تتحول إلى مشاكل أكبر.
ابدأ بفحص القاعدة. ابحث عن خدوش أو جروح أو بقع بيضاء قد تشير إلى تلف النواة. مرر يدك على السطح - يجب أن تشعر بالنعومة والتساوي. بعد ذلك، افحص الحواف بحثًا عن شقوق أو صدأ أو بقع باهتة. انتبه جيدًا للنقطة التي تلتقي فيها الحافة بالقاعدة، حيث تكون هذه المنطقة عرضة للانفصال.
لا تغفل عن الرباطات. تأكد من إحكام جميع البراغي وعدم وجود تشققات حول نقاط التثبيت. التصميم المدمج لزلاجات Snowfeet* WALKSKI يجعل هذه الفحوصات أسرع وأسهل، خاصة في الإضاءة الجيدة.
الجدران الجانبية هي منطقة حاسمة أخرى للفحص. تحقق من أي علامات رفع أو تشقق أو انفصال عن النواة. بينما قد تعاني الزلاجات التقليدية من انفصال الطبقات (حيث تبدأ الطبقات في التقشر)، تستخدم زلاجات WALKSKI بناءً من نوع الكاب مع نواة خشبية معتمدة مستدامة، مما يساعد في تقليل هذه المشاكل.
في فبراير 2024، نشر فريق Snowfeet مقالًا بعنوان "كيفية اختيار زلاجات التزلج في البرية؟" على snowfeetstore.com، مؤكدين أن زلاجات Snowfeet* WALKSKI للتجوال في البرية مصنوعة من "مواد عالية الجودة في بناء الزلاجات تجعلها متينة وطويلة الأمد، مما يضمن قدرتها على تحمل تحديات التضاريس المختلفة وظروف التزلج المتنوعة."
أخيرًا، ألقِ نظرة على القاعدات الجرافيتية. هذه مصممة لتدوم، مما يجعل الخدوش العميقة أقل شيوعًا. مع ذلك، من الجيد التحقق من أي أضرار تتجاوز التآكل السطحي.
بمجرد تحديد أي مشاكل، قرر ما إذا كانت إصلاحات سهلة يمكنك التعامل معها بنفسك أو إذا حان الوقت لاستدعاء المحترفين.
متى تصلحها بنفسك مقابل طلب المساعدة المهنية
بعض الإصلاحات بسيطة بما يكفي للتعامل معها في المنزل. الخدوش الصغيرة ولمسات الحافة الطفيفة تندرج ضمن هذه الفئة. بالنسبة للخدوش السطحية في القاعدة، يمكنك استخدام شموع P-Tex. سخّن الشمعة حتى يتساقط المادة في الخدش، ثم اكشطها وصقلها لتصبح ناعمة بمجرد أن تبرد. إذا كانت الحواف باهتة، يمكن لحجر الماس الممسوك بزاوية 88–90° أن يعيد حدة الحواف. المساحة السطحية الأصغر لألواح WALKSKI تجعل هذه المهام اليدوية أسهل، وحوافها المعدنية مصممة لمقاومة الانفصال.
من ناحية أخرى، بعض المشاكل تتطلب اهتمامًا مهنيًا. الخدوش العميقة التي تكشف النواة، الأضرار الكبيرة في الحواف، أو أي علامات على انفصال الطبقات يجب تركها للخبراء. بفضل المادة المعززة بالألياف الزجاجية والطبقات الإضافية في زلاجات Snowfeet*، هذه المشاكل أقل شيوعًا مقارنة بالزلاجات التقليدية.
مشاكل التثبيت، مثل البراغي الفضفاضة، أو ألواح التثبيت المتشققة، أو التحرك، هي مجال آخر حيث المساعدة المهنية ضرورية. حتى المشاكل الصغيرة في التثبيت يمكن أن تتحول بسرعة إلى مخاطر سلامة إذا لم تُعالج بشكل صحيح.
منتجات Snowfeet* مصممة لتكون قوية، وتلتزم بمعايير التصنيع الأوروبية الصارمة. جودة بنائها العالية تعني أنك ستقضي وقتًا أطول على المنحدرات ووقتًا أقل في التعامل مع الإصلاحات. التصميم المتين يقلل من خطر الأضرار الكبيرة، مما يجعل الإصلاحات نادرة.
إذا كنت غير متأكد من إصلاح ما، فمن الأفضل دائمًا أن تلعبها بأمان وتستشير محترفًا. الأمر يستحق ذلك لتجنب التسبب في أضرار أكبر.
كيفية تخزين زلاجات التورينج بشكل صحيح
كيفية تحضير الزلاجات للتخزين في فصل عدم الاستخدام
التحضير لزلاجات التورينج لفصل عدم الاستخدام يبدأ بفحص دقيق. تحقق من وجود أي شقوق في التثبيتات أو أضرار كبيرة قد تحتاج إلى إصلاح. قليل من الجهد الآن يمكن أن ينقذك من المفاجآت عند عودة الثلج.
بعد ذلك، نظف القواعد. قم بتنظيف الأوساخ وإذا لزم الأمر استخدم منظفًا للقواعد. بمجرد أن تصبح نظيفة تمامًا، ضع طبقة من شمع التخزين على القاعدة. هذا يساعد في حماية المادة خلال الأشهر التي ستظل فيها غير مستخدمة. لا تنسَ كشط أي شمع زائد من الحواف.
انتبه جيدًا للحواف المعدنية. تأكد من جفافها تمامًا قبل التخزين. إذا كان لديك زلاجات WALKSKI، فإن مسحها بسرعة بزيت خفيف يضيف حماية إضافية ضد الرطوبة. بالنسبة للزلاجات التقليدية، قد ترغب في شحذ الحواف أو أخذها إلى ورشة للصيانة. ومع ذلك، تم تصميم زلاجات WALKSKI لتحافظ على حدة حوافها لفترة أطول.
عندما يتعلق الأمر بالتثبيتات، قم بتخفيف إعدادات DIN لتقليل التوتر، وفكر في تزييت النوابض بشكل احترافي إذا لزم الأمر.
إذا كنت تستخدم زلاجات Snowfeet* WALKSKI، فإن تصميمها المدمج بطول 39 بوصة يجعل التحضير أسرع والتخزين أسهل. إنها منخفضة الصيانة مقارنة بالزلاجات التقليدية، مما يعني أنك ستقضي وقتًا أقل في تجهيزها.
مع تجهيز كل شيء، حان الوقت لتخزين زلاجاتك بشكل صحيح. لكن أولاً، دعنا نتجنب بعض الأخطاء الشائعة.
أخطاء التخزين التي يجب تجنبها
حتى لو أعددت زلاجاتك بشكل مثالي، فإن تخزينها بطريقة خاطئة يمكن أن يلغي كل عملك. الرطوبة هي العدو الأول هنا. يمكن أن تسبب صدأ الحواف وتضعف اللصق على جلود التسلق، مما يقلل من مقاومة الماء ويجعل الثلج يلتصق بها في الظروف الباردة. احذر من حقائب التزلج المقاومة للماء أيضًا - فقد تحبس الرطوبة بداخلها وتؤدي إلى الصدأ.
تجنب الأقبية الرطبة، أو الكراجات ذات تقلبات الحرارة، أو أي أماكن سيئة التهوية. بدلاً من ذلك، اختر مكانًا جافًا وجيد التهوية بعيدًا عن أشعة الشمس المباشرة والغبار. خزانة ذات تحكم مناخي أو غرفة إضافية مثالية.
الحرارة وأشعة UV ضارة بنفس القدر. يمكن أن تدمر اللصق على جلود التسلق وحتى تشوه بطانات وأغلفة أحذية التزلج، مما يجعلها تفقد ملاءمتها. تجنب تخزين معداتك في العليات، أو صناديق السيارات، أو بالقرب من فتحات التدفئة أو النوافذ المشمسة.
الظروف السيئة للتخزين مع مرور الوقت يمكن أن تؤدي إلى تلف الحواف، أو انفصال الطبقات، أو فقدان مرونة الزلاجات. زلاجات Snowfeet* مصممة لتتحمل هذه التحديات أفضل من الزلاجات التقليدية، لكن من الأفضل العناية بها.
بالنسبة لجلود التسلق، تأكد من جفافها تمامًا في درجة حرارة الغرفة قبل تخزينها. لا تستخدم أبدًا المدافئ أو الحرارة المباشرة - فهذا يمكن أن يفسد طبقة اللصق. خزنها في حقيبتها المخصصة، في مكان بارد ونظيف ومظلم، جنبًا إلى جنب مع زلاجاتك. القليل من العناية الآن سيحافظ على معداتك في أفضل حالة للمواسم القادمة.
sbb-itb-17ade95
من الشمع إلى Ptex: أساسيات صيانة الزلاجات
Snowfeet* WALKSKI مقابل الزلاجات التقليدية وألواح التزلج
عندما يتعلق الأمر بالصيانة والتخزين، فإن زلاجات Snowfeet* WALKSKI تتفوق بوضوح على الزلاجات التقليدية وألواح التزلج. بفضل تصميمها المدمج والخفيف الوزن، كل شيء من التنظيف إلى التخزين يصبح سهلاً.
الفرق الأكثر وضوحًا؟ مساحة التخزين. غالبًا ما تتطلب الزلاجات التقليدية وألواح التزلج مساحات تخزين كبيرة مخصصة، مثل الرفوف أو الإعدادات الرأسية. أما Snowfeet*، فيمكن وضعها في حقيبة ظهر. نعم، يمكنك تخزينها في خزانة أو حتى تحت سريرك دون التضحية بمساحة ثمينة.
ثم هناك المعدات. الإعدادات التقليدية تأتي مع أحذية تزلج متخصصة تحتاج إلى عناية إضافية، مثل ربطها عند عدم الاستخدام لتجنب التشوه. Snowfeet* تتخطى كل هذه المتاعب - فهي تعمل مع حذائك الشتوي العادي أو أحذية التزلج على اللوح، مما يلغي الحاجة إلى معدات ضخمة وصعبة الصيانة.
سهولة حملها تجعل الصيانة أسهل بكثير. Snowfeet* خفيفة وسهلة الحمل لدرجة أن أخذها للصيانة أو تلميع الشمع ليس بالأمر الصعب، على عكس حمل المعدات التقليدية.
مخطط مقارنة الصيانة والتخزين
| الجانب | Snowfeet* WALKSKI | التزلج التقليدي | ألواح التزلج على الثلج |
|---|---|---|---|
| مساحة التخزين | تناسب حقيبة الظهر | يتطلب تجهيزات تخزين أكبر | تحتاج إلى تخزين عمودي أو على رف |
| المعدات المرتبطة | أحذية شتوية عادية | تحتاج إلى أحذية تزلج متخصصة | أحذية سنوبورد متخصصة |
| صيانة الأحذية | لا يتطلب أي شيء | يجب ربط الأحذية عند التخزين | يتطلب عناية منفصلة للأحذية |
| تلميع | يحتاج إلى تلميع قياسي | يتطلب تلميع منتظم | يتطلب تلميع منتظم |
| ضبط الحافة | سهل مع جهاز ضبط مناسب | غالبًا ما تحتاج إلى ضبط احترافي | تحتاج إلى ضبط معتدل |
| وزن النقل | خفيف الوزن وقابل للحمل | أثقل | ضخم |
الرسم البياني أعلاه يلخص الأمر بشكل جيد - Snowfeet* تجعل التلميع، وضبط الحواف، والصيانة العامة أبسط بكثير. على سبيل المثال، ضبط الحواف المعدنية مهمة سريعة باستخدام أداة ضبط صغيرة ومناسبة، بفضل مساحتها السطحية الأصغر. فقط لا تنسَ تجفيف الحواف ومسحها سريعًا بالزيت قبل التخزين لمنع الصدأ.
منحنى التعلم أيضًا أسهل بكثير. الزلاجات التقليدية وألواح التزلج يمكن أن تكون مربكة للمبتدئين بسبب حجمها وتعقيد المعدات. Snowfeet*، بحجمها المناسب لحملها في الحقيبة وتوافقها مع الأحذية العادية، تزيل عامل التخويف هذا.
ميزة أخرى؟ عدم الحاجة إلى معدات متخصصة إضافية يعني أنك توفر المال. لأولئك الذين لديهم مساحة تخزين محدودة أو أي شخص يرغب في تجنب متاعب الصيانة التقليدية، Snowfeet* خيار ذكي وعملي.
إذا كنت تعاني من ضيق المساحة أو تتعامل مع عدة قطع من معدات الشتاء، فإن زلاجات Snowfeet* WALKSKI تحل واحدة من أكبر مشاكل الرياضات الشتوية. فهي سهلة الصيانة، توفر الوقت، وتساعد على إطالة عمر معداتك - مما يبقيك على المنحدرات لفترة أطول وبأقل عناء.
كيفية جعل زلاجات التورينج تدوم لفترة أطول
العناية اليومية بزلاجاتك وتخزينها بشكل صحيح يمكن أن يحدث فرقًا كبيرًا في مدة استخدامها. السر للحفاظ على زلاجاتك في أفضل حالة لسنوات؟ قليل من الاهتمام الإضافي بعد كل استخدام.
ابدأ بـ تجفيف زلاجاتك فورًا بعد التزلج. هذا يمنع تكون الصدأ على الحواف المعدنية، مما يحافظ على حدتها واستعدادها للعمل. بالنسبة لزلاجات Snowfeet* WALKSKI، هذه الخطوة مهمة بشكل خاص. تصميمها المدمج يجعل الصيانة أسهل، لكنه يعني أيضًا أنه يجب أن تكون أكثر حرصًا. مسح سريع بالزيت قبل التخزين يمكن أن يضيف طبقة إضافية من الحماية ضد الصدأ.
إذا كنت متجهًا لرحلة متعددة الأيام، فإن التلميع اليومي يحدث فرقًا كبيرًا. فهو يحمي القاعدة ويحسن الانزلاق، وبفضل المساحة السطحية الأصغر لـ Snowfeet*، يصبح التلميع أسرع وأقل إزعاجًا.
شيء آخر لا بد منه؟ الحفاظ على نظافة القاعدة. يمكن للأوساخ أن تتلف القاعدة، لذا نظفها بالماء والصابون بعد كل استخدام. إذا كنت تتزلج على مسارات مهيأة أو على تضاريس جليدية، فمن الجيد أيضًا فحص الحواف بواسطة خدمة محترفة لضمان بقائها حادة وتؤدي أداءً جيدًا.
واحدة من مزايا Snowfeet* هي سهولة صيانتها. حجمها الصغير يجعل مهام مثل التلميع وضبط الحواف أسرع وأقل جهدًا مقارنة بالزلاجات التقليدية. شحذ الحواف يتبع نفس العملية كما في الزلاجات العادية، لكنه أسرع بسبب حجمها الأصغر.
الثبات هو ما يحافظ على زلاجاتك في حالة ممتازة. بضع دقائق فقط من العناية - التجفيف، التلميع، والفحص - بعد كل خروج يمكن أن تحدث فرقًا كبيرًا. تم تصميم Snowfeet* لجعل هذه الروتين سهلًا، حيث تتناسب تمامًا مع عاداتك بعد التزلج. اجمع هذه الخطوات مع التخزين الموسمي المناسب، وستبقى زلاجاتك في حالة ممتازة لفترة طويلة.
الأسئلة الشائعة
كم مرة يجب أن ألمع زلاجاتي الجبلية، وهل يعتمد ذلك على الظروف التي أتزلج فيها؟
عندما يتعلق الأمر بتلميع زلاجاتك الجبلية، يعتمد تكرار التلميع حقًا على مدى ومكان تزلجك. للاستخدام العرضي، عادةً ما يكفي التلميع مرة أو مرتين في الموسم. إذا كنت تتزلج بشكل متكرر، حاول التلميع كل 4-6 مرات. ولكن إذا كنت تستخدم زلاجاتك بشكل مكثف أو تواجه ظروفًا صعبة، فإن تلميعها بعد كل جلسة هو الطريق لتحقيق الأداء الأمثل.
خذ على سبيل المثال زلاجات Snowfeet's WALKSKI Backcountry Touring. إنها مصممة لتدوم، لكن التلميع المنتظم يحافظ على انزلاقها بسلاسة وأدائها كالحلم. بالإضافة إلى ذلك، الأمر لا يقتصر على الركوب فقط - فهو يحمي القاعدة من التآكل، خاصة عند التعامل مع جميع أنواع الثلج. القليل من الصيانة يقطع شوطًا طويلًا في الحفاظ على زلاجاتك في أفضل حالة.
كيف تختلف الصيانة والتخزين بين زلاجات Snowfeet* WALKSKI والزلاجات التقليدية؟
زلاجات Snowfeet* WALKSKI تتمحور حول الراحة والبساطة. حجمها الصغير يعني أنك لن تحتاج إلى تفريغ نصف خزانة ملابسك فقط لتخزينها. بالإضافة إلى ذلك، فهي منخفضة الصيانة للغاية. انسَ معدات التعديل المتخصصة التي تتطلبها الزلاجات التقليدية - Snowfeet* تجعل الأمر سهلاً باستخدام شمعات عامة وإكسسوارات أساسية مثل الأحزمة البديلة. الحفاظ عليها في أفضل حالة أمر سهل.
علاوة على ذلك، هذه الزلاجات مصممة لتكون قوية. بفضل المواد المتينة والتصميم الذكي، تتعامل مع الرطوبة وتقلبات درجات الحرارة ببراعة. هذا يعني قلقًا أقل بشأن التآكل والمزيد من الوقت للاستمتاع بالمنحدرات. إذا كنت من محبي الرياضات الشتوية ولكن لا ترغب في عناء صيانة الزلاجات التقليدية، فإن زلاجات Snowfeet* خيار قوي.
ما هي أفضل الطرق لصيانة زلاجات Snowfeet* WALKSKI لأداء يدوم طويلاً؟
للحفاظ على أداء زلاجات Snowfeet* WALKSKI بأفضل شكل، القليل من الصيانة المنتظمة يقطع شوطًا طويلًا. ابدأ بتطبيق الشمع على القاعدة بشكل متكرر - هذا لا يساعدك فقط على الانزلاق بشكل أسرع بل يمنع أيضًا التصاق الثلج. بالنسبة للحواف، مُشَحِذ الحواف المحمول مثالي للحفاظ على حدتها وخلوها من الصدأ. إذا لم تكن من محبي الأعمال اليدوية، زيارة سريعة لمتجر خدمة الزلاجات المحترف يمكن أن تفعل العجب. العناية بزلاجاتك بهذه الطريقة تضمن بقاءها في حالة ممتازة وجاهزة دائمًا لمغامرتك القادمة.
بعد كل استخدام، تأكد من تنظيف أي أوساخ أو رطوبة. ترك الأوساخ أو الماء على زلاجاتك قد يؤدي إلى تلفها مع مرور الوقت. منتجات Snowfeet* مصممة لتدوم، لكن هذه الخطوات السهلة للصيانة يمكن أن تساعدها على الأداء بشكل أفضل وتدوم أطول من الزلاجات أو ألواح التزلج التقليدية.


اترك تعليقًا
This site is protected by hCaptcha and the hCaptcha Privacy Policy and Terms of Service apply.