


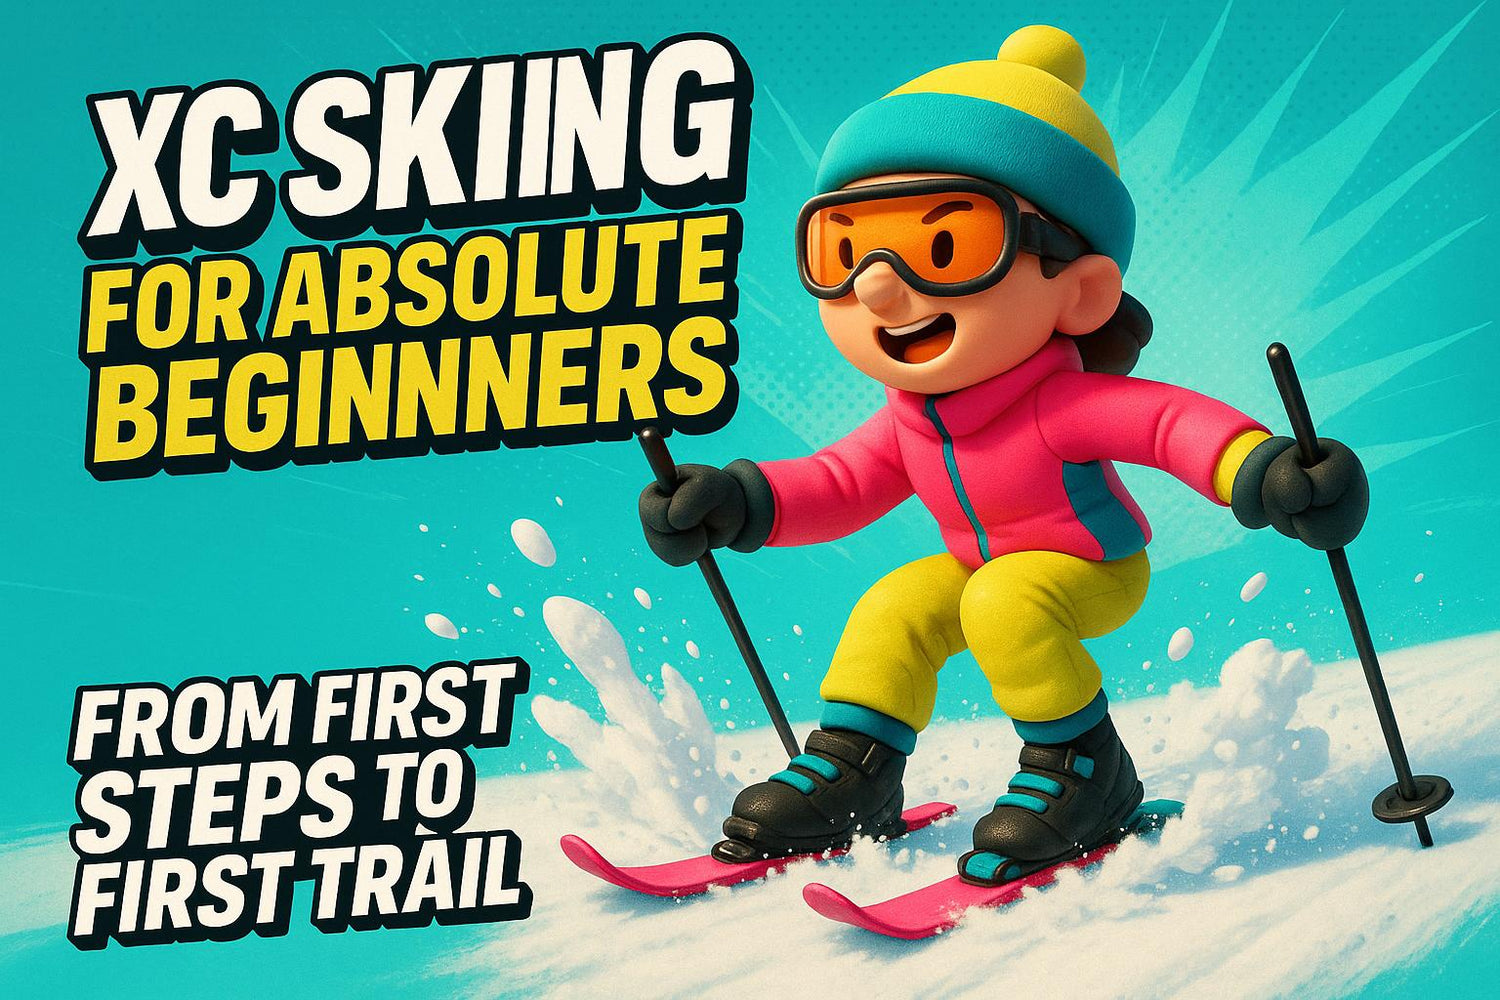
El esquí de fondo (esquí XC) es una forma divertida y económica de disfrutar el invierno mientras te mantienes activo. A diferencia del esquí alpino, es menos concurrido, más fácil de aprender y no requiere resorts lujosos. Además, es un entrenamiento de cuerpo completo que es suave para tus articulaciones.
Para principiantes, los esquís compactos como los Snowfeet NORDIC Cross-country Skate Skis simplifican el proceso de aprendizaje. Son más cortos (solo 35 pulgadas), livianos y funcionan con botas de invierno normales, ahorrándote dinero y complicaciones. Puedes practicar en nieve plana en tu patio trasero, parques locales o senderos aptos para principiantes.
Esto es lo que necesitas saber para empezar:
- Estilos: Elige entre esquí clásico (deslizamiento fácil), esquí de patinaje (más rápido, como patinaje sobre hielo) o esquí de travesía (terreno sin preparar).
- Equipo: El equipo básico incluye esquís, botas, fijaciones y bastones. Los esquís Snowfeet son una excelente opción para principiantes porque son portátiles y fáciles de usar.
- Técnicas: Concéntrate en el equilibrio, el cambio de peso y movimientos simples como deslizar y detenerse.
Vístete en capas, mantente hidratado y, lo más importante, diviértete. El esquí XC es para disfrutar del paisaje nevado mientras aprendes a tu propio ritmo. Ya sea que busques ponerte en forma o simplemente relajarte, es una actividad perfecta para el invierno para todos.
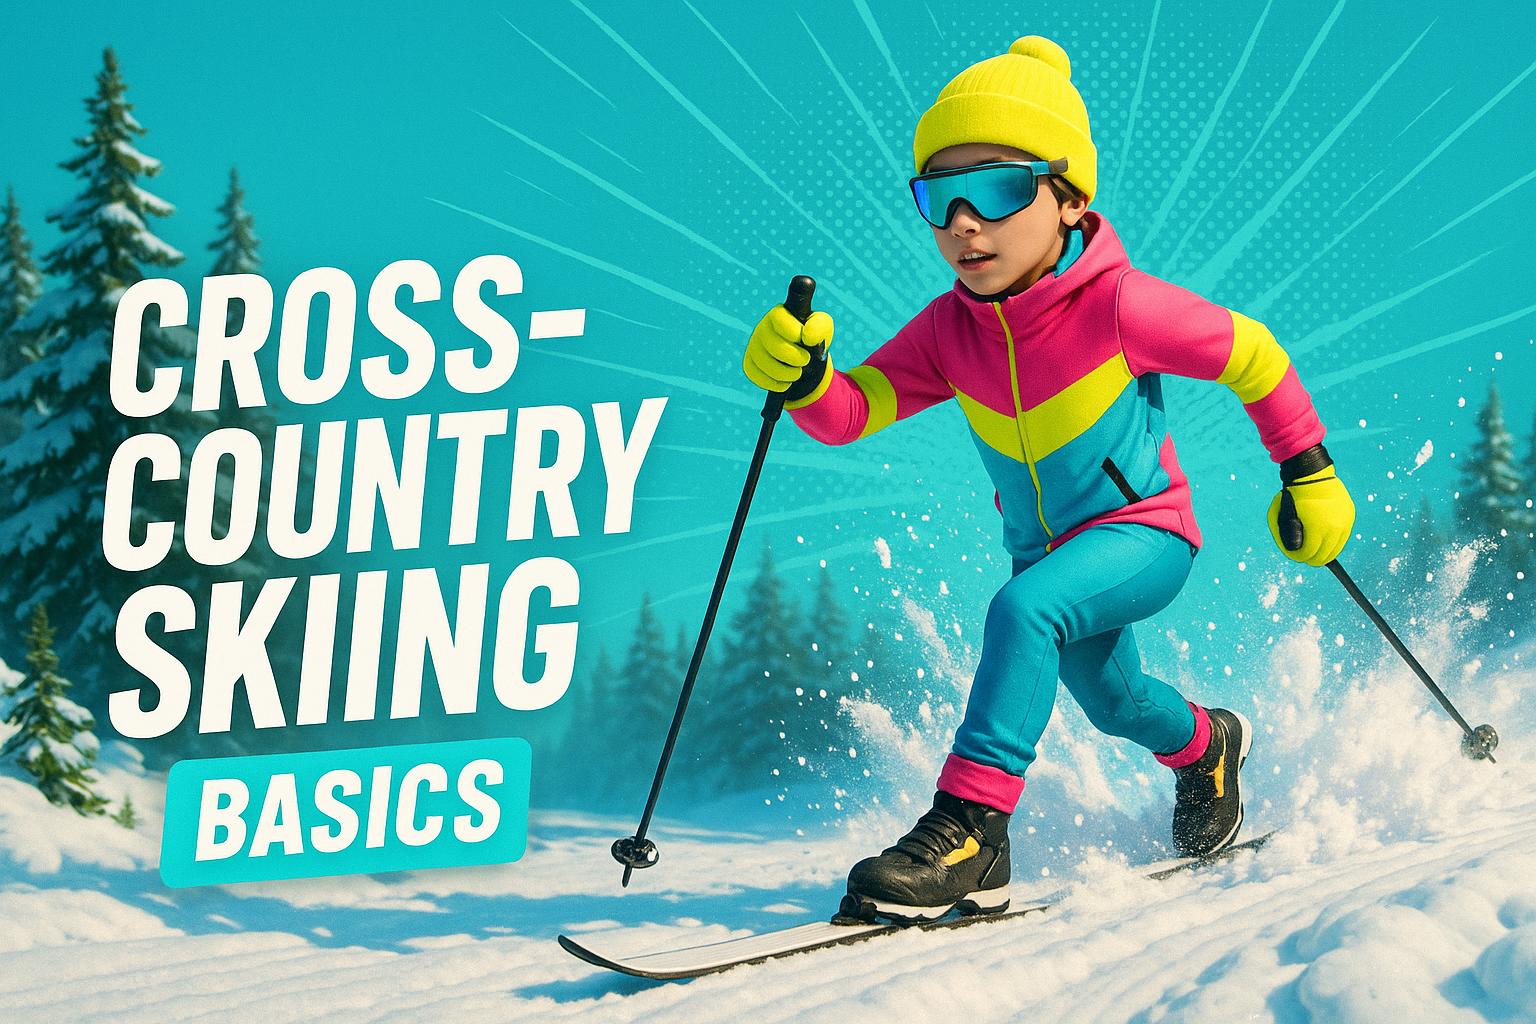
Conceptos básicos del esquí de fondo
¿Qué es el esquí de fondo?
El esquí de fondo, o esquí XC (a veces llamado esquí nórdico), es un juego completamente diferente comparado con el esquí que podrías ver en grandes estaciones. Olvídate de los telesillas y las bajadas empinadas: aquí se trata de impulsarte a ti mismo a través de terreno plano o suavemente ondulado cubierto de nieve. Es un entrenamiento, sin duda, pero esa es parte de la diversión.
El equipo también es bastante diferente. Los esquís de fondo, a menudo llamados "esquís delgados", son más ligeros y estrechos que los esquís alpinos. Las fijaciones son únicas también, dejando el talón libre para levantar, lo que crea un movimiento natural parecido a caminar. Esta libertad de movimiento significa que no solo desciendes cuesta abajo, sino que usas tus piernas, core y brazos todo el tiempo. Es una forma fantástica de mantenerse activo y disfrutar del paisaje invernal.
Tipos de esquí de fondo
El esquí de fondo tiene tres estilos principales, cada uno con su propia vibra y conjunto de habilidades. Elegir el correcto depende de tus objetivos y nivel de condición física.
- Esquí clásico: Este es el estilo que la mayoría de la gente imagina cuando piensa en el esquí de fondo. Se trata del "paso diagonal" o "patada y deslizamiento", que es como caminar sobre esquís. Empujas con un esquí mientras deslizas con el otro, a menudo en pistas paralelas preparadas. Es sencillo y apto para principiantes.
- Skate Skiing: Imagina patinaje de velocidad sobre nieve. Los esquís forman una V mientras te impulsas, haciendo que este estilo sea más rápido e intenso. Aunque al principio parezca complicado, si alguna vez has patinado sobre hielo, el movimiento te resultará sorprendentemente familiar. Es una excelente opción para quienes buscan un entrenamiento más dinámico.
- Backcountry Skiing: Este es para los aventureros. Se trata de explorar terrenos salvajes y sin preparar. Como este estilo puede ser más desafiante y requiere conocimientos de seguridad, es mejor intentarlo después de dominar lo básico.
Para principiantes, el esquí de skate puede ser más fácil de aprender con el equipo adecuado. Opciones compactas como los esquís Snowfeet* NORDIC Cross-country Skate — de solo 35 pulgadas (90 cm) de largo — están diseñados para simplificar el proceso de aprendizaje. Su diseño más corto y ligero ofrece mejor control y hace que dominar la técnica sea menos intimidante comparado con los esquís tradicionales, que son mucho más largos.
Términos básicos que necesitas conocer
Aprender algunos términos clave puede ayudarte a lanzarte a la nieve con confianza:
- Kick Zone: Es la sección bajo el centro de tus esquís clásicos, también llamada zona de agarre o bolsillo de cera. Cuando presionas tu peso sobre un esquí, esta área agarra la nieve, dándote la tracción necesaria para impulsarte. Los esquís tradicionales suelen requerir cera de agarre aquí, pero los esquís nórdicos Snowfeet* evitan esta complicación usando agarres pretexturizados para mejor tracción, perfectos para principiantes.
- Glide Zone: Son las partes delanteras y traseras de tus esquís, diseñadas para deslizarse suavemente sobre la nieve. Aunque la cera de deslizamiento puede mejorar el rendimiento al reducir la fricción, muchos esquiadores casuales disfrutan del deslizamiento natural sin preparación extra.
- Weight Transfer: Es el arte de desplazar suavemente tu peso de un esquí al otro mientras mantienes el equilibrio. Es una habilidad crucial tanto para el esquí clásico como para el skate.
- Balanced Stance: Una postura fuerte es tu base. Párate con los pies a la anchura de los hombros y flexiona ligeramente las caderas, rodillas y tobillos. Mantener el peso centrado sobre las bolas de los pies ayuda con el equilibrio y el control.
- Double Poling: En terreno plano, puedes impulsarte con ambos bastones al mismo tiempo para ganar velocidad. Es una técnica útil cuando quieres darle un descanso a tus piernas sin perder impulso. Los esquís Snowfeet*, con su diseño compacto, hacen que esta técnica sea especialmente efectiva para quienes están comenzando.
El esquí de fondo no es solo un ejercicio, es una forma de conectar con los paisajes invernales mientras te mantienes activo. Ya sea que deslices por senderos preparados o te aventures en la naturaleza, hay un estilo y ritmo para todos.
Equipo que necesitas para empezar
Lista básica de equipo
Comenzar con el esquí de fondo no requiere mucho equipo, solo lo esencial: esquís, botas, fijaciones y bastones. Los esquís tradicionales de fondo suelen medir entre 6 y 8 pies, lo que puede ser mucho para quienes aún están aprendiendo a equilibrarse y controlar. Además, necesitarás botas nórdicas (que cuestan entre $150 y $300) y fijaciones compatibles solo con esas botas. Los bastones ayudan con el equilibrio y la propulsión, pero no son estrictamente necesarios al empezar.
Si todo eso suena complicado, hay una opción más sencilla: esquís Snowfeet* NORDIC Cross-country Skate. Estos esquís compactos reducen la complejidad, siendo una excelente opción para principiantes.
Por qué los esquís Snowfeet* NORDIC Cross-country Skate funcionan mejor
Los esquís Snowfeet* NORDIC están diseñados para abordar los desafíos comunes que enfrentan los principiantes. Con solo 35 pulgadas (90 cm) de largo, son mucho más cortos y ligeros que los esquís tradicionales. Esto los hace más fáciles de manejar, especialmente cuando estás aprendiendo a equilibrarte y a desplazar tu peso correctamente.
¿Una característica destacada? La compatibilidad con calzado. En lugar de invertir en botas nórdicas especializadas, puedes usar cualquier bota de invierno resistente que ya tengas. Esto te ahorra dinero y facilita probar el esquí de fondo sin un gran gasto inicial.
La portabilidad es otra gran ventaja. Estos esquís caben en una mochila o en el maletero del coche, por lo que puedes evitar la molestia de los portaequipajes o espacio extra para el equipo. Ya sea que vayas a un sendero nevado, un parque o incluso tu propio jardín, empacar y salir a la nieve es muy fácil.
Los esquís más cortos también significan una curva de aprendizaje más suave. Puedes concentrarte en disfrutar el deslizamiento y ganar confianza en lugar de luchar con un equipo sobredimensionado. Y con un precio de $250–$275, los esquís Snowfeet* NORDIC son mucho más asequibles que un equipo tradicional, que puede costar entre $400 y $800+ al incluir botas y fijaciones.
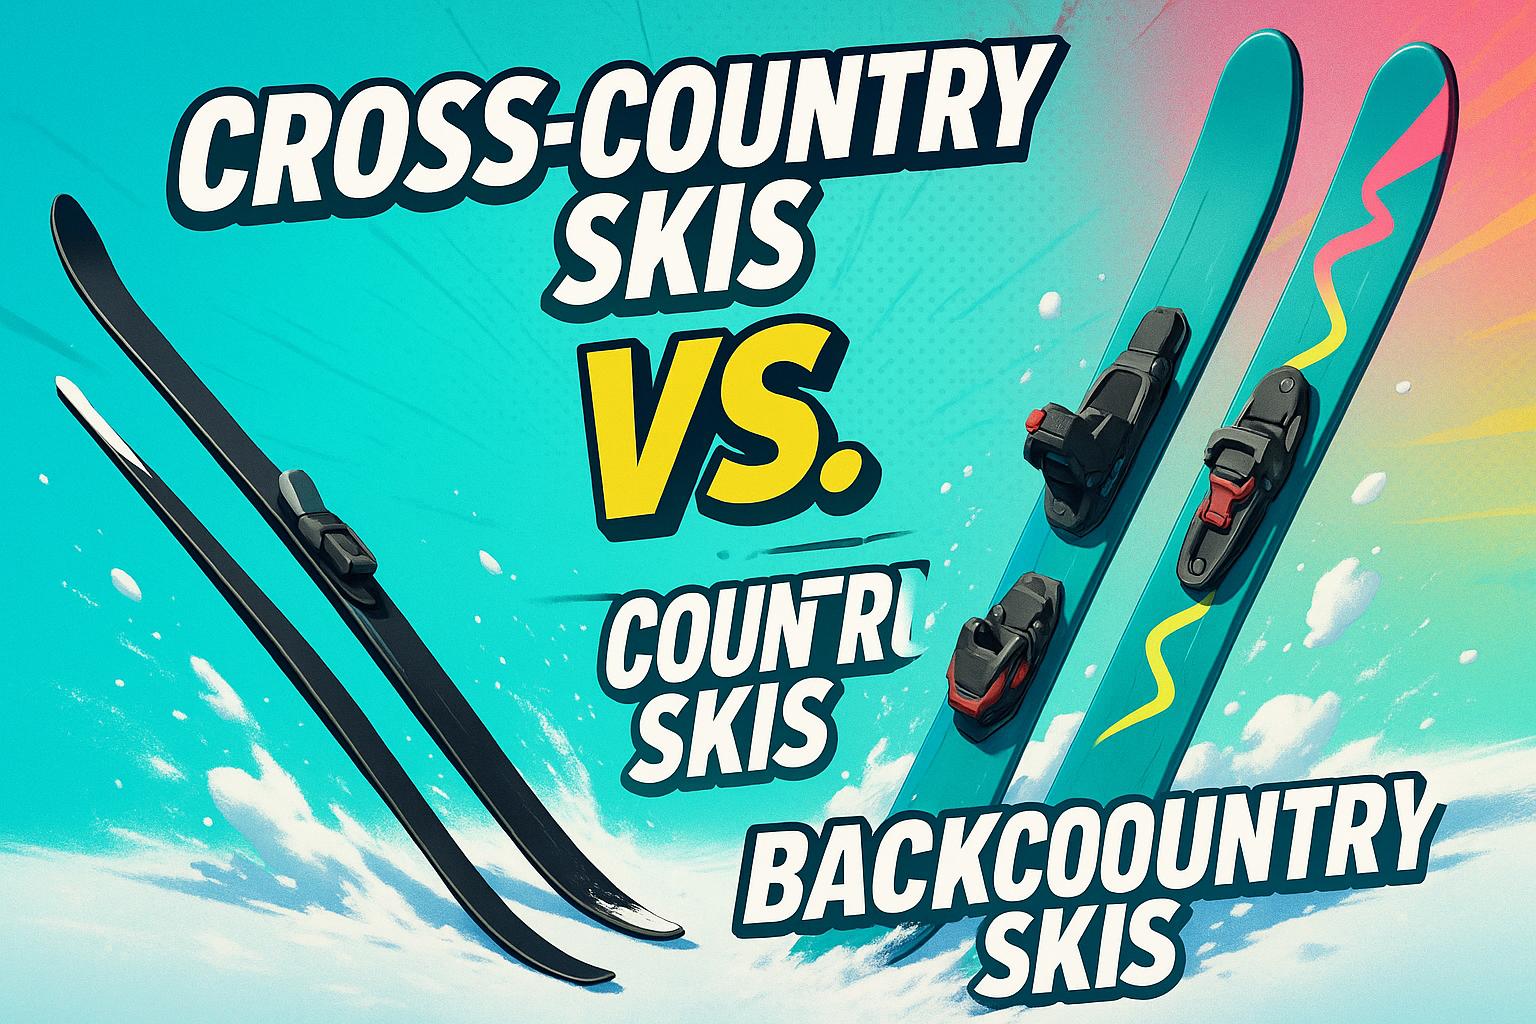
Snowfeet* vs. Esquís y Snowboards Tradicionales
Así es como Snowfeet* se compara con los esquís tradicionales de campo traviesa y los snowboards:
| Característica | Snowfeet* NÓRDICO | Esquís XC tradicionales | Snowboards |
|---|---|---|---|
| Longitud | 35 pulgadas (90 cm) | 72–96 pulgadas (180–245 cm) | 48–65 pulgadas (120–165 cm) |
| Peso | Ultraligero | Más pesado y voluminoso | Moderado a intenso |
| Compatibilidad de calzado | Cualquier bota de invierno | Solo botas nórdicas especializadas | Solo botas de snowboard |
| Portabilidad | Cabe en una mochila | Requiere portaequipajes o espacio extra en el vehículo | Necesidades moderadas de transporte |
| Dificultad de aprendizaje | Apto para principiantes | Curva de aprendizaje más pronunciada | De moderado a difícil |
| Rango de precios | $250–$275 | $400–$800+ (con botas/fijaciones) | $300–$600+ (con botas/fijaciones) |
| Opciones de terreno | Pistas, parques, patios traseros | Principalmente pistas pisadas | Estaciones de esquí, montañas |
Los esquís tradicionales de fondo, como los de marcas como Rossignol o Salomon, son fantásticos para esquiadores experimentados que recorren senderos preparados. Pero su mayor longitud, equipo especializado y curva de aprendizaje más empinada pueden intimidar a los principiantes.
Las tablas de snowboard, por otro lado, están diseñadas para la diversión cuesta abajo en estaciones de esquí. Vienen con sus propios requisitos: pases de elevador, botas de snowboard y terreno específico, lo que las hace menos prácticas para explorar lugares nevados locales.
Los esquís NÓRDICOS Snowfeet* llenan perfectamente el vacío. Te permiten disfrutar la libertad del esquí de fondo sin la complejidad, los altos costos ni la curva de aprendizaje pronunciada del equipo tradicional. Ya sea que estés recorriendo un sendero o simplemente disfrutando de la nieve cerca, Snowfeet* facilita sumergirte y disfrutar.
Técnicas básicas y movimiento
Equilibrio y deslizamiento con Snowfeet*
Los esquís NÓRDICOS Snowfeet* son un cambio radical cuando se trata de aprender a equilibrarse. Con solo 35 pulgadas de largo, su tamaño compacto los hace más sensibles a tus movimientos, dándote la capacidad de ajustarte rápidamente y mantenerte firme sobre tus pies.
Comienza encontrando tu centro de gravedad. Sobre nieve plana, párate con los esquís paralelos y separados aproximadamente al ancho de tus hombros. Distribuye tu peso de manera uniforme entre ambos pies y inclínate ligeramente hacia adelante desde los tobillos, no desde la cintura. Piensa en ello como estar sobre una patineta: equilibrado pero listo para moverte.
Una vez que te sientas cómodo manteniendo el equilibrio, deslizarse viene de forma natural. Empújate suavemente con un pie mientras el otro esquí permanece plano sobre la nieve. La longitud más corta de Snowfeet* significa que no alcanzarás tanta velocidad como con esquís más largos, dándote mejor control mientras practicas.
Prueba la técnica de cambio de peso para familiarizarte con el movimiento. Levanta un esquí ligeramente del nieve, luego cambia al otro. Con menos peso y sin puntas largas de esquí de qué preocuparte, esto es mucho más fácil de manejar que con esquís tradicionales. Además, usar tus botas de invierno habituales proporciona un soporte de tobillo familiar, a diferencia de las botas nórdicas más rígidas usadas en configuraciones clásicas.
Una vez que domines el equilibrio, es hora de enfocarte en dominar los movimientos básicos.
Movimientos básicos: avanzar, detenerse y girar
Para avanzar, usa un paso de patinaje. Esto es diferente del paso diagonal que se usa con esquís más largos. Impúlsate en un ángulo ligero con un esquí mientras deslizas hacia adelante con el otro, similar al patinaje sobre hielo o en patines. Con Snowfeet*, los pasos más cortos se sienten más naturales. Comienza con empujes pequeños, de unos 12 a 18 pulgadas hacia un lado, y aumenta tu rango a medida que ganes confianza.
Detenerse es un área donde Snowfeet* facilitan la vida a los principiantes. La parada en cuña es tu recurso principal: angula las puntas de los esquís en forma de "V" y empuja los talones hacia afuera. Los esquís más cortos hacen que esta maniobra sea rápida y simple, sin la torpeza de los esquís largos. Otra opción es la parada con paso: simplemente da un paso al lado para una detención suave y controlada.
Girar se siente intuitivo con estos esquís más cortos. Para giros básicos, desplaza tu peso al esquí exterior mientras dejas que el esquí interior siga el movimiento. El diseño compacto significa que puedes hacer giros más cerrados y manejar senderos estrechos con facilidad. Comienza con giros con paso, donde das un paso en la dirección que quieres ir, antes de pasar a giros tallados más avanzados. Snowfeet* hacen estos movimientos sencillos, ayudándote a sentir el control desde el principio.
Construyendo tu confianza
Una vez que domines lo básico, es hora de construir confianza aumentando gradualmente los desafíos. Snowfeet* son perfectos para esto, gracias a su fácil manejo. Comienza en terreno plano para sentirte cómodo, estableciendo metas pequeñas y manejables para cada sesión de práctica.
Por ejemplo, en tu primer día, intenta mantenerte de pie y equilibrado durante 30 segundos. Para el segundo día, intenta dar cinco pasos deslizantes hacia adelante. Para el tercer día, trabaja en tu primera parada exitosa. Este enfoque paso a paso te ayuda a evitar la frustración que a menudo viene con intentar demasiado demasiado pronto.
Un ejercicio divertido para probar es el ejercicio de "hoja que cae". Deslízate hacia adelante mientras cambias tu peso de un esquí a otro, creando un patrón suave en zigzag por una pendiente pequeña. Con Snowfeet*, esto se siente más como hacer skate que esquiar tradicionalmente, lo que muchos principiantes encuentran menos intimidante.
Una de las mejores cosas de aprender con Snowfeet* es lo indulgentes que son. Si pierdes el equilibrio o enganchas un borde, no tendrás que lidiar con el drama de los esquís largos enredándose o causando una caída fuerte. Su longitud más corta y el soporte de tus botas regulares significan que a menudo puedes simplemente salir del problema, similar a caminar sobre suelo helado.
Comienza con sesiones de práctica de 20 a 30 minutos. Aunque Snowfeet* tiene una curva de aprendizaje más suave, aún usarás músculos de formas nuevas. A medida que te sientas más cómodo, naturalmente extenderás tus sesiones y comenzarás a explorar terrenos más variados.
Elegir tu primer sendero
Los mejores senderos para principiantes en EE. UU.
Comenzar tu aventura de esquí de fondo en el sendero correcto puede marcar toda la diferencia. Para principiantes, los senderos verdes o para novatos son tu mejor opción. Estos senderos suelen tener pendientes suaves y terreno fácil, dándote el espacio perfecto para practicar el equilibrio y el deslizamiento.
Los senderos preparados son especialmente útiles para principiantes. Estos senderos tienen superficies lisas y uniformes que reducen baches y obstáculos, facilitando mantener el control, especialmente con equipo como Snowfeet*. Los rail-trails son otra gran opción, ofreciendo caminos rectos con pendientes suaves (normalmente menos del 3%).
Al elegir una pista, busca lugares con terreno ondulado que eviten subidas empinadas o áreas propensas a avalanchas. La accesibilidad también es clave: piensa en el estacionamiento, las instalaciones en el inicio del sendero y los servicios cercanos. Estas comodidades pueden hacer que tus primeras salidas sean mucho más sencillas y agradables.
Antes de salir, tómate un momento para revisar consejos de seguridad y condiciones de la pista para asegurarte de que todo vaya bien.
Condiciones de la Pista y Seguridad
Siempre verifica las condiciones de la pista y los pronósticos del tiempo antes de salir. Las condiciones pueden cambiar rápidamente, y estar preparado es la mitad de la batalla.
Usa mapas claros y sigue rutas bien señalizadas que muestren niveles de dificultad y distancias. Seguir la etiqueta adecuada en las pistas —como ceder el paso a esquiadores más rápidos, obedecer las señales y ser cortés con los demás— ayuda a mantener la experiencia segura y agradable para todos.
Presta atención también a la temperatura. Viste en capas para poder ajustarte a las condiciones cambiantes durante el día. Para principiantes, el clima extremadamente frío puede ser difícil, mientras que las temperaturas cercanas al punto de congelación pueden resultar en nieve blanda que es más difícil de navegar.
Cuando se combinan con la versatilidad de Snowfeet*, estas precauciones garantizan un día sin preocupaciones en las pistas.
Cómo Snowfeet* Facilitan el Acceso a las Pistas
Snowfeet* hacen que llegar y disfrutar de las pistas sea muy fácil. Su tamaño compacto de 35 pulgadas significa que caben fácilmente en el maletero de tu coche, sin necesidad de portaequipajes voluminosos o configuraciones complicadas para transportarlos.
Esta portabilidad abre un mundo de opciones. Mientras que los esquís nórdicos tradicionales funcionan mejor en senderos preparados, Snowfeet* te permiten explorar más allá de los lugares habituales. Puedes deslizarte por caminos de senderismo cubiertos de nieve, parques locales, campos de golf o incluso tu propio jardín. Esta libertad te evita depender únicamente de costosos centros nórdicos o estaciones de esquí.
¿Otra ventaja? Puedes usar botas de invierno normales con Snowfeet*, lo que facilita salir a las pistas de forma espontánea. Ya sea que te enfrentes a nieve compacta, hielo ligero o nieve poco profunda sobre césped, Snowfeet* se adaptan mejor que los esquís nórdicos largos y estrechos que requieren condiciones específicas.
Esta flexibilidad significa más oportunidades para esquiar durante toda la temporada, dándote práctica extra y ayudándote a ganar confianza en tu camino para convertirte en un esquiador de fondo habilidoso.
sbb-itb-17ade95
Consejos para una Gran Primera Experiencia
Cómo Vestirse para Comodidad y Calor
Mantenerse cálido y cómodo en la nieve comienza con un buen sistema de capas. El truco es elegir materiales que te mantengan seco y se muevan contigo.
Comienza con una capa base que absorba la humedad hecha de material sintético o lana merino; evita el algodón. Como explica REI:
"Vístete con capas que no sean de algodón, que se muevan fácilmente y absorban el sudor."
Luego, añade una capa intermedia para aislamiento. Un forro polar ligero o chaqueta sintética aislante funciona genial, proporcionando calor sin restringir tu movimiento. Para tu capa exterior, elige algo que bloquee el viento y la nieve ligera mientras sea transpirable; no necesitas nada muy pesado ya que te calentarás al moverte.
¡No olvides tus extremidades! Un gorro cálido y guantes aislantes con buen agarre son esenciales para sujetar bien tus bastones. Si usas Snowfeet*, puedes usar tus botas de invierno impermeables habituales, siempre que ofrezcan buen soporte para el tobillo. Así, puedes evitar gastar mucho en botas nórdicas especializadas hasta estar seguro de que este deporte es para ti.
Consejo profesional: comienza el día sintiendo un poco de frío; te calentarás rápido una vez que empieces en los senderos. Ajusta tus capas según sea necesario para mantenerte cómodo.
Mantente Hidratado y Conserva Tu Energía
Una vez que estés vestido para el éxito, no olvides la hidratación y los snacks. Esquiar de fondo es un ejercicio, especialmente cuando estás aprendiendo y ajustándote a los nuevos movimientos.
Lleva una pequeña riñonera con agua y algunos snacks fáciles como mezcla de frutos secos o barras energéticas. Toma pausas para beber y picar algo; estos momentos son perfectos para absorber el paisaje nevado también.
Presta atención a cómo te sientes. Si te cansas o tu técnica empieza a fallar, está bien tomar un descanso. Disfrutar la experiencia es mucho más importante que exigirte demasiado.
Concéntrate en Divertirte
Con tu equipo y energía listos, cambia tu mentalidad a lo que realmente importa: divertirte. Tu primera vez esquiando de fondo se trata de explorar y disfrutar, no de clavar cada movimiento.
No te estreses por caer o tambalearte: todo es parte del aprendizaje. El diseño compacto de Snowfeet* facilita recuperarte de pequeños errores en comparación con los esquís largos tradicionales, así que cada tropiezo es solo otro paso adelante.
Disfruta de la belleza del paisaje invernal y del ritmo calmado de deslizarte sobre la nieve. Celebra los pequeños logros, ya sea mantenerte en pie un poco más o dominar tu primer deslizamiento suave.
Cada persona aprende a su propio ritmo, y la flexibilidad de Snowfeet* significa que incluso puedes practicar en tu parque local o en el patio trasero. Este ambiente sin presión facilita ganar confianza antes de aventurarte en senderos más grandes.
Sobre todo, no te tomes demasiado en serio. Ríete de las caídas, disfruta el deslizamiento y deja que la alegría de esquiar te guíe. Una actitud relajada te ayudará a pasar de principiante a esquiador confiado en poco tiempo.
Cómo esquiar de fondo: Guía para principiantes - Parte 2 | PSIA-AASI

Tu camino hacia el éxito en el esquí de fondo
Empezar tu aventura en el esquí de fondo no tiene que ser complicado. Con lo básico correcto, elecciones inteligentes de equipo y senderos bien seleccionados, estás en camino de disfrutar este increíble deporte invernal. Todo se trata de entender lo esencial, encontrar el equipo adecuado y familiarizarte con los movimientos.
Si buscas una forma fácil y amigable para principiantes de empezar, Snowfeet* podría ser justo lo que necesitas. Con solo 35 pulgadas de largo y diseñados para funcionar con botas de invierno normales, son una alternativa económica a los equipos tradicionales. Además, son lo suficientemente compactos para llevarlos en una mochila, lo que los hace súper convenientes. A diferencia de los esquís tradicionales que a menudo requieren portaequipajes y te limitan a senderos preparados, Snowfeet* te permiten explorar cualquier lugar, desde tu parque local hasta centros nórdicos. Esta flexibilidad significa que puedes comenzar sin las complicaciones de equipos voluminosos.
Aprender cualquier habilidad nueva toma tiempo, pero Snowfeet* están diseñados para acelerar el proceso. Su tamaño compacto te da mejor control y estabilidad, facilitando ganar confianza y habilidad en cada salida.
Con la mentalidad y el equipo adecuados, tu primera ruta puede ser divertida y sin estrés. Imagínate deslizándote, respirando el aire fresco del invierno y sintiendo la satisfacción de impulsarte sobre la nieve. Cada salida te ayudará a mejorar tu técnica y a aumentar tu amor por el deporte.
El esquí de fondo es más que un ejercicio: es una forma completamente nueva de disfrutar el invierno. Ya sea que busques metas de fitness, anheles aventura o simplemente quieras un escape tranquilo hacia paisajes nevados, este deporte tiene algo para todos. Con Snowfeet* como punto de partida, estás listo para salir a la nieve con confianza y emoción.
Los senderos te llaman: ¡toma tu equipo y haz tus primeras huellas hoy!
Preguntas frecuentes
¿En qué se diferencian los Snowfeet NORDIC Cross-country Skate Skis de los esquís de fondo tradicionales?
Snowfeet NORDIC Cross-country Skate Skis son un cambio total para cualquiera que quiera disfrutar del esquí de fondo sin las complicaciones del equipo tradicional. Estos esquís son más cortos, ligeros y fáciles de usar, lo que los convierte en una gran alternativa al equipo estándar.
¿Una de las características más geniales? Se sujetan a casi cualquier zapato de invierno, así que no necesitas gastar en botas de esquí voluminosas y especializadas. Con solo 90 cm de largo, son compactos y mucho más fáciles de controlar, especialmente para principiantes. Su diseño ligero significa mejor maniobrabilidad, ayudándote a sentirte más seguro y haciendo que el proceso de aprendizaje sea mucho más divertido que con esquís tradicionales.
¿Cuál es el mejor estilo de esquí de fondo para mi nivel de condición física y objetivos?
El esquí de fondo ofrece dos estilos principales: clásico y skate. El esquí clásico es un excelente punto de partida, especialmente para principiantes o cualquiera que busque una actividad más relajada. El movimiento es similar a caminar, lo que facilita aprenderlo y es perfecto para recorrer senderos planos o con suaves ondulaciones. Por otro lado, el esquí skate se trata de velocidad y energía. Es un poco como patinar sobre hielo, requiere más fuerza y resistencia, ideal si buscas un entrenamiento de alta intensidad.
Para los recién llegados, empezar con el esquí clásico y probar los Snowfeet* NORDIC Cross-country Skate Skis (90 cm) puede facilitar mucho el proceso. Estos esquís más cortos y ligeros son más fáciles de manejar que los tradicionales, ayudándote a encontrar el equilibrio rápidamente y a disfrutar del paseo desde el primer momento. ¿Lo mejor? Su diseño compacto funciona tanto para esquí clásico como para estilo skate, así que puedes probar ambas técnicas a medida que ganas confianza y habilidad.
¿Qué debo considerar al elegir un sendero para mi primera aventura de esquí de fondo?
Para tu primera vez esquiando de fondo, quédate con senderos aptos para principiantes. Estos suelen ser planos o tener pendientes suaves y a menudo están marcados como senderos verdes. Son perfectos para ayudarte a sentirte cómodo con tu equilibrio y técnica. Evita por ahora los senderos azules o negros, ya que suelen ser más empinados y complicados, aumentando la probabilidad de caídas.
Antes de salir, tómate un momento para revisar el clima y las condiciones del sendero. Los senderos bien preparados son mucho más fáciles de navegar, especialmente cuando estás empezando. Opta también por rutas más cortas, para que puedas introducirte en el deporte sin exigirte demasiado. ¡Elegir el sendero adecuado puede marcar toda la diferencia para convertir tu primera salida en una experiencia divertida y positiva!


Deja un comentario
Este sitio está protegido por hCaptcha y se aplican la Política de privacidad de hCaptcha y los Términos del servicio.