


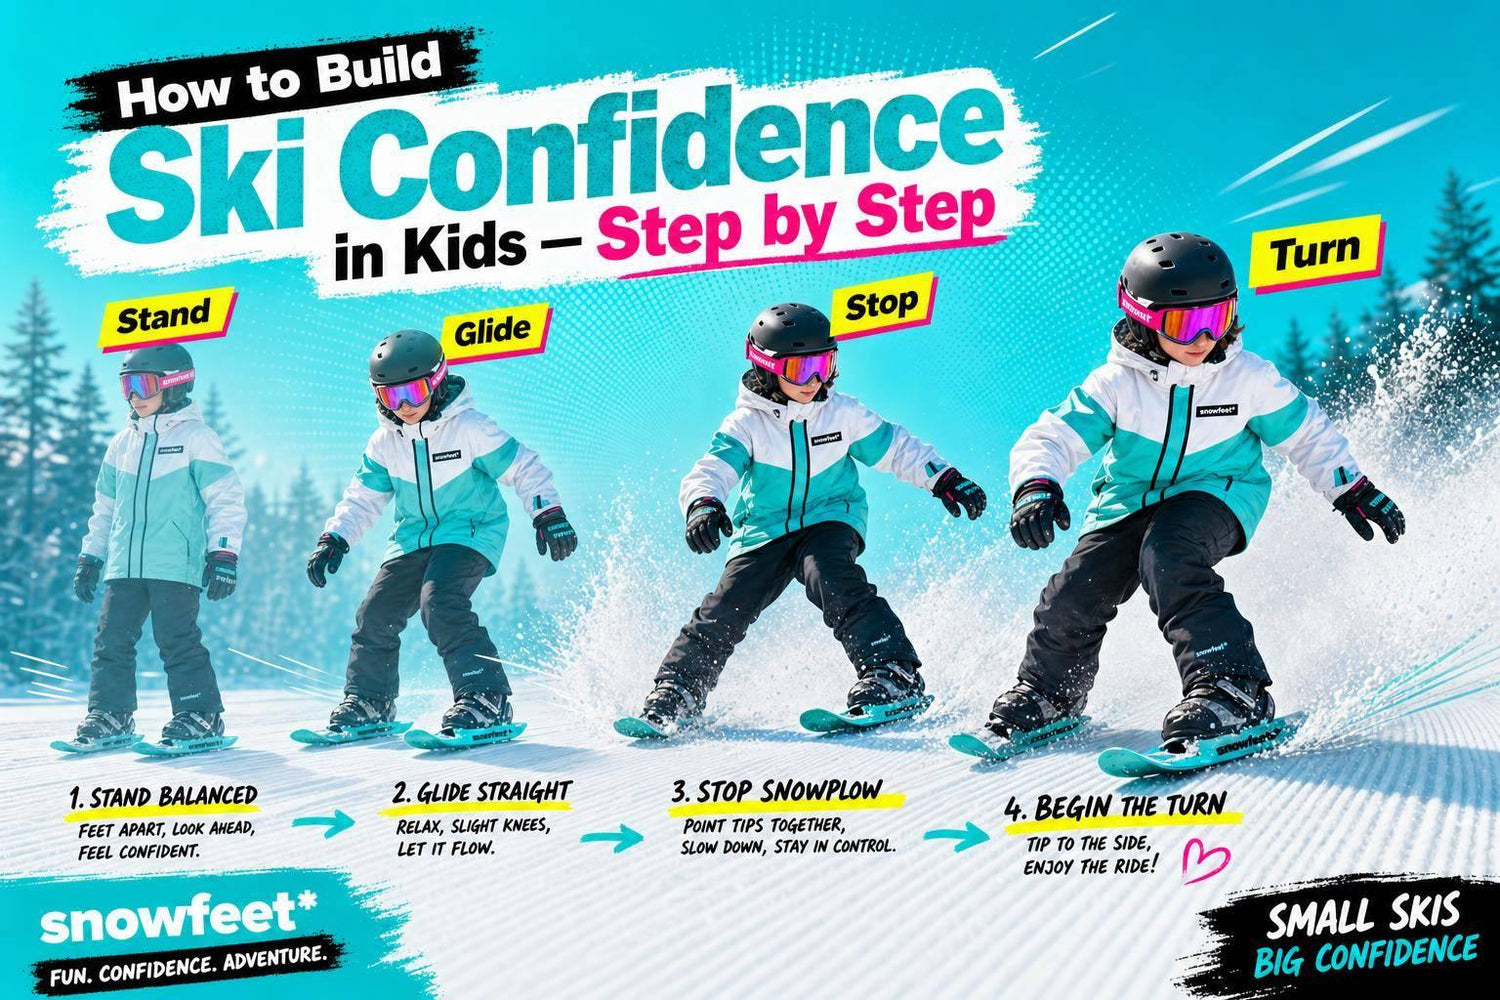
Kids build ski confidence with small wins, not big slopes. If I want a child to feel calm on snow, I start with easy gear, flat ground, short sessions, and one skill at a time: stand, glide, stop, turn, repeat.
Here’s the short version:
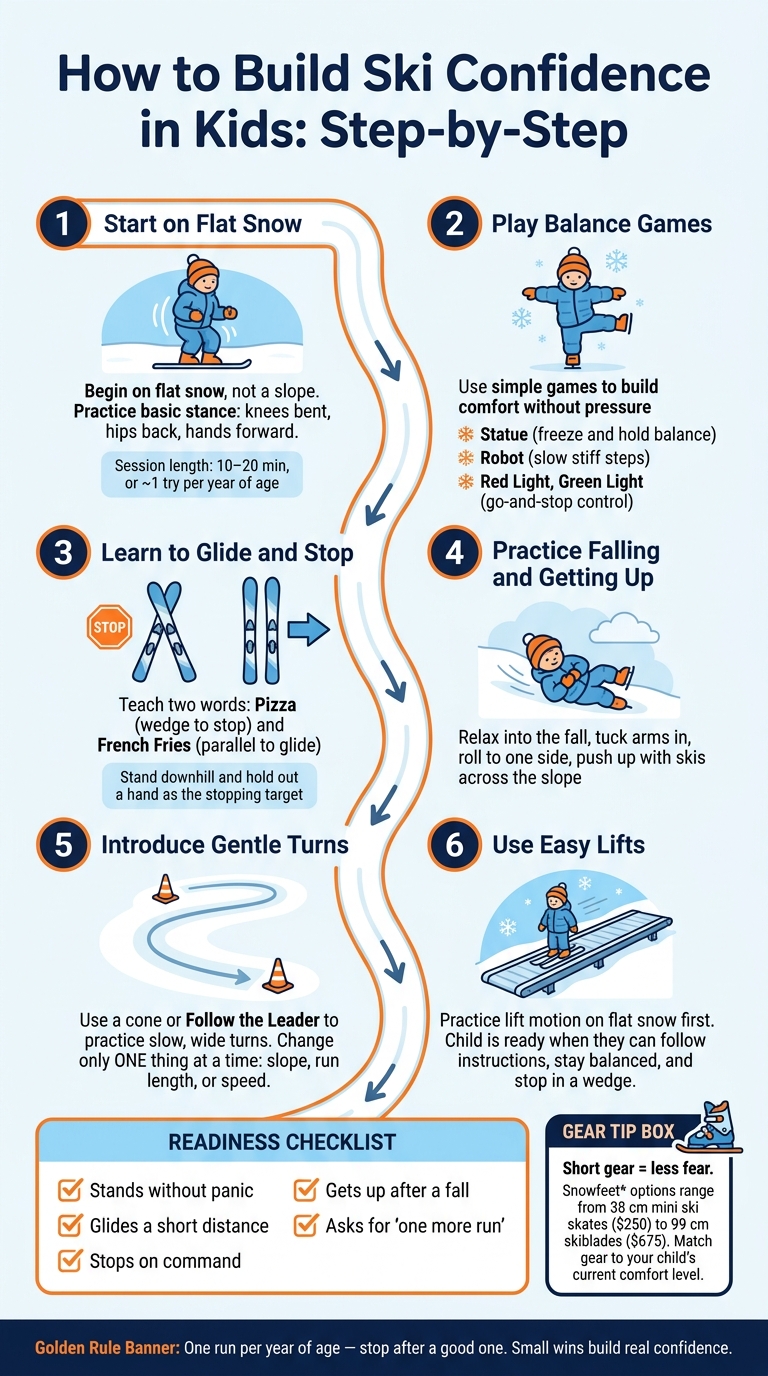
- Start on flat snow first. Not the bunny hill.
- Keep sessions short: about 10 to 20 minutes at first, or roughly one try per year of age.
- Teach stopping early. “Pizza” matters more than speed.
- Use simple games like Statue, Robot, and Red Light, Green Light.
- Move up only when your child stays calm and in control.
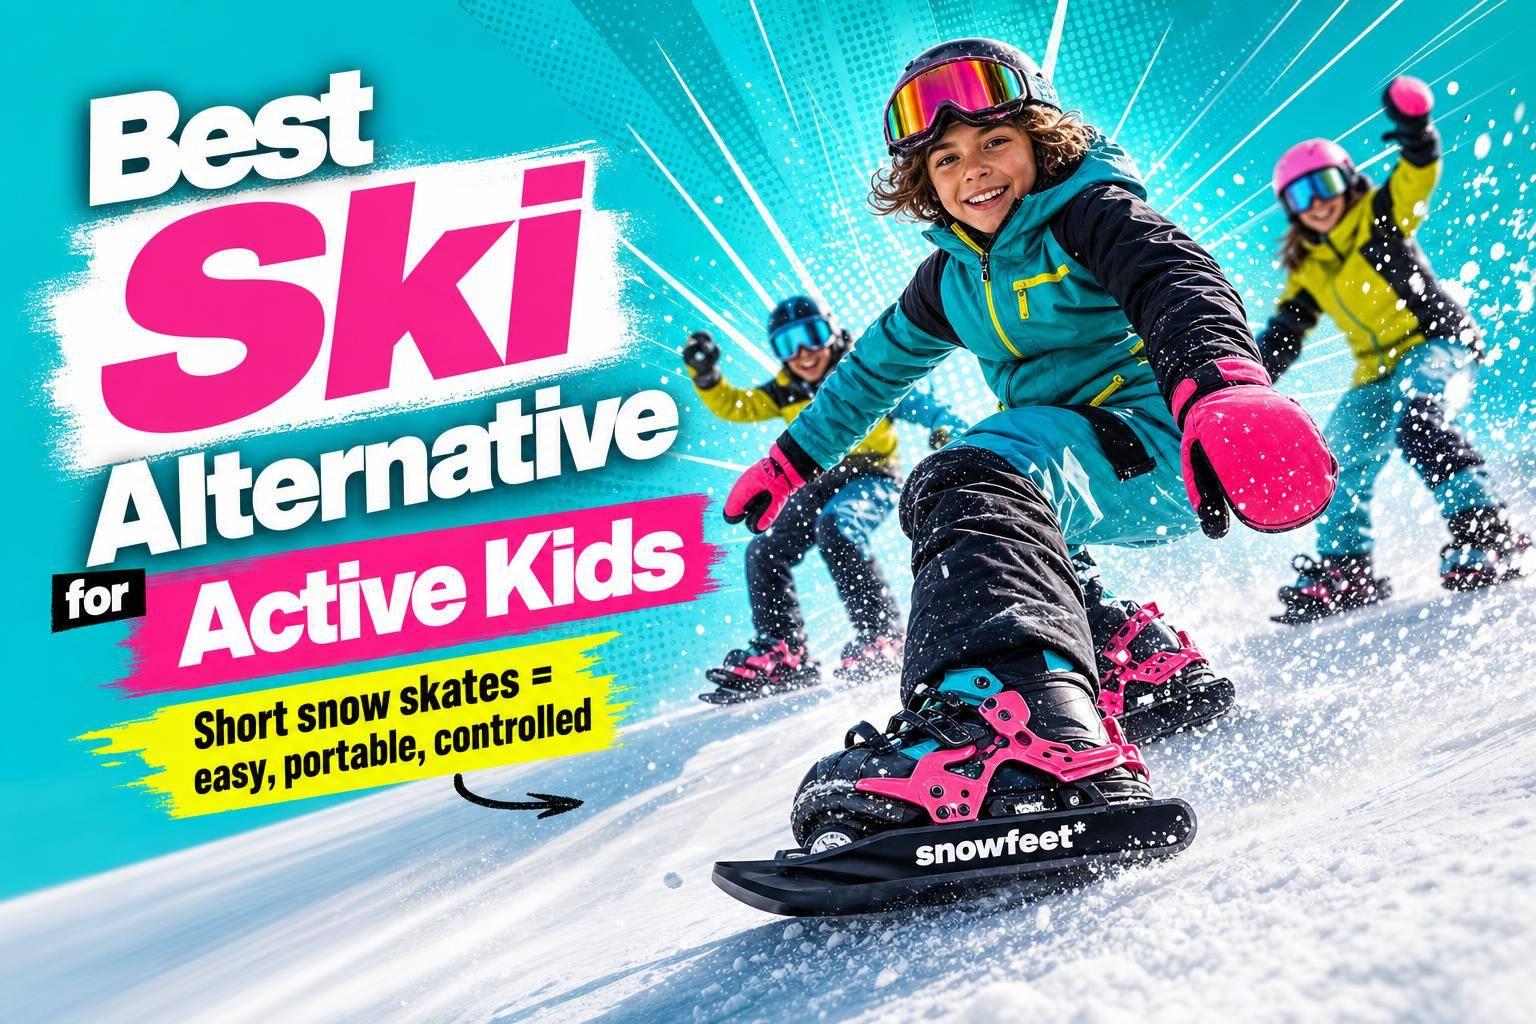
- Short Snowfeet* gear can feel less scary than long skis or a snowboard for many young kids.
A few signs I look for before moving to the next step:
- They can stand without panic
- They can glide a short distance
- They can stop on command
- They can get up after a fall
- They still want “one more run” :)
One thing stands out in the article: for young beginners, confidence often comes more from easy-to-control gear than from pushing harder. That’s why it compares Snowfeet* options, from 38 cm mini ski skates ($250) up to 99 cm skiblades ($675), and explains where each one fits.
If you want a simple plan, it’s this: flat snow → short glide → wedge stop → gentle turns → easy lift. That order keeps fear low and helps kids learn without the full mountain drama.
Quick comparison
| Option | Best stage | Length | Price | Main point |
|---|---|---|---|---|
| Snowfeet* Mini Ski Skates | First slides on flat snow | 38 cm / 15 in | $250 | Small and simple |
| Snowfeet* PRO | Flat snow to tiny slopes | 50 cm / 20 in | $275 | Good next step |
| Skiskates | Early slope practice | 44 cm / 17 in | From $575 | More locked-in feel |
| Skiblades | Kids who want more ski feel | 65 cm / 26 in | From $635 | More stable than mini skates |
| Skiblades | More ski-like feel on easy runs | 99 cm / 39 in | From $675 | Closer to skis, less bulk |
| Long skis | Later progression | Much longer | Varies | More to control |
| Snowboard | Later for many young kids | One board | Varies | Harder first day for some kids |
A few practical extras from the piece matter too: keep kids warm in about 15°F to 32°F, skip poles at the start, check boot fit before you leave home, and stop when form falls apart, tears start, or little toes go cold.
If you want a visual on kid ski basics, these can help:
- Beginner kids’ skiing basics on YouTube
- How to teach the pizza stop on YouTube
- Magic carpet lift tips for kids on YouTube
So, if I had to sum it up in one line: confidence grows when kids feel safe, dry, and in control - and when each run feels like a win, not a test.
How to Build Ski Confidence in Kids: Step-by-Step Guide
How to Choose the Best Skis for Kids
Choose Gear That Feels Easy to Control
Gear should feel easy to carry, wear, and steer right away. When it does, kids can work on balance instead of wrestling with their setup.
Why Short Snowfeet* Gear Is Less Intimidating Than Long Skis or Snowboards

Long skis can feel awkward for a first-timer. They’re tougher to pivot, the tips can cross, and there’s just more stuff for a child to deal with after a fall. And snowboards? They can feel like a lot at first because both feet are locked onto one board. For many little kids, that makes the first day harder.
Shorter gear changes the feel of learning. It’s lighter, easier to steer, and simpler to get back under control after a tumble. It also helps kids feel less overwhelmed. And that matters. When a child sees that their gear feels small and doable, they loosen up. That relaxed stance helps them learn sooner.
Best Snowfeet* Options for Different Beginner Stages
Start with the easiest option for where your child is right now. Snowfeet* gear lines up well with early progress, from flat snow to mellow beginner slopes:
- Snowfeet* Mini Ski Skates (38 cm / ~15 in) - from $250: The smallest option. Great for first slides on flat snow. Works with regular winter shoes.
- Snowfeet* PRO (50 cm / ~20 in) - $275: A good next step for kids who feel steady on flat terrain and want to try very gentle slopes.
- Skiskates (44 cm / ~17 in) - from $575: A more structured feel underfoot for early slope practice, with a wood core construction.
- Skiblades (65 cm / ~26 in) - from $635 and Skiblades (99 cm / ~39 in) - from $675: Good for kids who want more of a ski feel without the size and hassle of full-length skis. They sit between mini skates and standard skis.
Match the gear to your child’s comfort level. Simple beats ambitious here every time :)
Gear Checklist and Comparison Table for Parents
Warm, dry kids stay calmer and learn sooner. Dress for 15–32°F weather, and leave room to move. Puffy layers that block knee bending make balance tougher than it needs to be.
Before you head out, check for:
- Helmet that meets ASTM F2040 or a similar standard
- Kid-sized goggles
- Waterproof mittens
- Neck gaiter
- Moisture-wicking base layer, insulating mid-layer, and waterproof outer layer
- One pair of warm ski socks
- Properly fitted boots or winter shoes that work with the Snowfeet* model
Also, check boot fit before you get to the mountain. Some Snowfeet* models work with regular winter boots, which can save you from the ski-boot fitting circus. Others need more structured footwear for slope control. Get that part wrong, and the day can go sideways fast.
| Feature | Snowfeet* Short Gear | Traditional Long Skis | Snowboard |
|---|---|---|---|
| Length | 38–99 cm (~15–39 in) | Much longer and bulkier | Usually longer, one board |
| Weight | Lightweight | Heavier | Moderate |
| Learning speed | Faster for beginners | More gradual | Steeper initial curve |
| Portability | Fits in a backpack | Needs a ski bag or rack | Needs a board bag |
| Boot compatibility | Winter shoes or ski boots, depending on model | Ski boots required | Snowboard boots required |
| Best use | Flat areas to easy beginner slopes | Full mountain progression | Full mountain progression |
With the right setup, you’re ready for flat-snow practice before moving onto any slope.
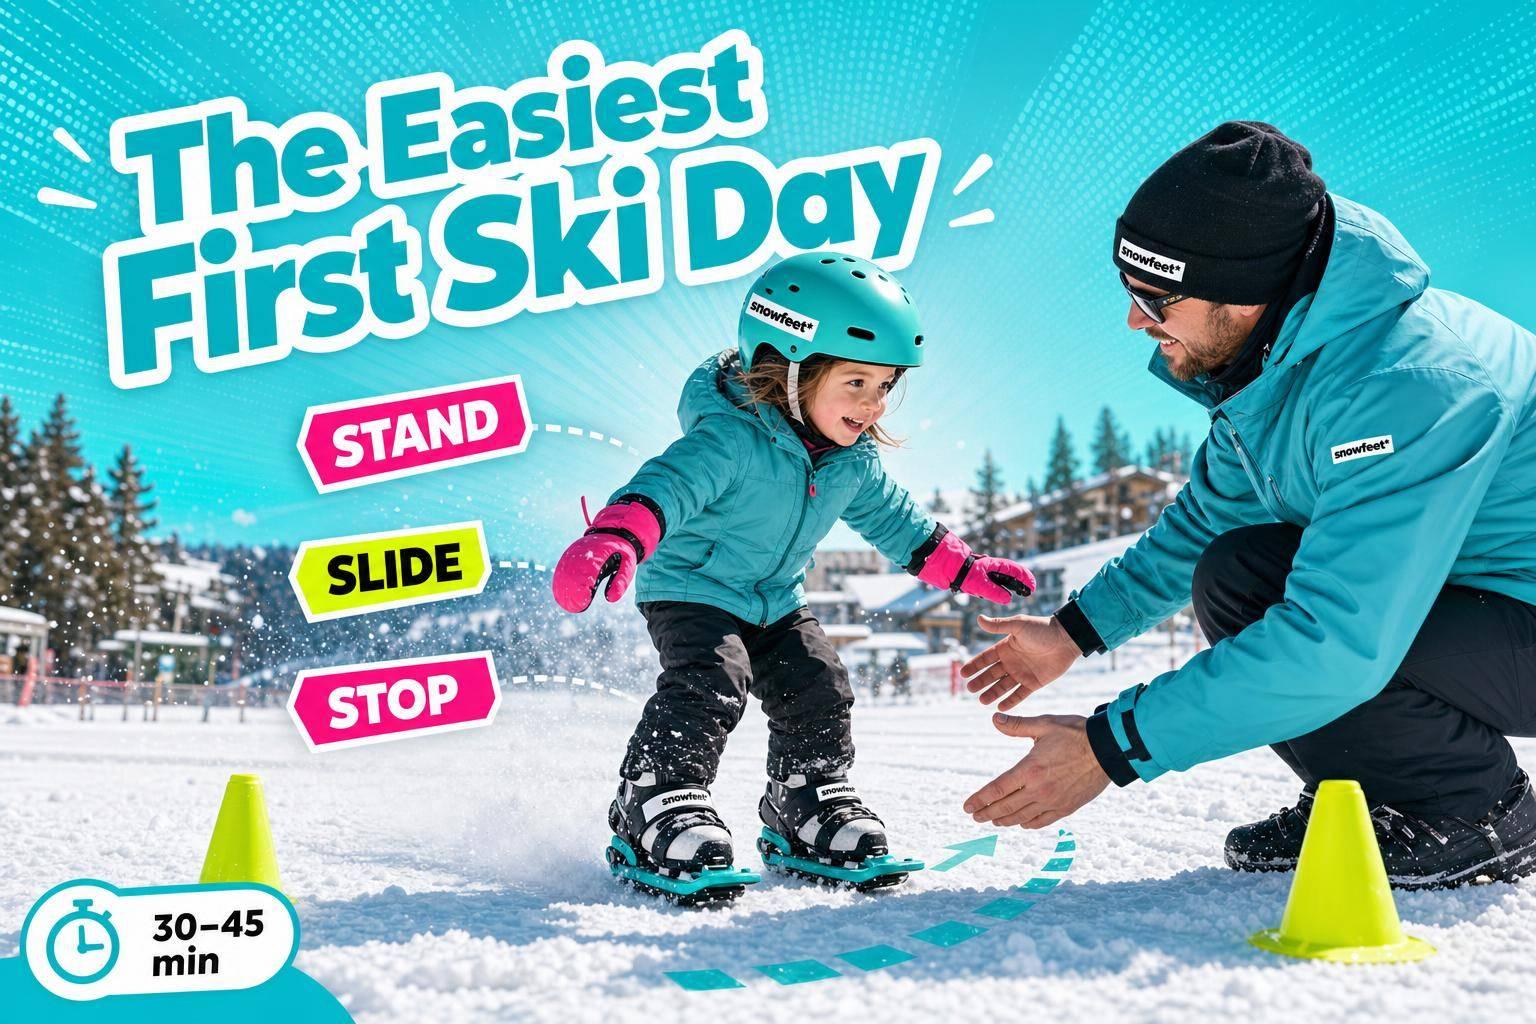
Steps 1 and 2: Start on Flat Snow, Then Learn to Glide and Stop
First Day on Snow: Comfort, Trust, and Short Sessions
Start on flat snow, not a slope. That gives your child a calm first win, and it gives you less chaos to manage. With short Snowfeet* gear, there’s also less stuff under their feet from the first step, which helps a lot.
Begin with the basic stance: knees bent, hips back, hands forward. That’s the home base for everything that comes next. Once your child can stand still without wobbling all over the place, move into a few balance games.
Keep that first session short, around 10 to 20 minutes, or about one short try per year of age. End it before your child gets worn out or upset. A good first day should leave them wanting one more run, not begging for hot chocolate and a full retreat.
Simple Games That Lower Fear Before Formal Instruction
Games work well here because they teach the skill without the heavy “lesson” feeling.
Try a few simple ones:
- Statue: Freeze in place and hold balance.
- Robot: Take slow, stiff steps to get used to the feel and weight of the gear.
- Red Light, Green Light: Use this once gliding starts to work on go-and-stop control.
You can also track progress with a short milestone list. Keep it simple and concrete: “stood still for 5 seconds,” “slid 10 feet,” “stopped near a cone.” That makes progress easy to spot, and kids love seeing those little wins stack up.
Skip poles at this stage. They don’t help much yet, and they often pull attention away from balance and footwork.
After a few wins on flat snow, move to the tiniest glide you can find.
First Glides and First Stops on Very Gentle Slopes
Teach two words first: "Pizza" and "French Fries." Pizza means ski tips close together in a wedge to slow down and stop. French Fries means skis stay parallel to glide.
For the first glide, stand downhill and hold out a hand as the stopping target. Have your child slide toward you in French Fries, then make a big Pizza to stop. It’s simple, clear, and it gives them a person to aim for, which feels less scary than “just go.”
Once that starts to click, bring back Red Light, Green Light. Green means French Fries and go. Red means Pizza and stop. It builds stop-and-go habits fast, and in a way kids tend to enjoy.
Teach falling and getting back up last in this step. Show your child how to relax into a fall, tuck their arms in, roll to one side, then push up with skis across the slope. That one skill cuts out a lot of fear before it has time to grow.
When your child can glide, stop, and stand up on their own, they’re set for gentle turns and easy lifts.
sbb-itb-17ade95
Steps 3 and 4: Build Turns, Use Easy Lifts, and Know When to Move On
Once stopping feels easy, it’s time to work on steering and lifts.
From Straight Glides to Gentle Turns and Linked Turns
Use the control from Step 2 to bring in turning. No need to rush speed. Slow and smooth wins here.
Start with one simple target, like a cone, mitten, or stuffed animal, and ask your child to turn toward it. Then try Follow the Leader. You go first on a gentle slope and make slow, wide turns with big, clear movements. Your child copies you. That keeps things simple and stops the whole run from feeling like too much at once.
Short Snowfeet* gear helps here because kids can pivot more easily than they can on long skis.
Once your child can link a few turns, change just one thing at a time:
- slope
- run length
- speed
That way, you’re not tossing three new things at them at once. That’s how meltdowns happen, and, well, nobody drove to the mountain for that :)
Once your child can make one gentle turn, move to carpet practice.
How to Introduce Magic Carpet Lifts and Beginner Lifts Without Stress
Before the magic carpet lift, practice the motion on flat snow. Use boot stomps and tiny glides first. A motion that feels familiar can cut down fear on that first ride.
A child is usually ready for a lift when they can follow simple instructions, stay balanced, and stop on their own in a wedge. If they freeze or panic, step back to flat-snow drills for a bit.
Readiness Signs, Setbacks, and When to Use Ski School
Move up only when your child stays calm, curious, and in control. Use the table below to pick the next move.
| Situation | What to Do | Signs to Watch For |
|---|---|---|
| Ready to advance | Move to slightly steeper terrain | Stops on command, makes gentle turns, wants another run |
| Stay on current slope | Repeat for muscle memory | Can do the skill but not consistently yet |
| Step back | Return to flat snow or take a break | Freezing up, repeated falls, tears, stiffness, refusal |
| Call a professional | Book a ski school lesson | Parent patience is running low, child needs a fresh voice, progress has stalled |
Ski school can help sooner than many parents think. A professional instructor brings a fresh voice and drills that often click in a way a parent’s coaching doesn’t. It’s not a failure. It’s just smart. If you book a lesson, morning is often the best bet, when your child is most rested.
Stop when focus starts to fade or form falls apart. If your child starts crying, check for cold toes or hunger first. Stop while they still feel good.
Conclusion: Build Confidence With Small Wins and the Right Gear
The pattern doesn’t change much, no matter the stage: flat snow, gliding, stopping, turning. That’s the rhythm. Ski confidence grows from short sessions, simple steps, and small wins.
Snowfeet* skiblades and mini ski skates are easier for kids to steer, turn, and stop than full-length skis. That makes early success more likely. And when the setup feels easy, progress feels less like a battle and more like fun.
One simple rule works well: one run per year of age. So, a 5-year-old does five runs, then stops after a good one.
Only move on when your child stays relaxed, stays in control, and asks for another run. That’s a good sign. When kids feel in control, confidence tends to grow right behind it.
Small wins build real confidence.
FAQs
What age can kids start skiing?
There’s no one “perfect” age to start. That said, lots of kids do well when they begin skiing between ages 3 and 6.
By age 3 or 4, most children have enough balance and coordination to start learning the basics. Think simple stuff: standing, sliding a bit, and getting used to how snow feels under their feet.
Some toddlers start even earlier. But at that age, it should stay light and playful. Short, supervised sessions work best. The goal isn’t to “teach skiing” in a big, serious way. It’s just to help them feel okay in ski boots and get used to sliding.
For very young beginners, Snowfeet MINI KIDS* can feel easier to handle than the longer, heavier gear common from traditional ski brands. That can make those first tries a little less clunky and a lot more fun :)
How do I know if my child is ready for a steeper slope?
Your child is ready for a steeper slope once they can stop, glide, and link gentle turns on the bunny hill.
Before you head up, check two things:
- They can use a pizza wedge to control speed every time
- They don’t need constant reassurance between turns
Snowfeet* gear is shorter and more responsive than bulky ski gear, so kids often pick up these skills a bit faster and feel more at ease doing it. When it’s time to move up, stick with wide, gentle terrain and keep each session short. That tends to go a lot better than squeezing in “just one more run” when little legs are cooked :)
What should I do if my child gets scared on snow?
If your child gets scared, don’t push them onto slopes or chairlifts. That usually backfires.
Instead, head to a flat, low-pressure spot. Keep it easy. Play a few simple games. Then ask what feels scary. Is it the speed? Falling? The lift itself? Once you know the problem, you can talk through it without making the moment feel big.
Lightweight gear like Snowfeet Skiskates or Skiblades can feel less scary than standard skis. They’re smaller, simpler, and often less awkward for kids to manage. You can also practice falling and standing back up on soft snow. That takes some of the fear out of the unknown.
Keep sessions short. If things start to go sideways, wrap it up early. And if you can, end on a small win. One smooth glide, one calm stop, one good laugh - sometimes that’s all it takes :)


اترك تعليقًا
This site is protected by hCaptcha and the hCaptcha Privacy Policy and Terms of Service apply.